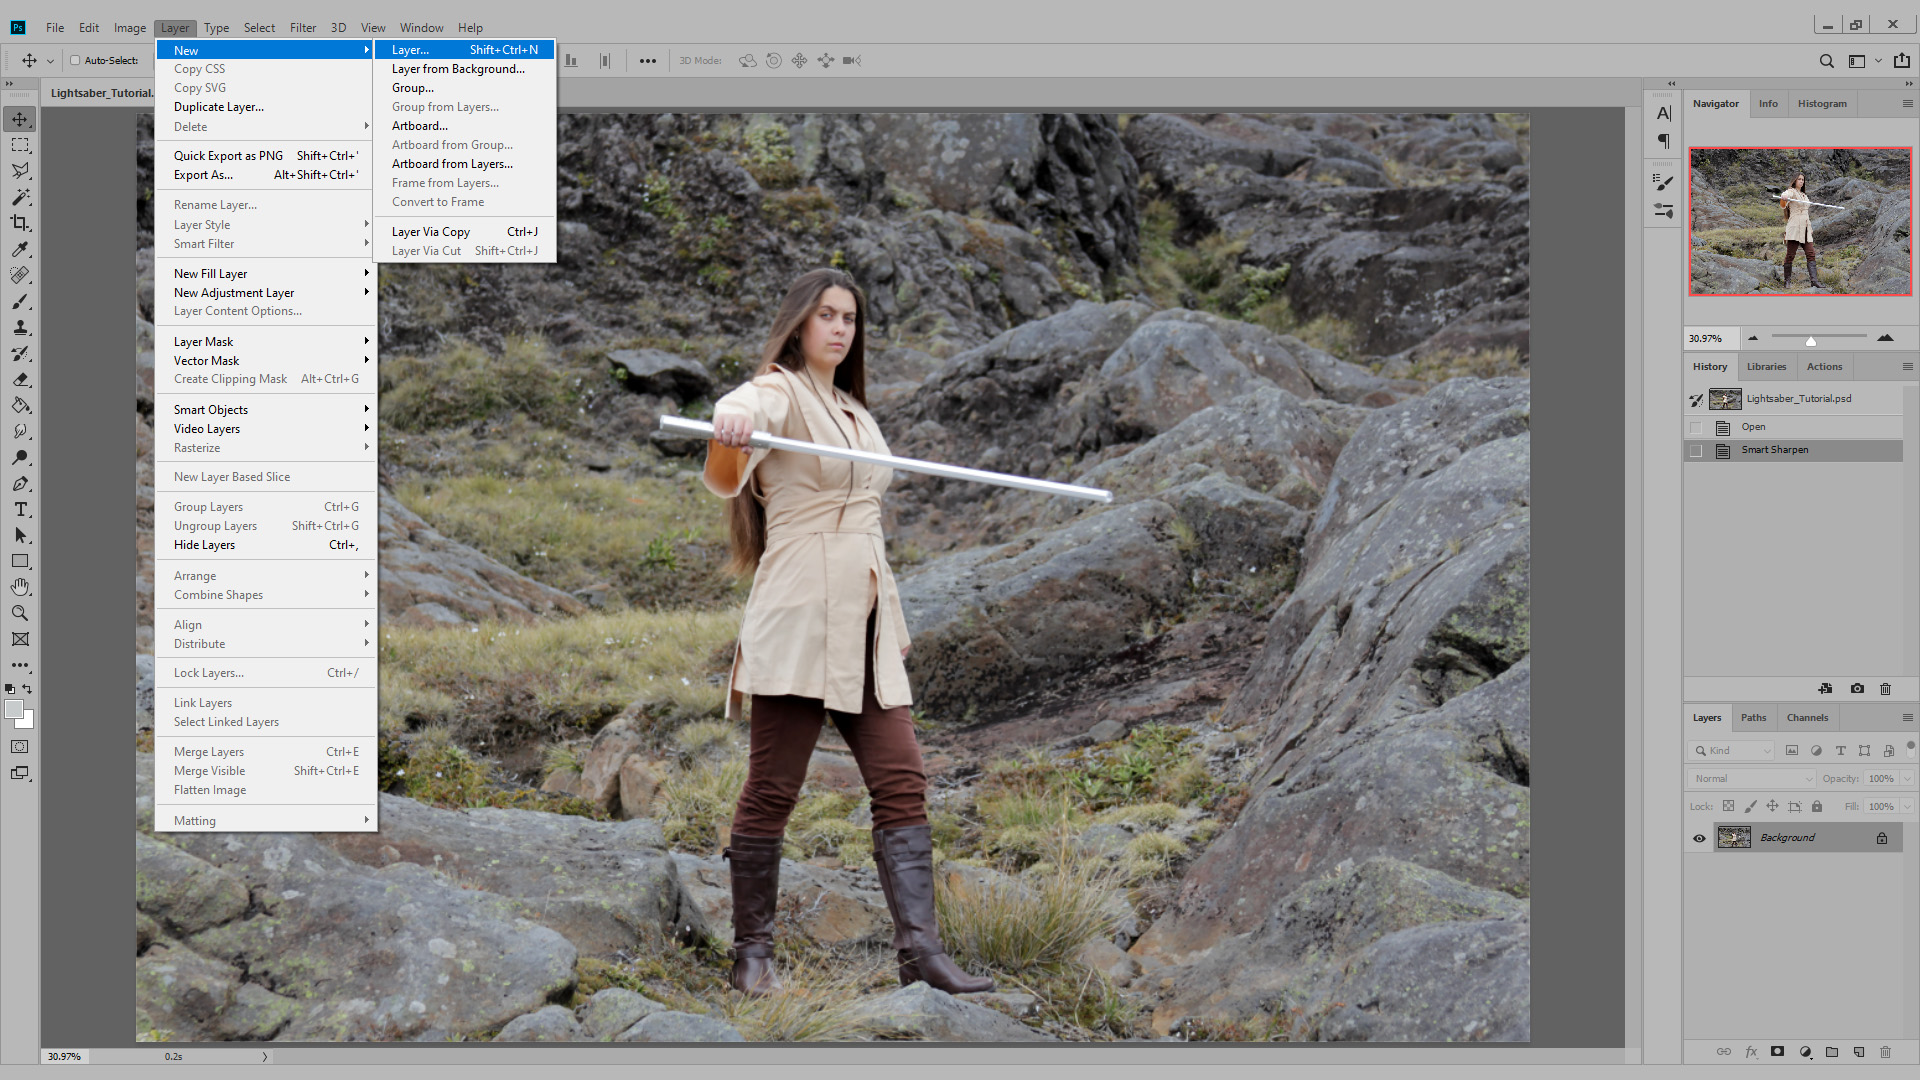
Star Wars Lightsaber Photoshop Tutorial
A little bit of Photoshop work to add lightsaber effects into toy or costuming photographs is a fun and effective way to finish off an image that features a Jedi or Sith character wielding the iconic Star Wars energy weapon.
Over time, the representation of lightsabers in official media has changed subtly, as original movies have been remastered, and publicity images have had additional tweaking prior to release, but I’ve fine-tuned a personal approach to achieve the lightsaber effect that I feel captures the original feel of the coloured glow. There are many ways to produce a lightsaber blade in a graphics app, of course, but a little work is required for it to not look too harsh or over-saturated. Here’s my version of a step-by-step Lightsaber Photoshop Tutorial, showing how to bring a lightsaber to life, that others may find helpful.
The following “How To” is a guide only… a bit of artistry is required to take into account the scale of the image, and other aspects like the overall image contrast and the intended colour of the blade. We’ll touch on that as we go through the steps.
Creating a lightsaber effect in Photoshop
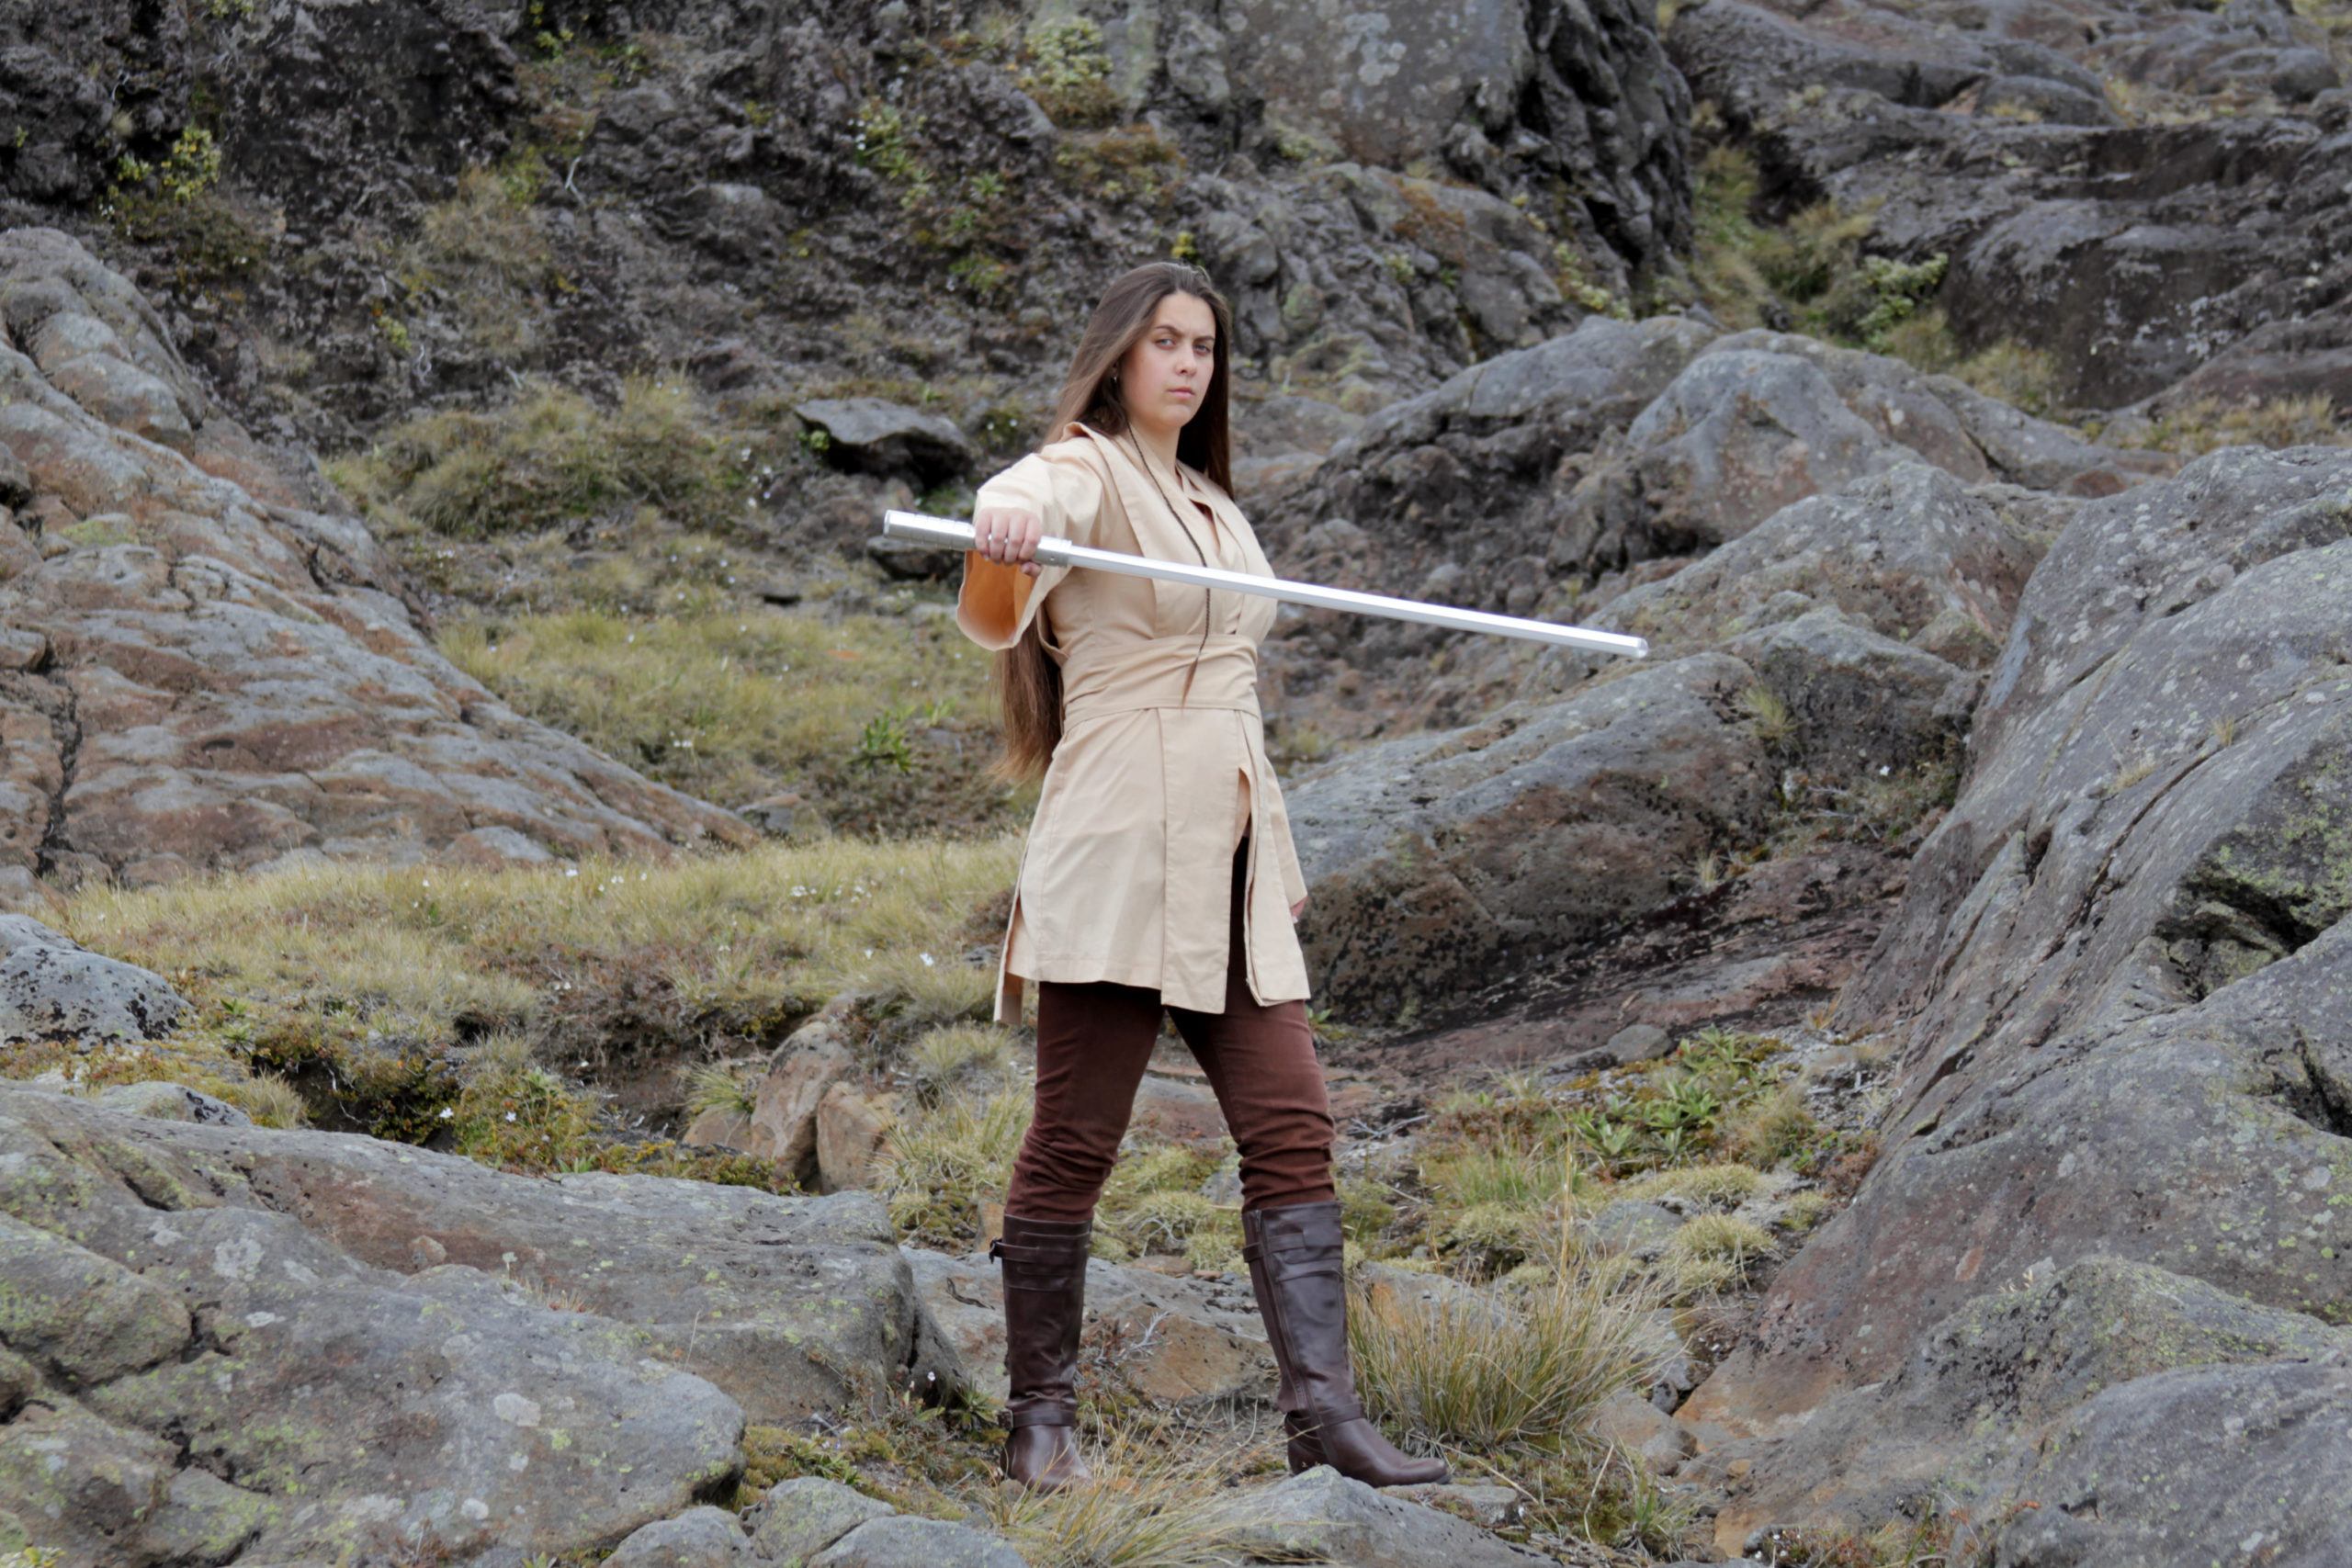
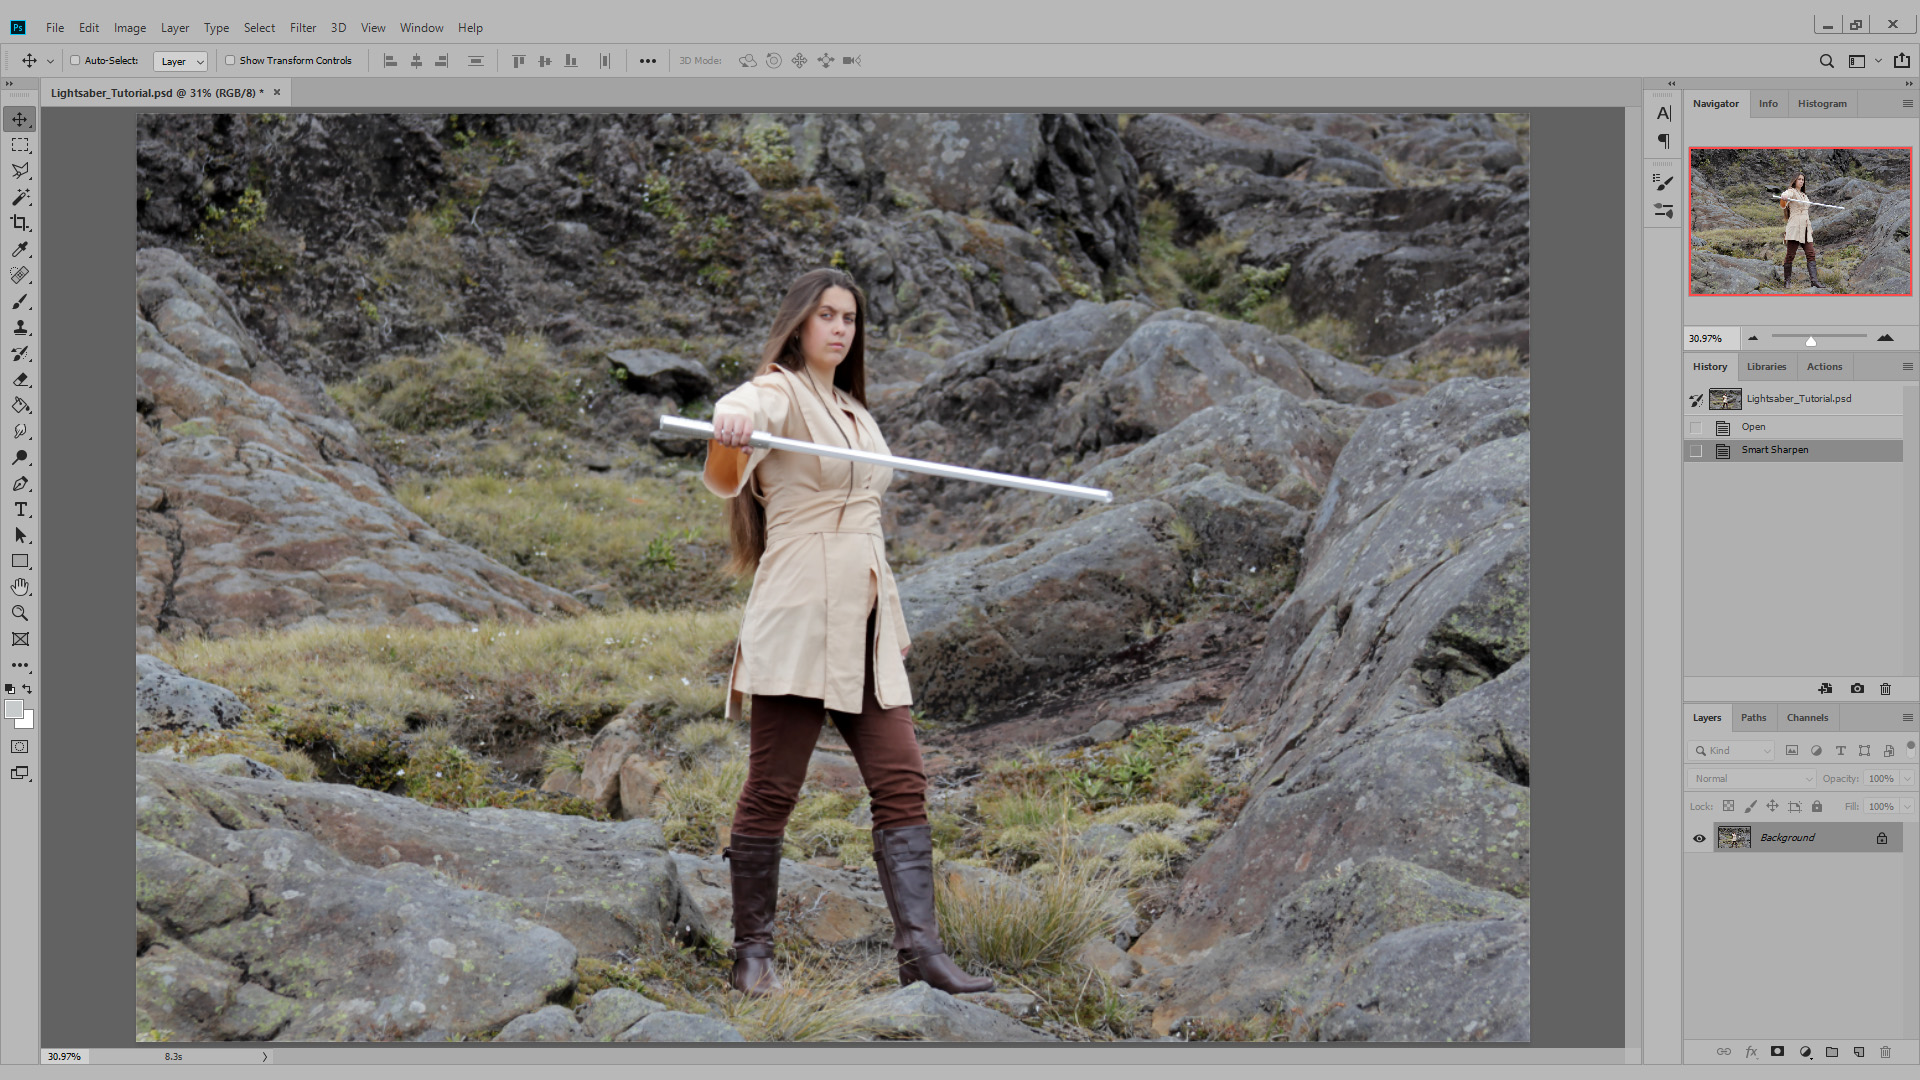
1. Select and open image – generally use the highest resolution you have available (1080px high, or greater, works well). An image where the saber blade is square on to the camera is the easiest, but this technique will work when the saber blade is angled towards the camera (in fact, that added perspective can actually make the overall effect even more realistic).
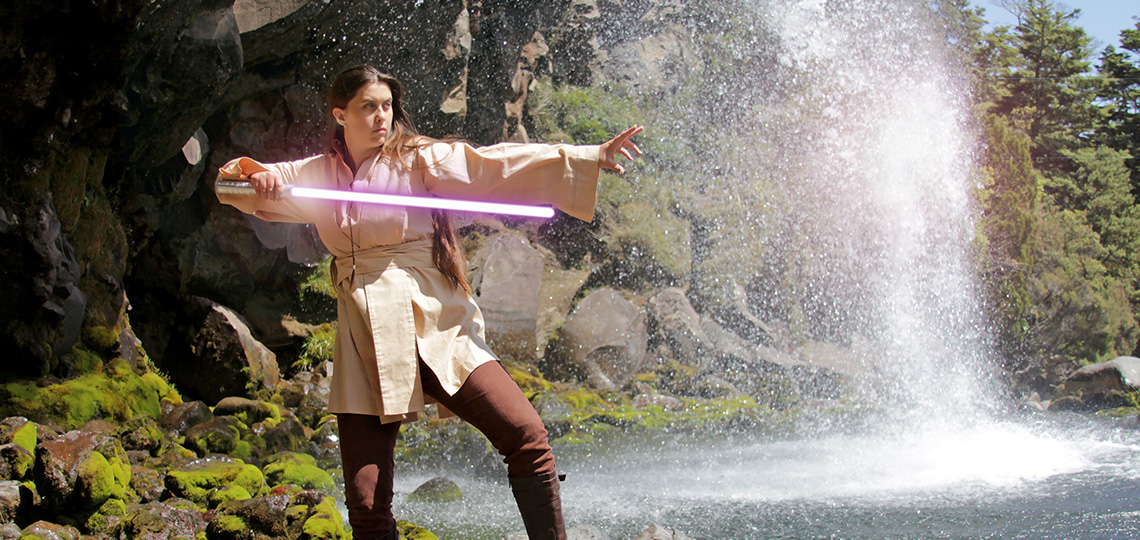
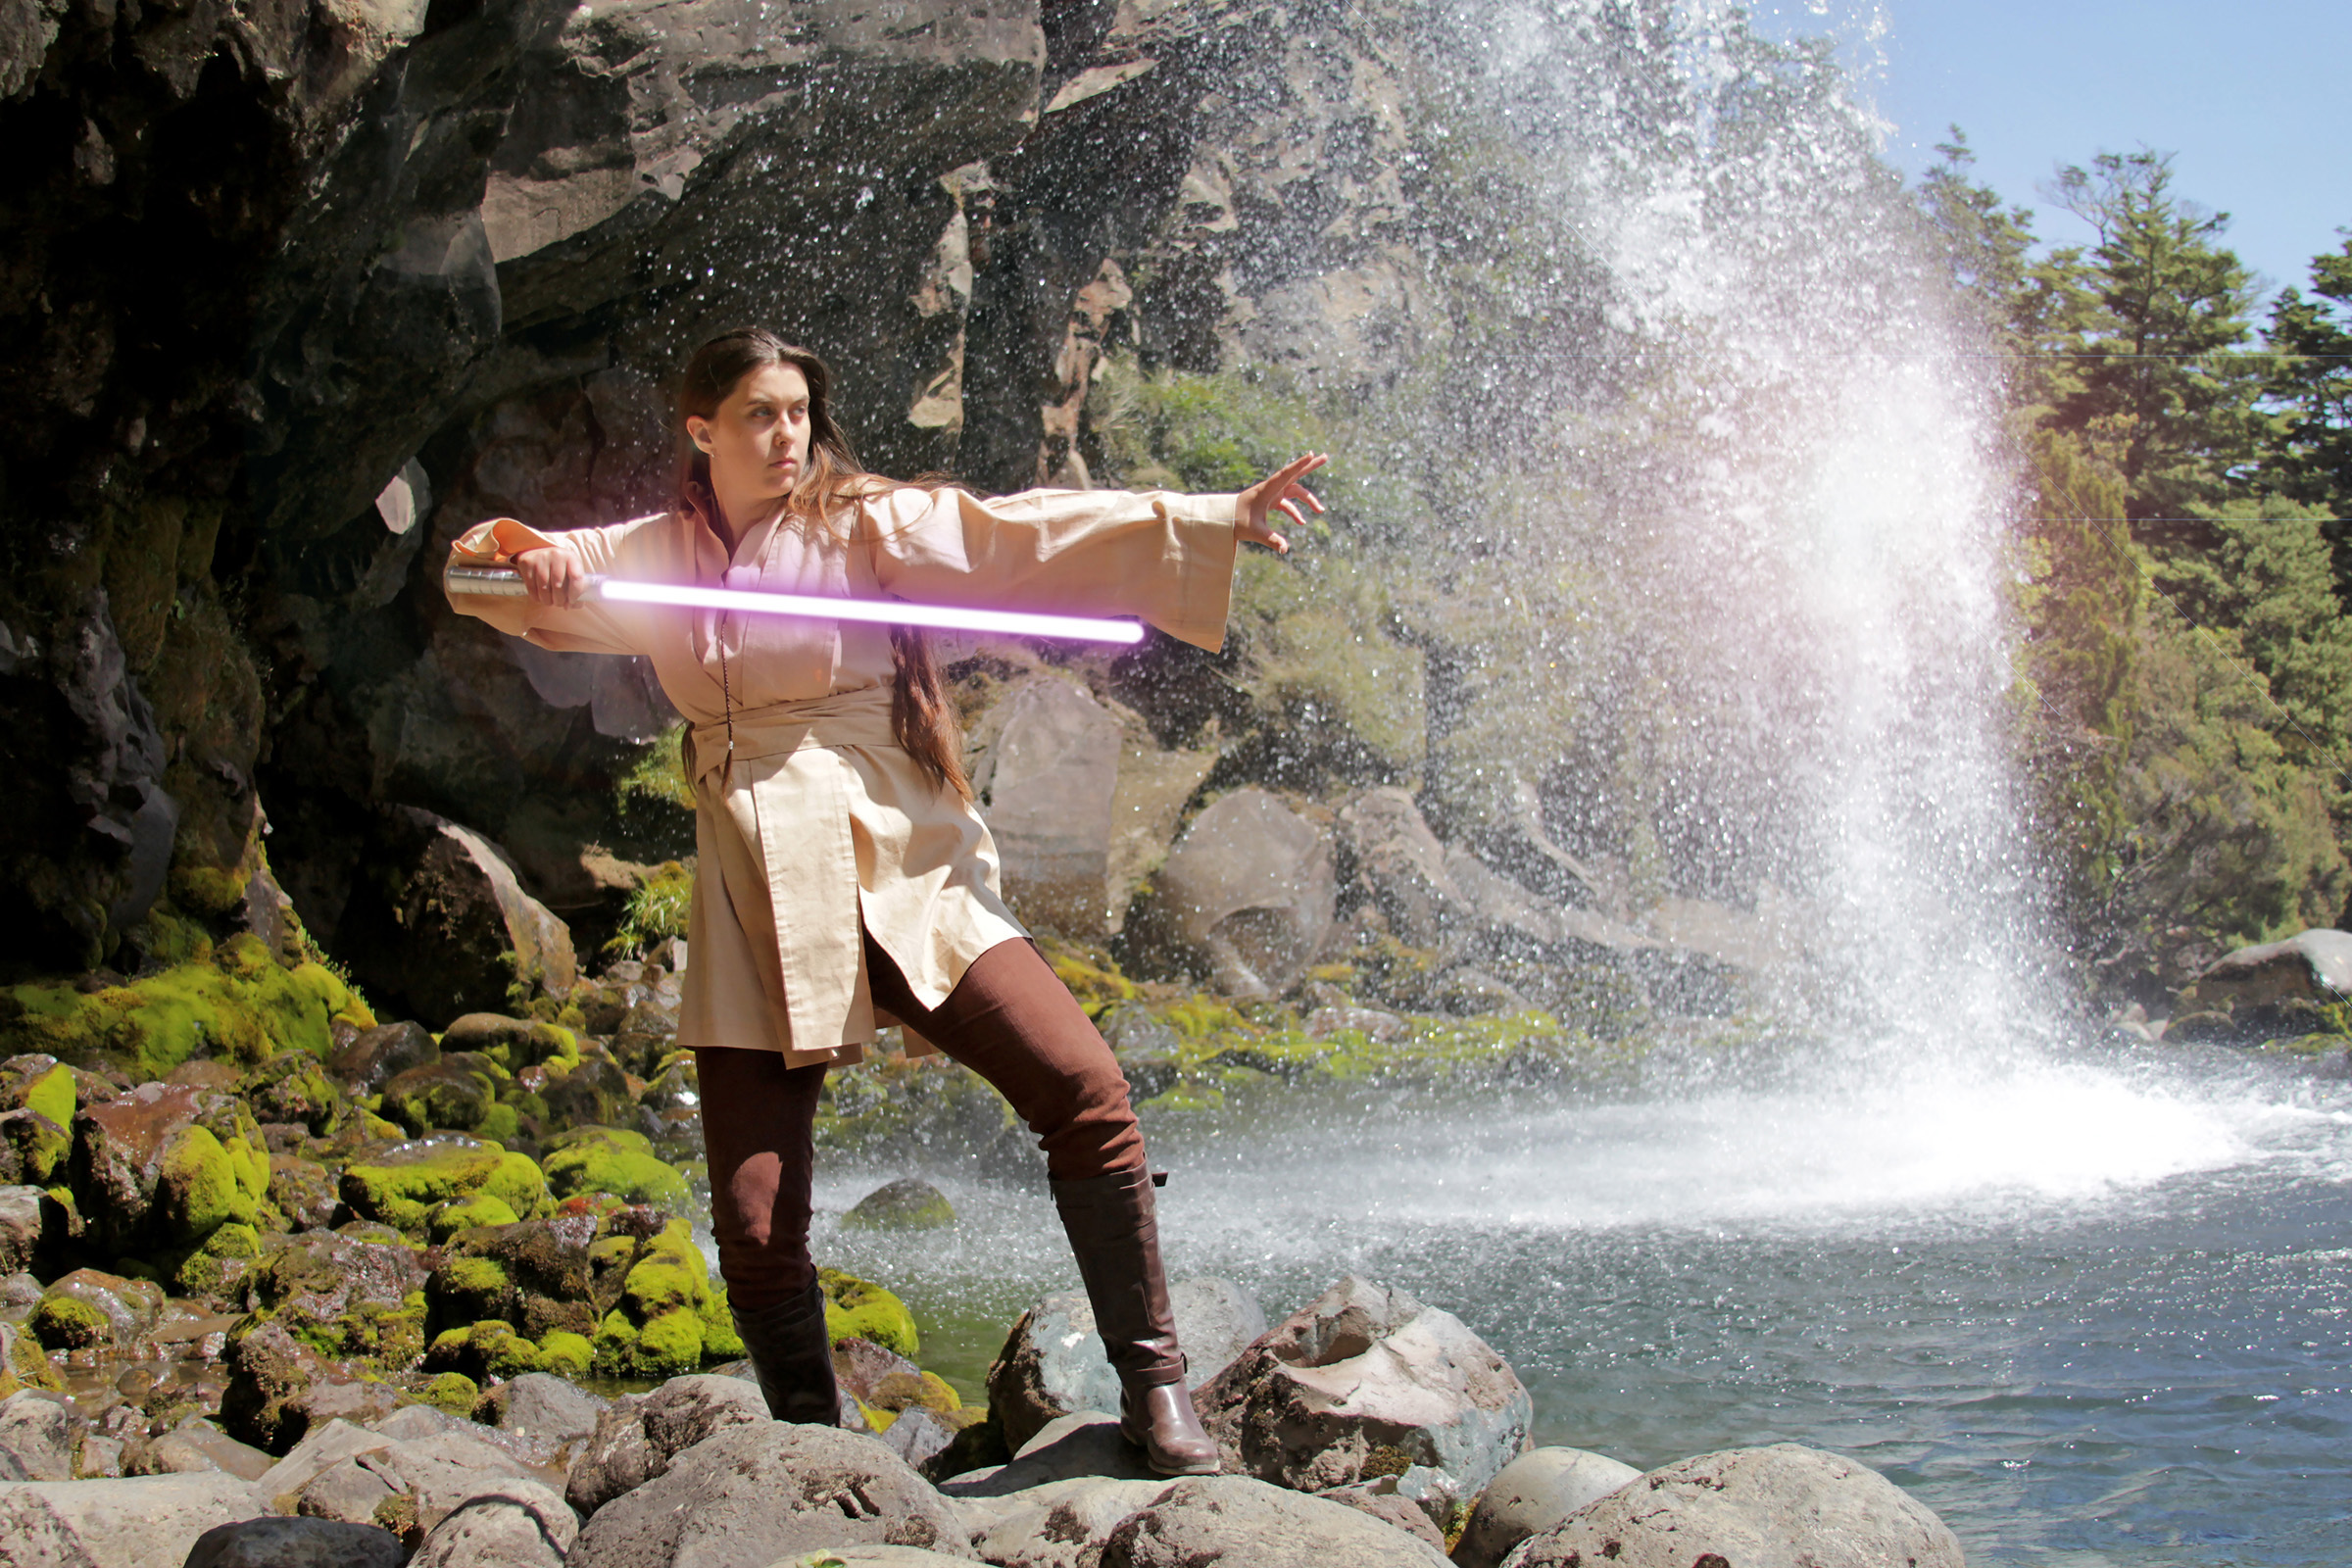
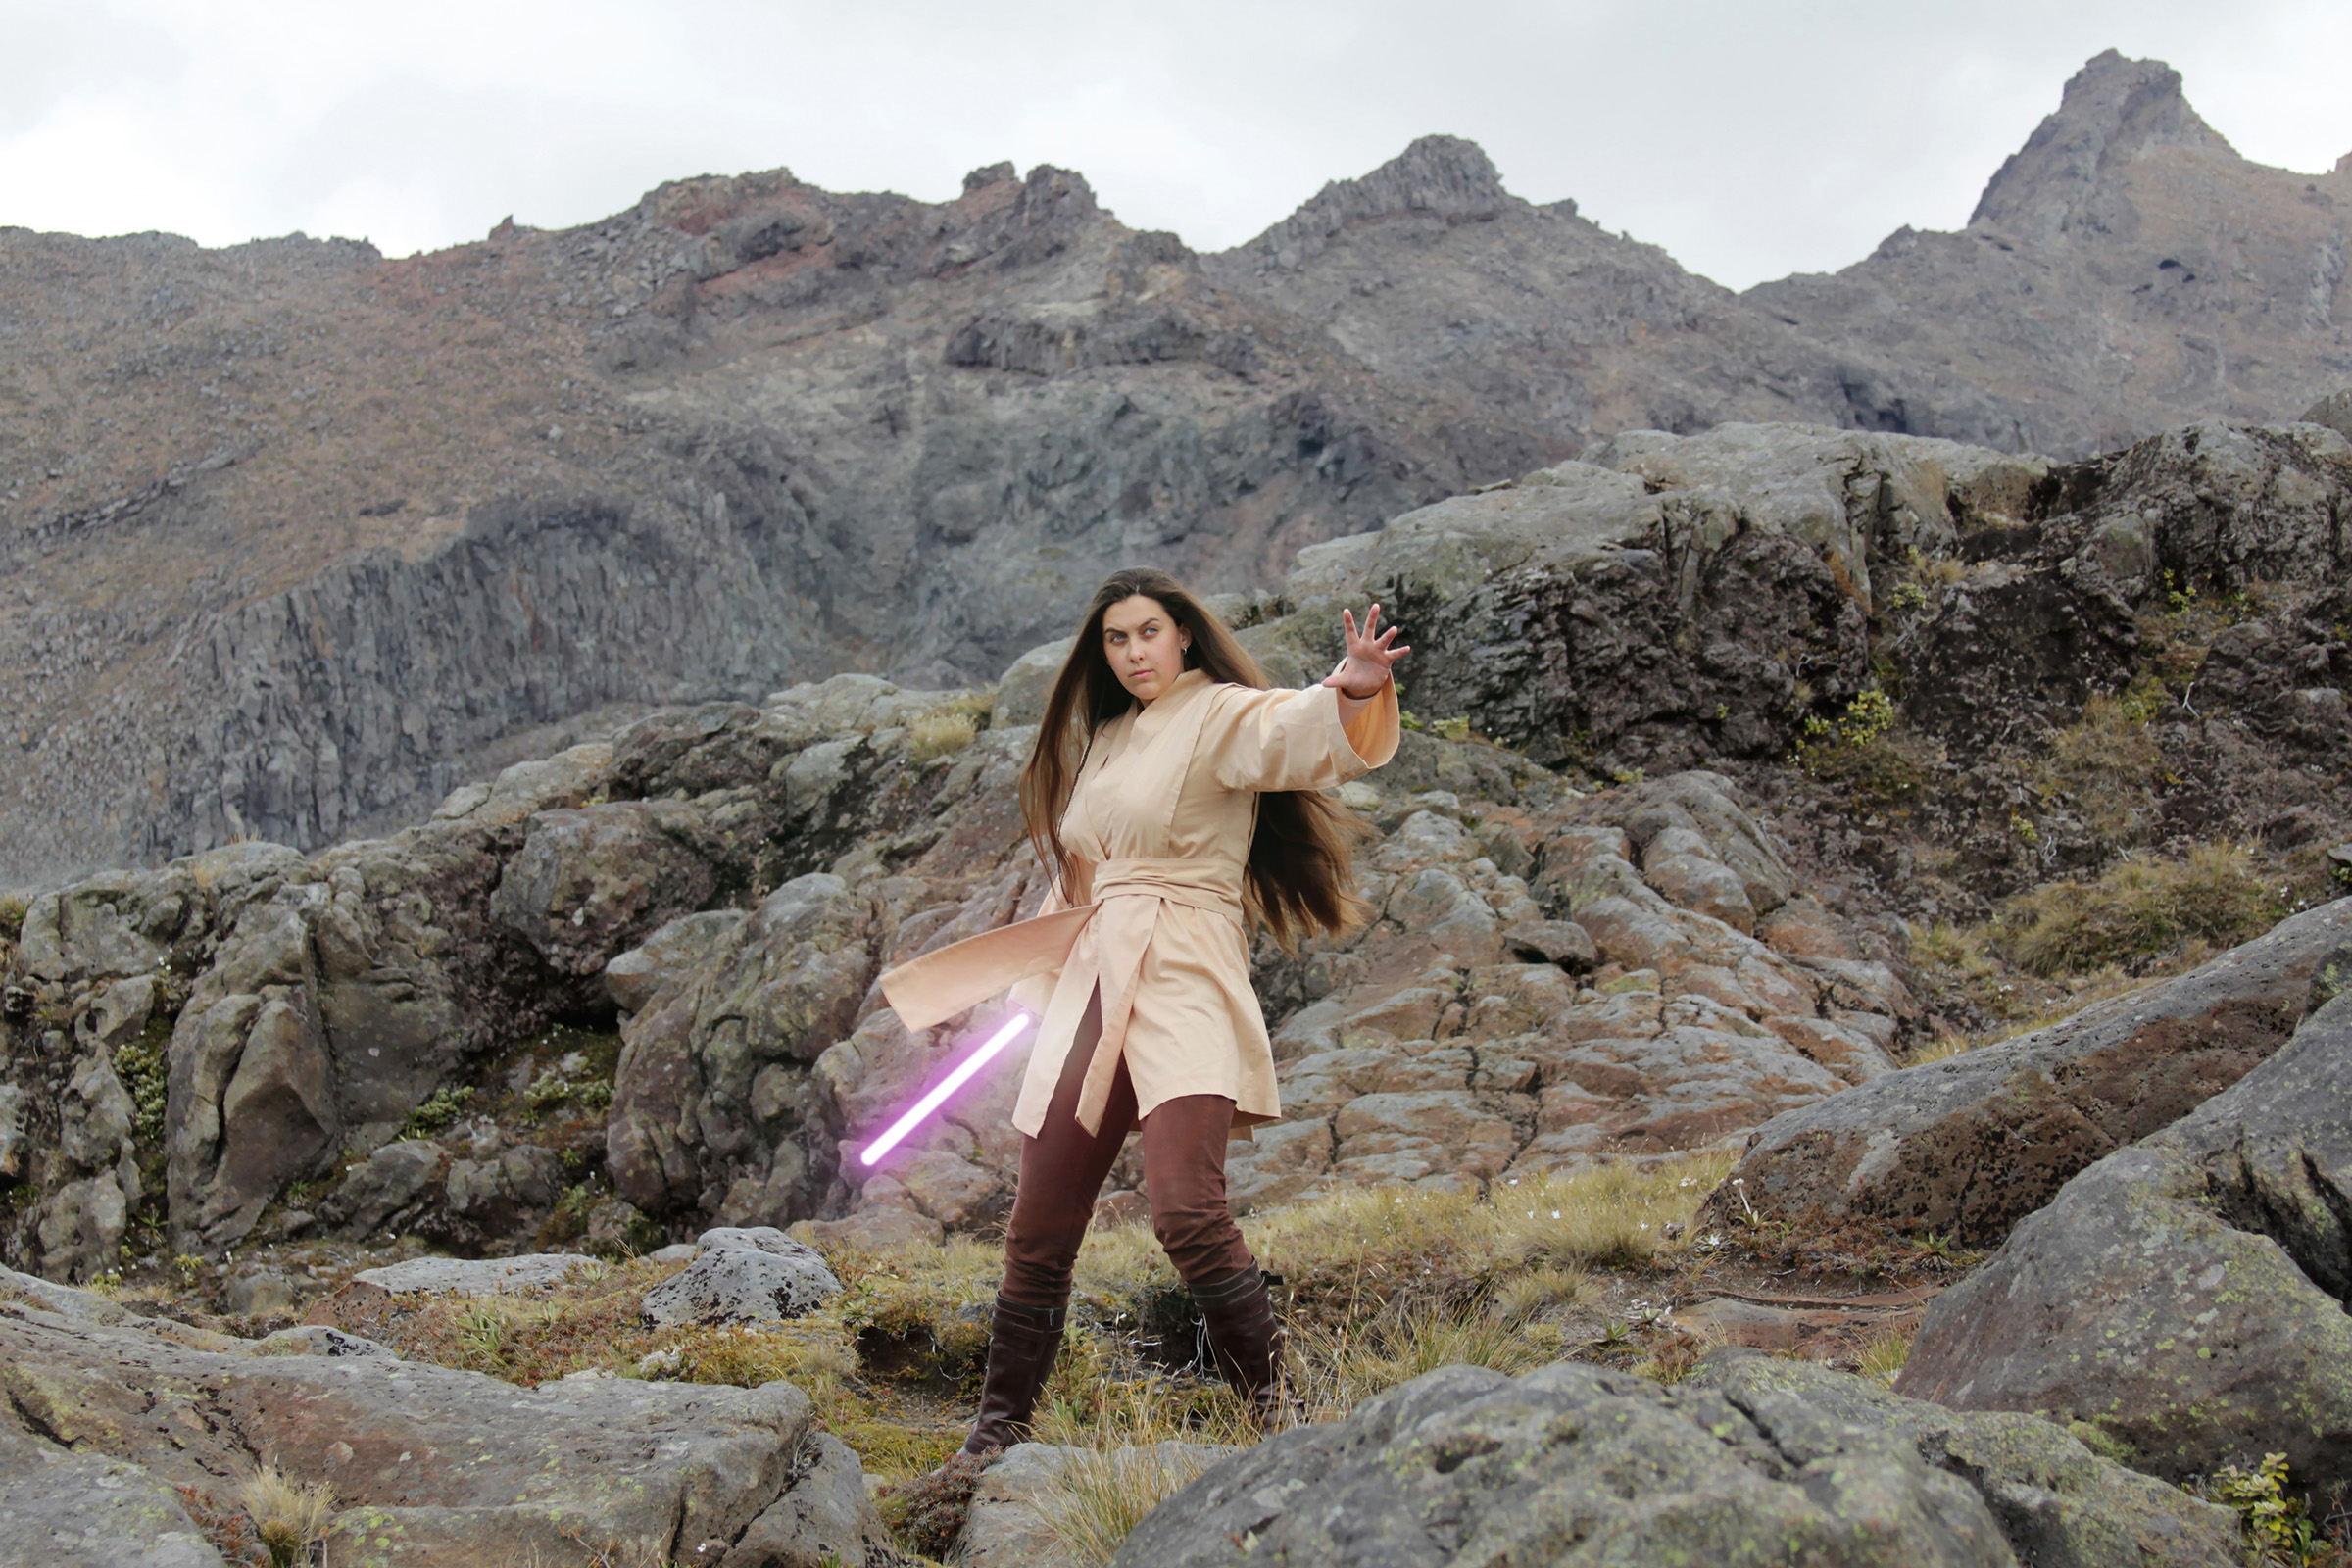
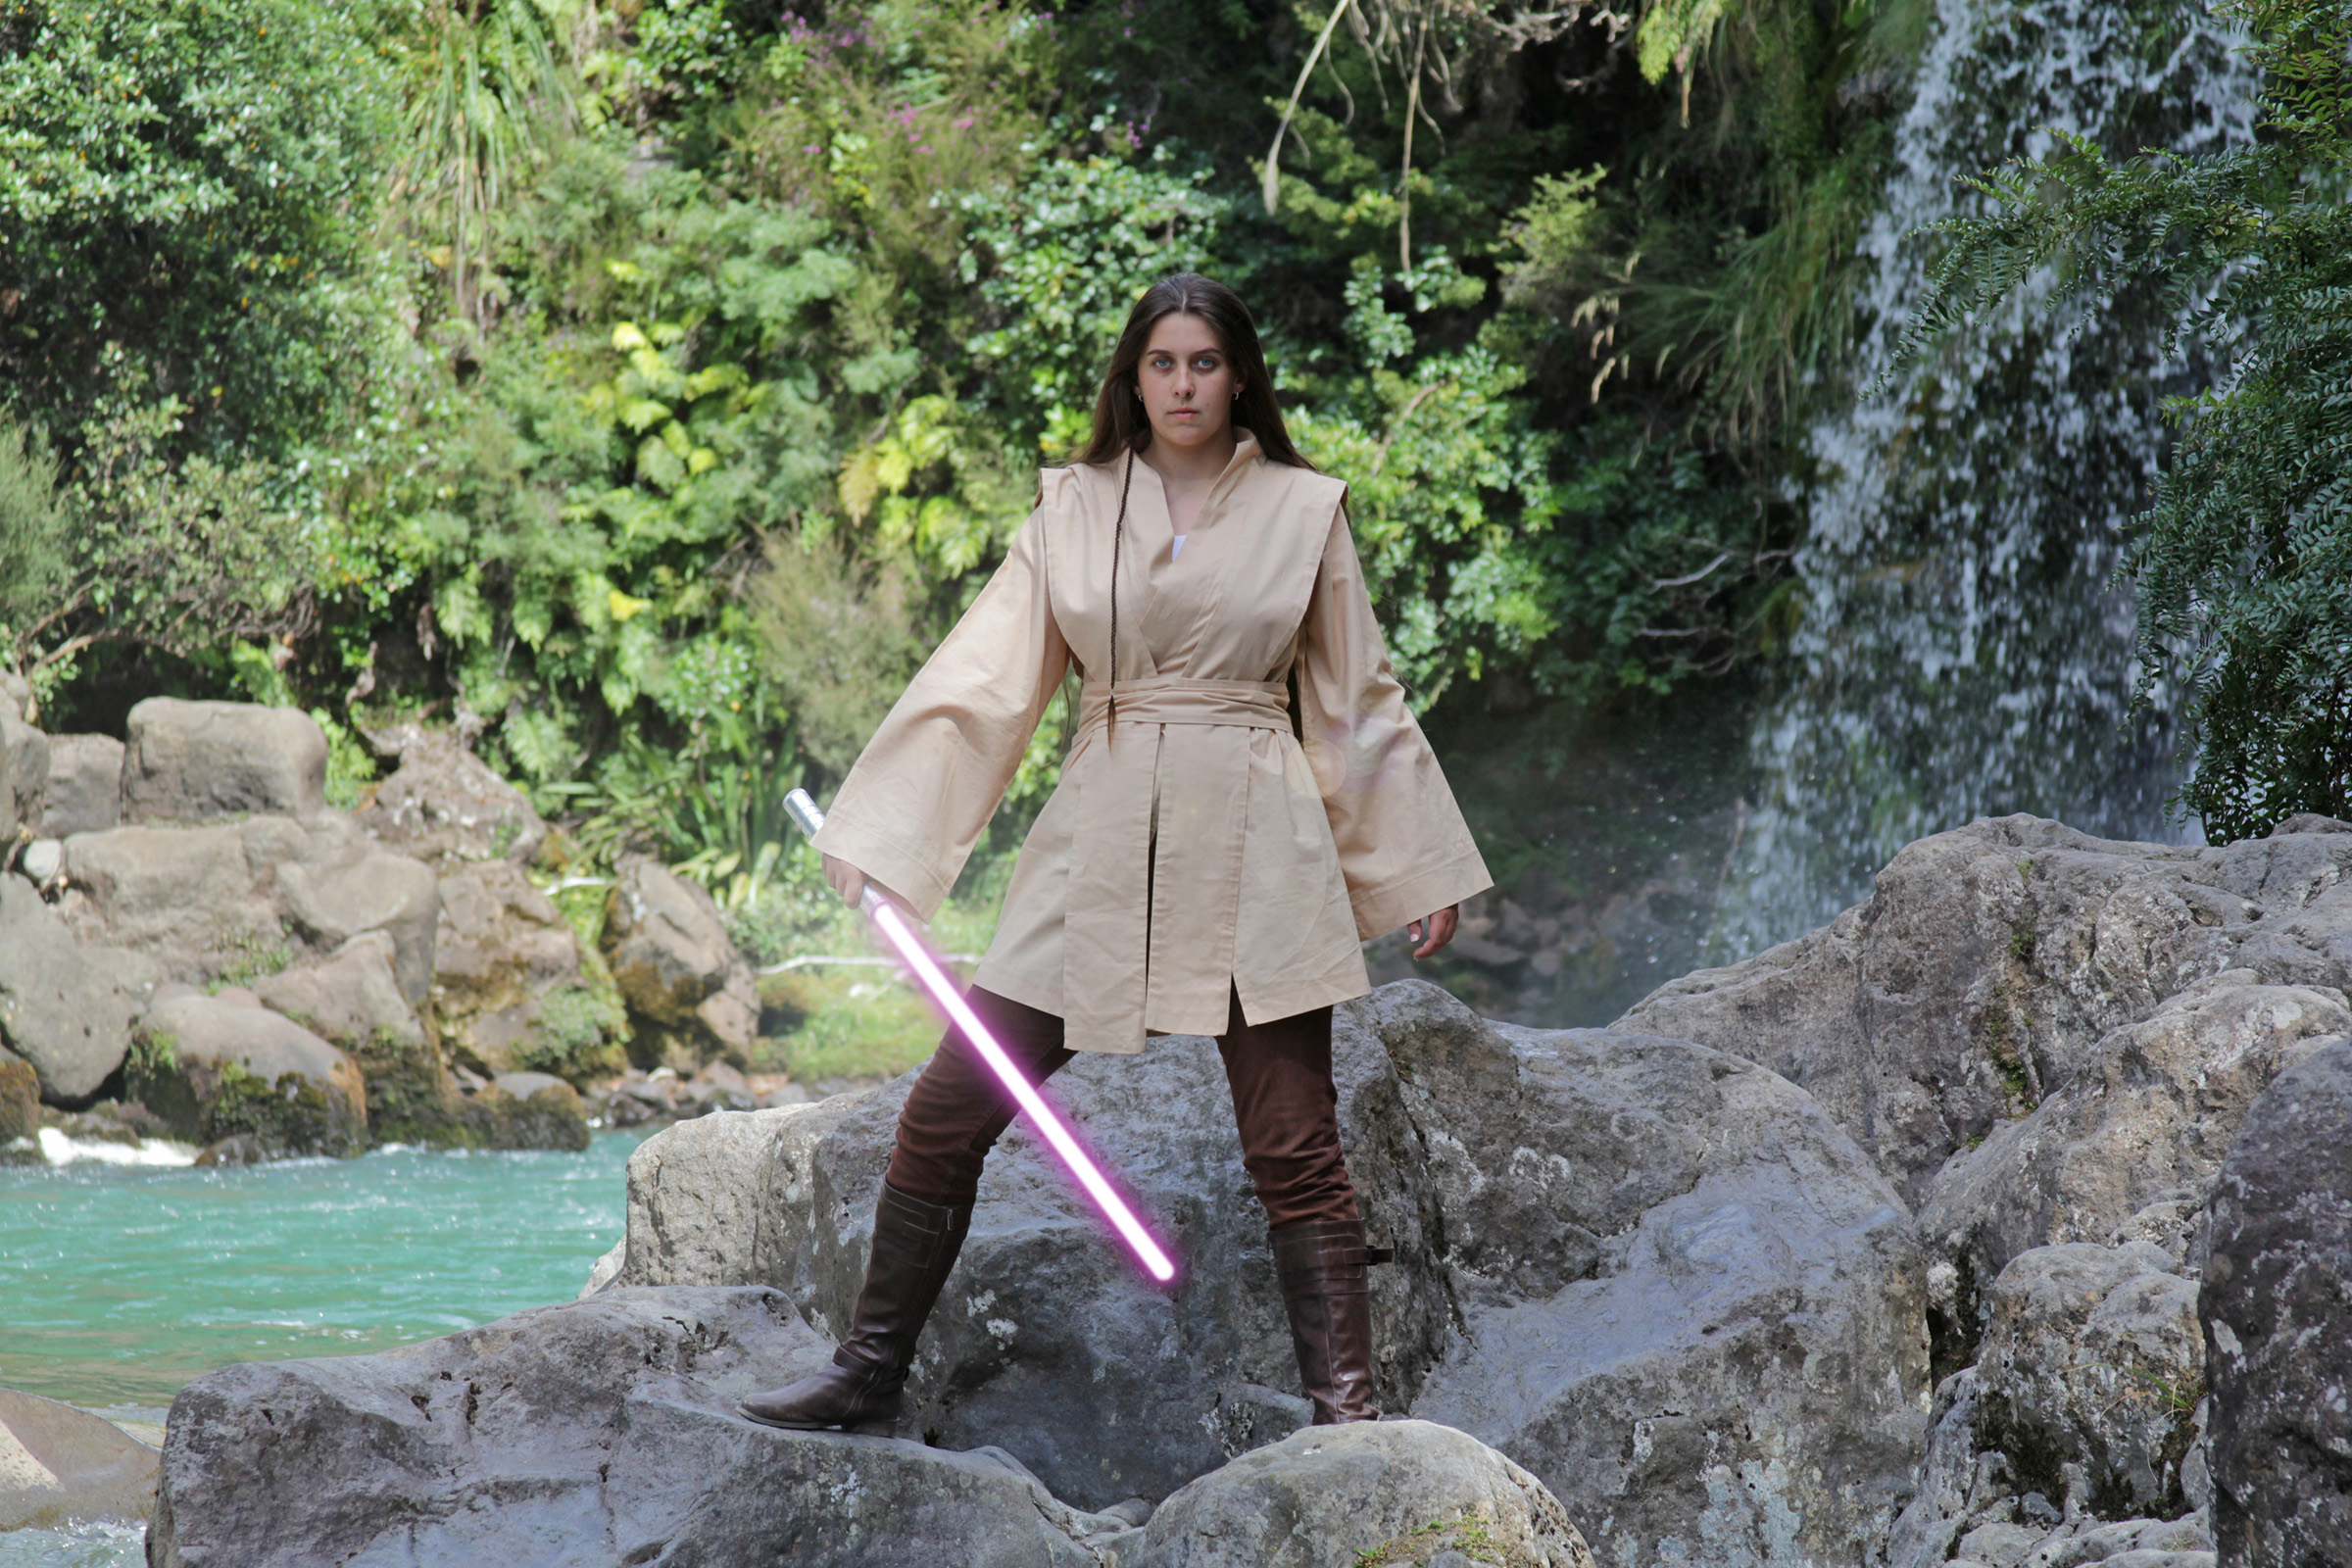
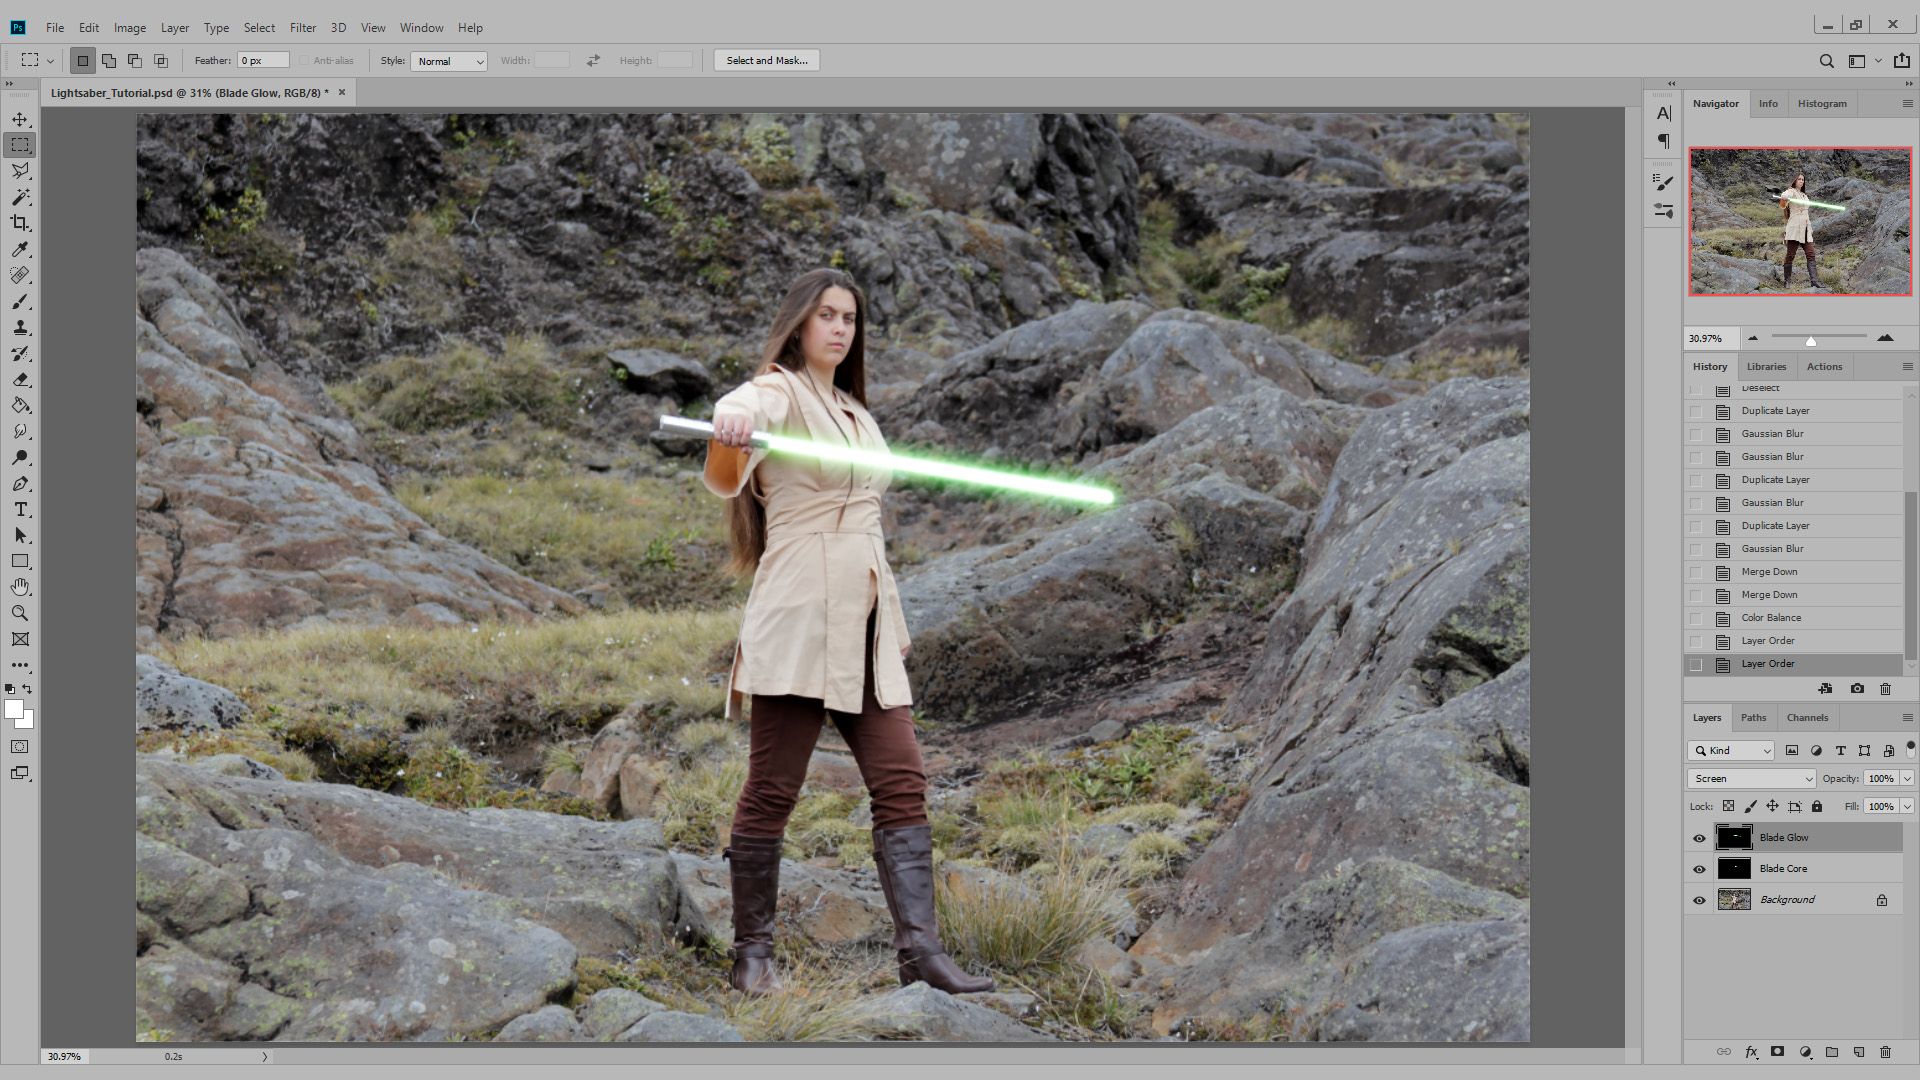
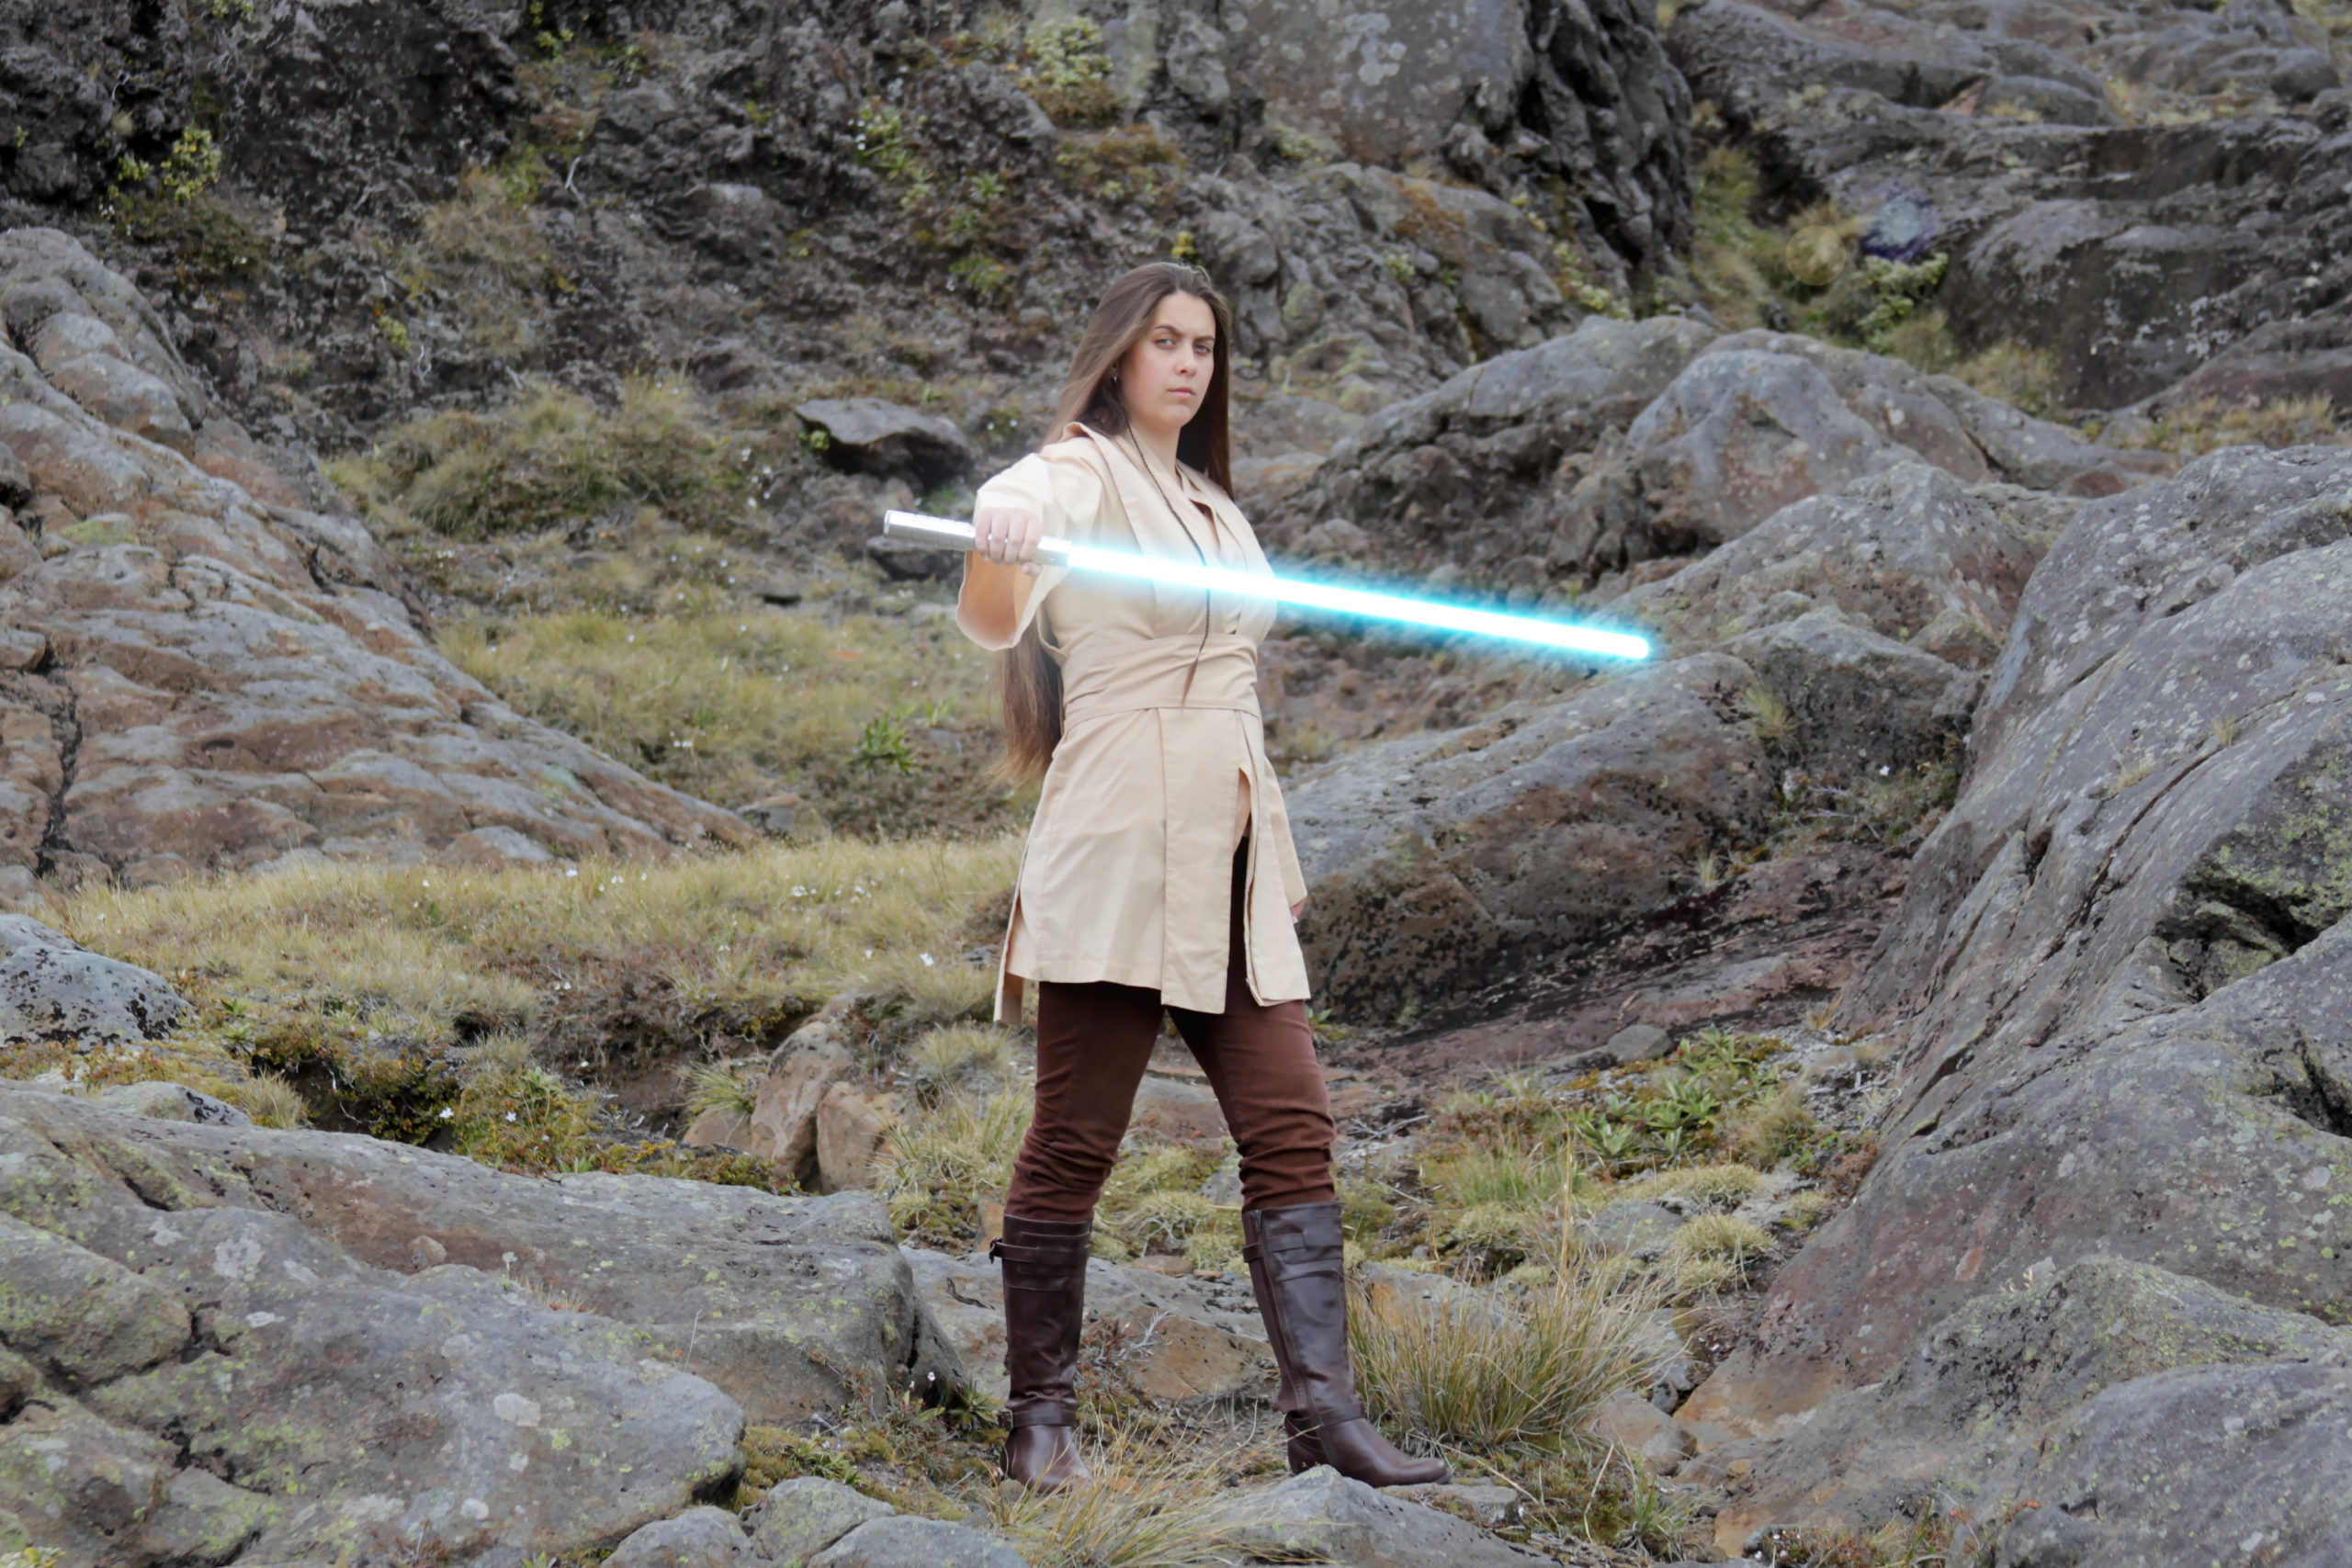
The image that we’re going to work with, shown above, and below once opened in Photoshop, is of our daughter Juliet in her Jedi costume, taken in the Tongariro National Park, New Zealand (likewise for the completed examples at the top of this page).
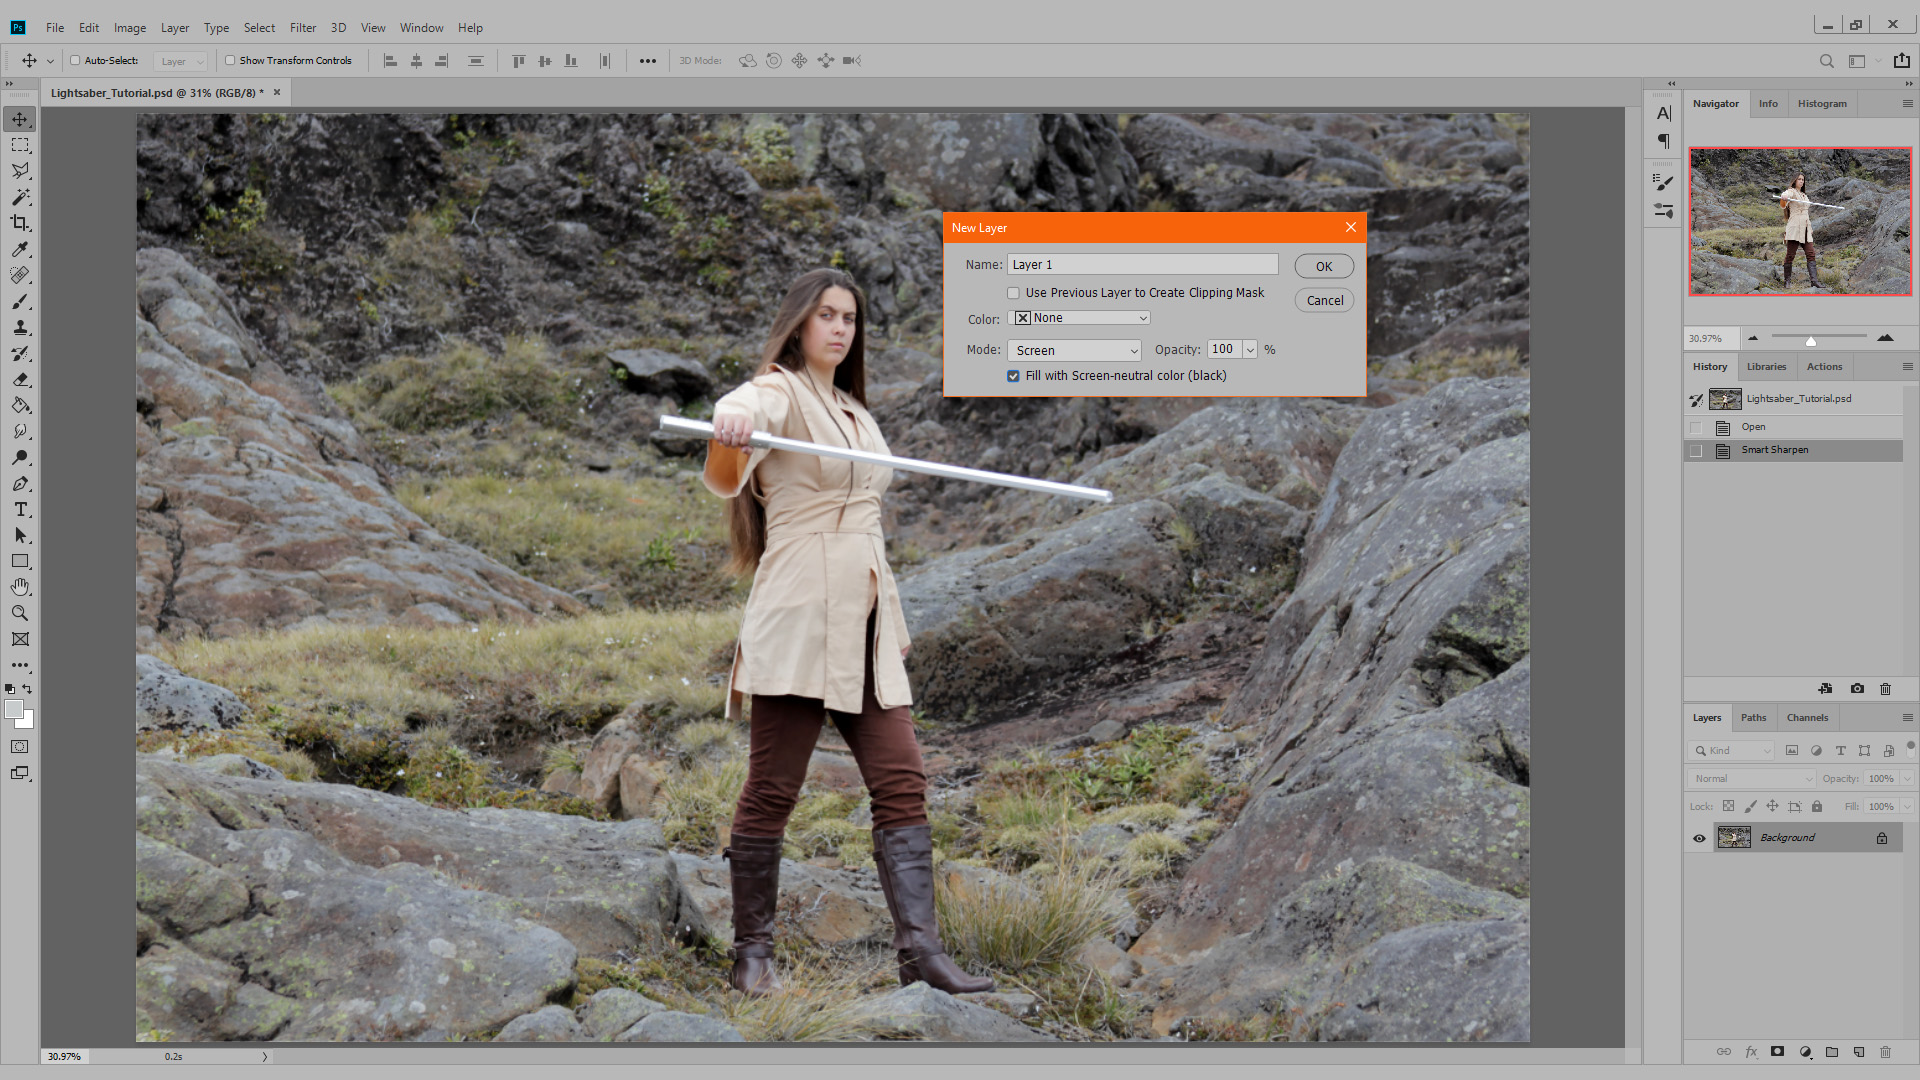
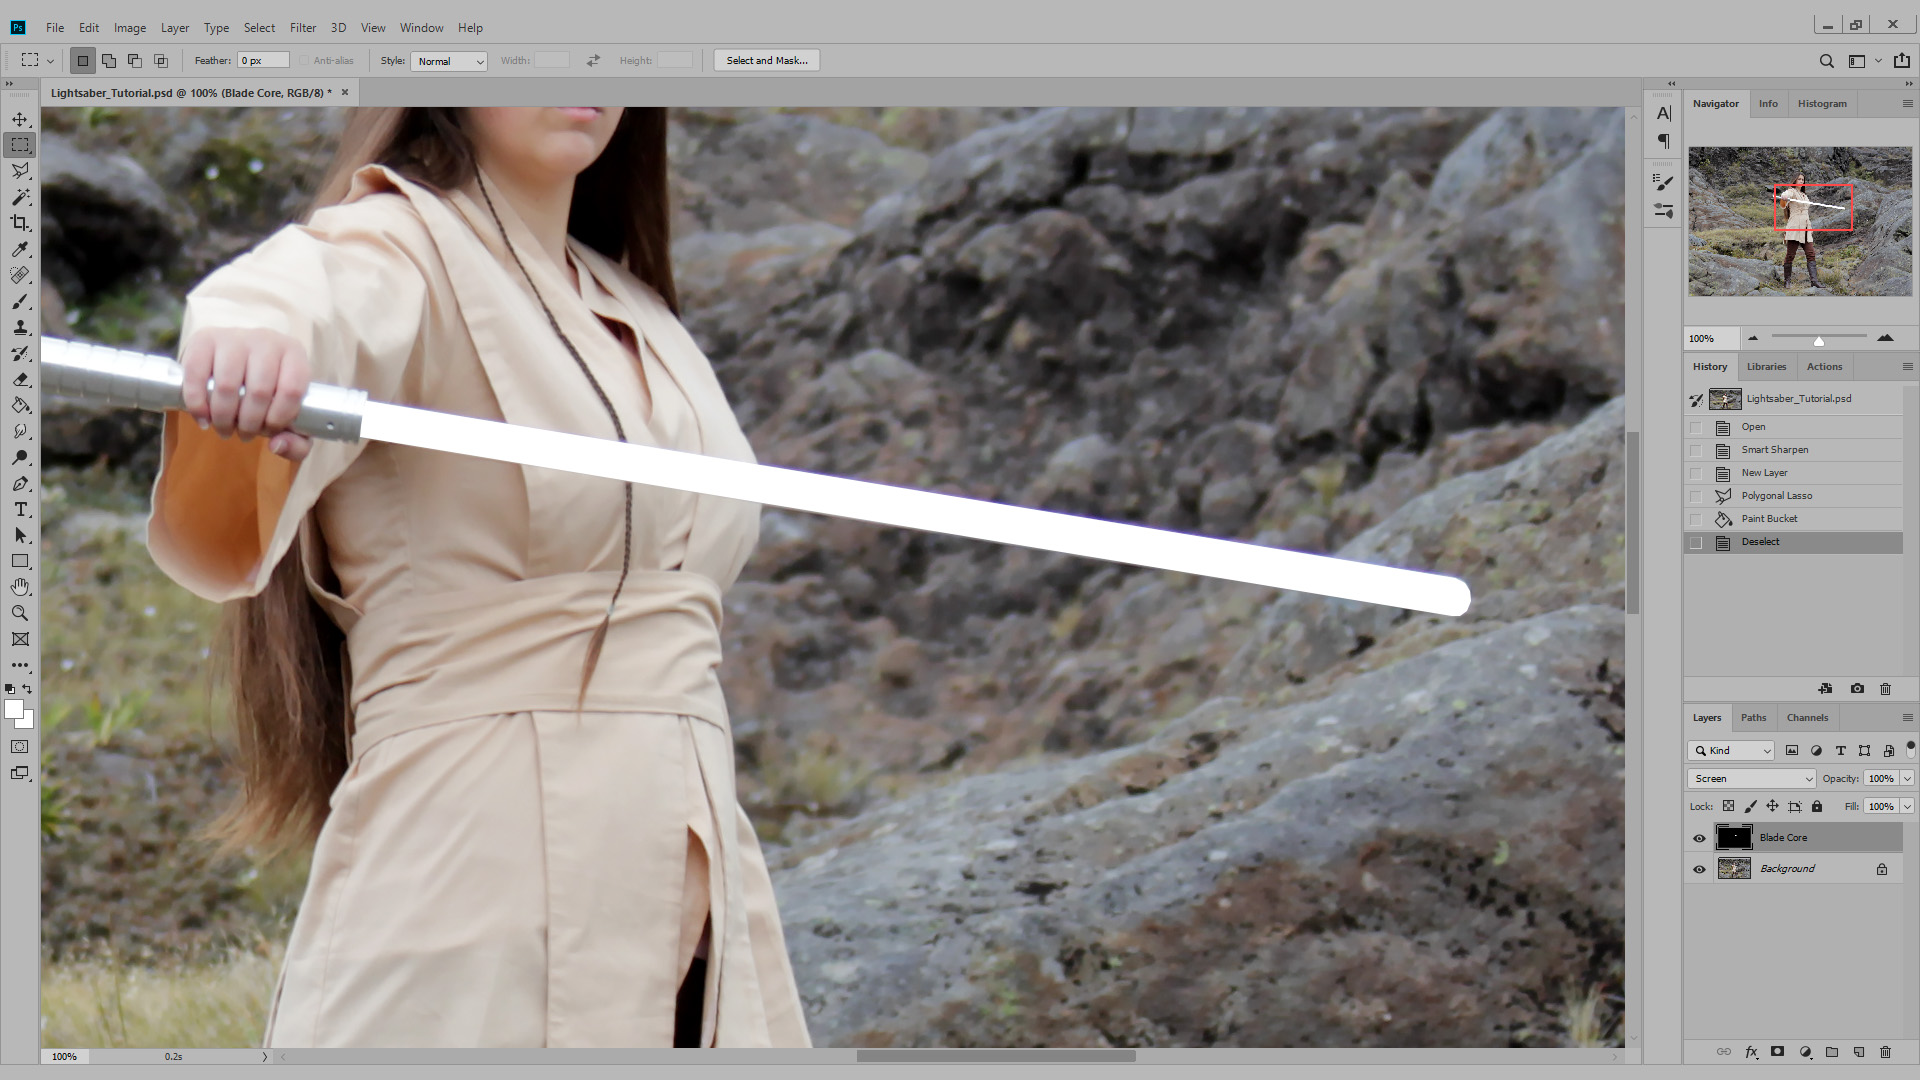
2. Create Blade Core layer – create a new layer, using Shift+Ctrl+N (or from the menus, Layer > New > Layer). The Layer Mode should be set to Screen, 100% Opacity, and select “Fill with Screen-Neutral color (black)” during the layer creation. For convenience, give this layer a name such as “Blade Core”.
We will be using the Screen blend mode for both the blade core and glow effects. Without getting into the maths of this blend mode, it’s just worth noting that black pixels in the screen layer do not affect the overall blend colour/brightness, while white or light pixels will result in a lighter colour. Adobe describes this as being “similar to projecting multiple photographic slides on top of each other”. The bottom line is that it achieves the lightsaber glow effect we are after.

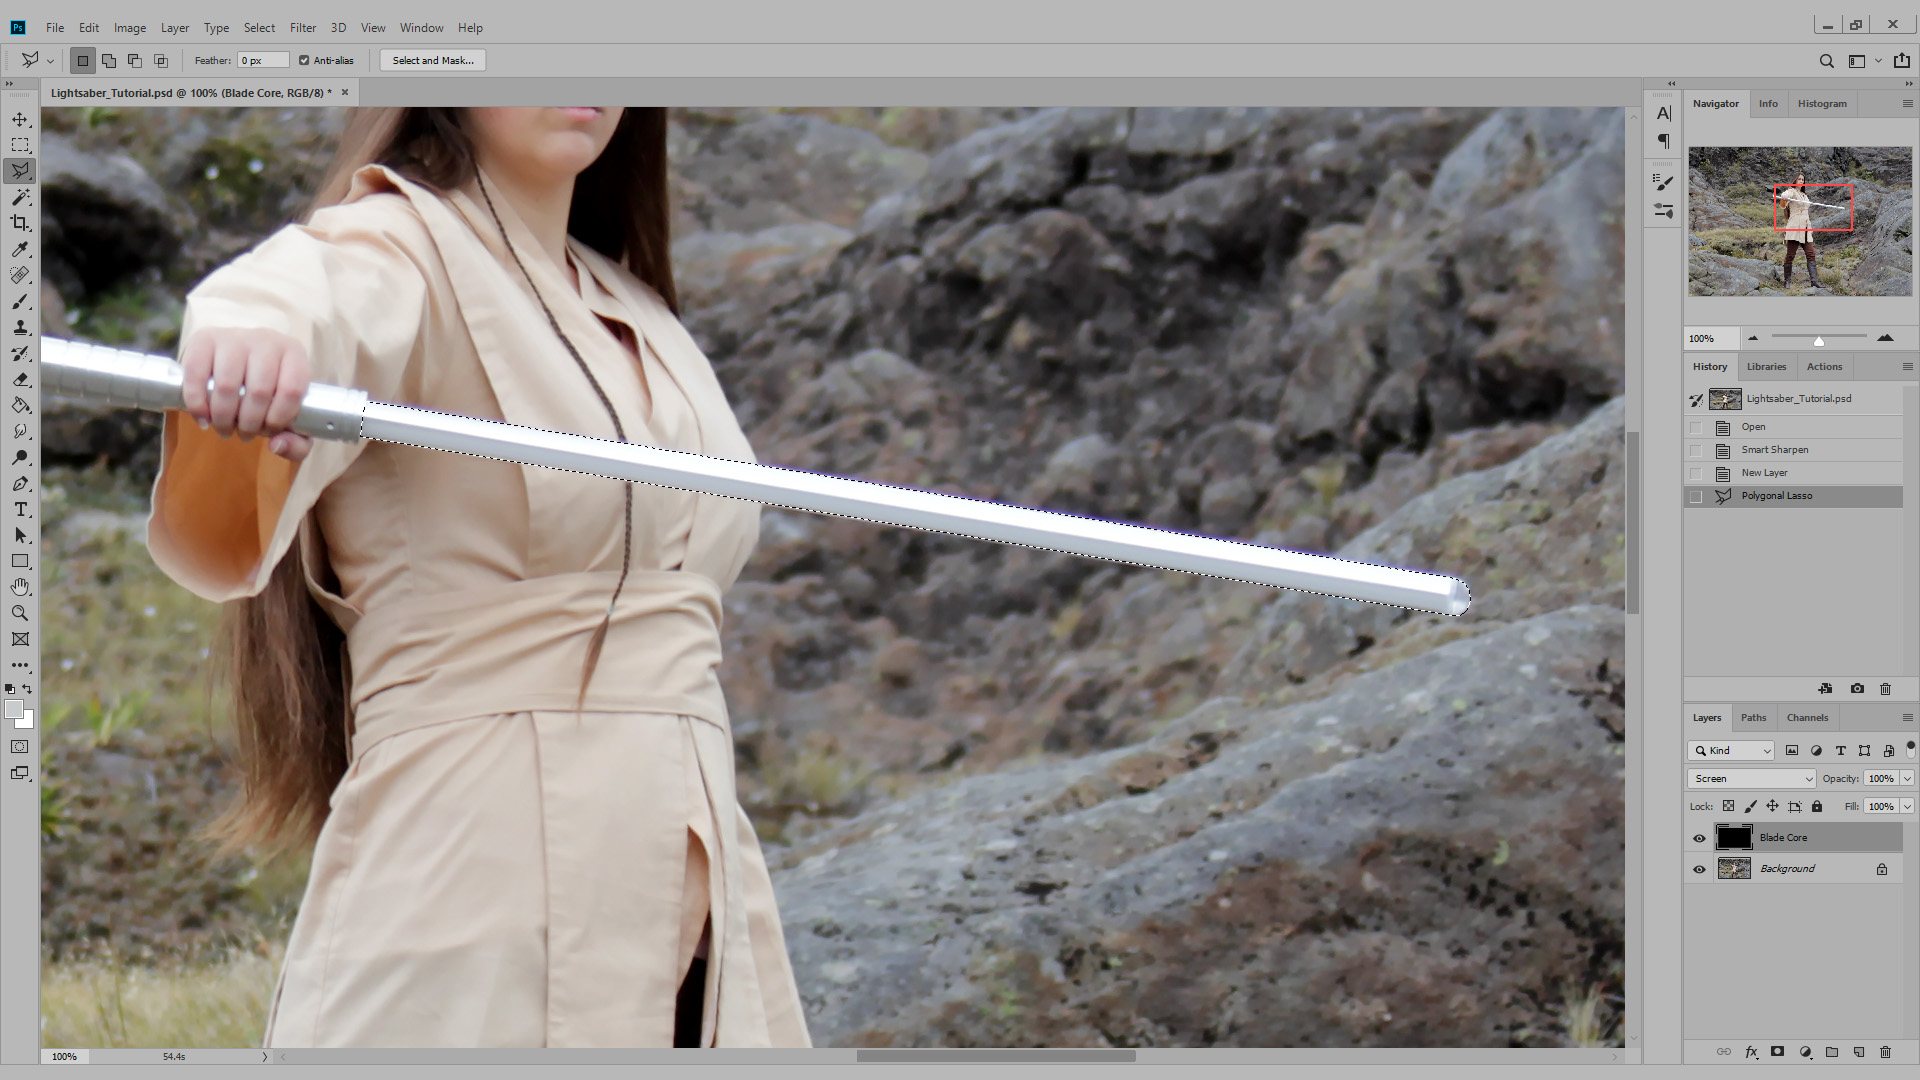
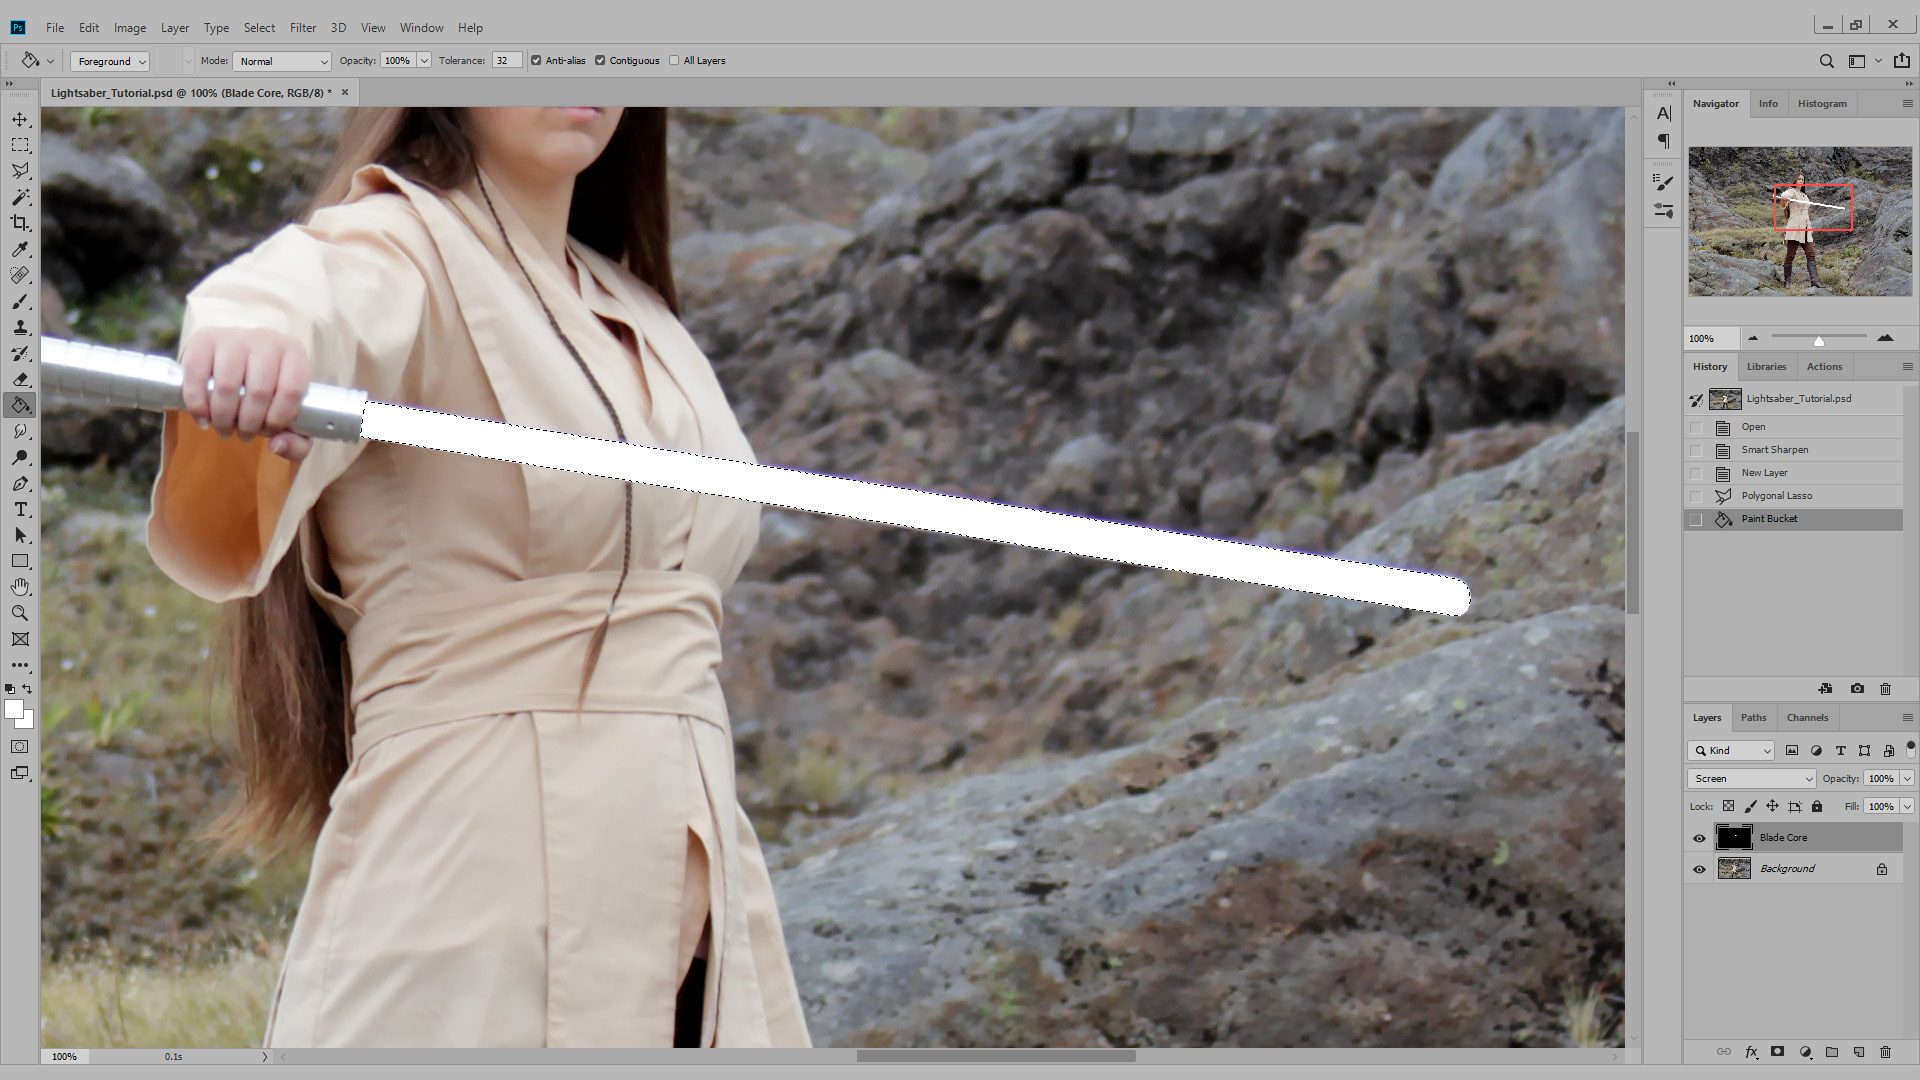
3. Create Blade Core – to create the blade core, which will be white in the final image, we need to draw a white blade onto the Blade Core layer. Use whatever technique you prefer and/or are most familiar with. One way or another, you need a blade that matches and covers the unlit blade in your raw photo.
My preference is to create a selection manually using a Lasso tool (or Pen tool to create a path), stepping around the visible edges of the unlit blade, and filling it with pure white. You can alternatively achieve this just using a Brush, with a bit of fine-tuning and practice, if that is what you are most familiar with. Either way, it is important to match the shape/curve of both the tip of the saber blade, and the point where it meets the “emitter” of the lightsaber hilt. When the saber is square on to the camera, the emitter end of the blade will be just a straight line at right angles to the edges of the blade, but if the blade is pointing towards the camera, a curve will be seen.
(Optional) If you are using a photo that does not have an unlit lightsaber blade in it, you can still apply this technique, but you will need to manually insert a white blade onto this layer (using the same approach as in the preceding paragraph). This is a little harder to do. A key thing is to fully ensure that the blade lines up well with the hilt of the saber, as any unintended angle between the hilt and blade throws the finished effect off. One way to do this that I sometimes resort to is to insert a temporary guide layer where I just use the Pen tool to mock up a blade, then create a selection over it on the Blade Core layer as described in the previous paragraph.
Make sure you Deselect the blade core (if you used a selection to create it) once the selection is filled with white, before proceeding.
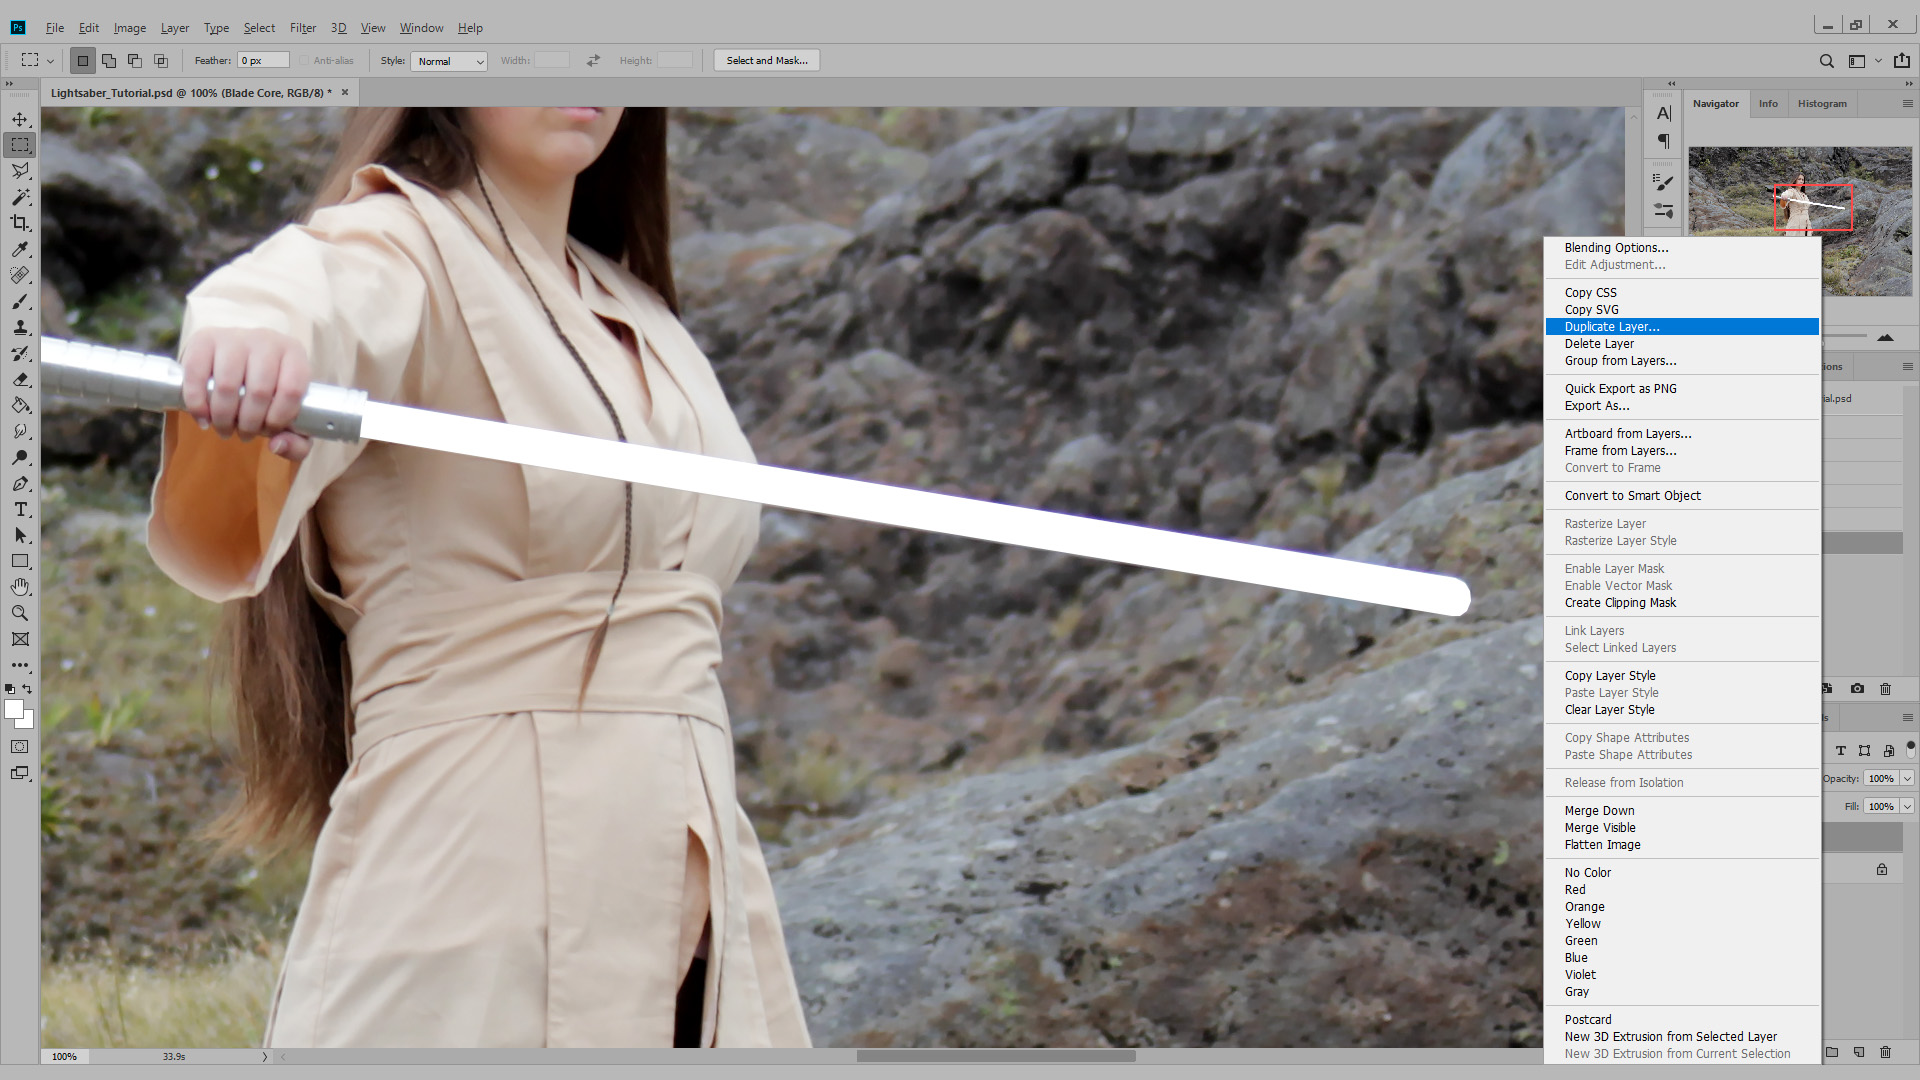
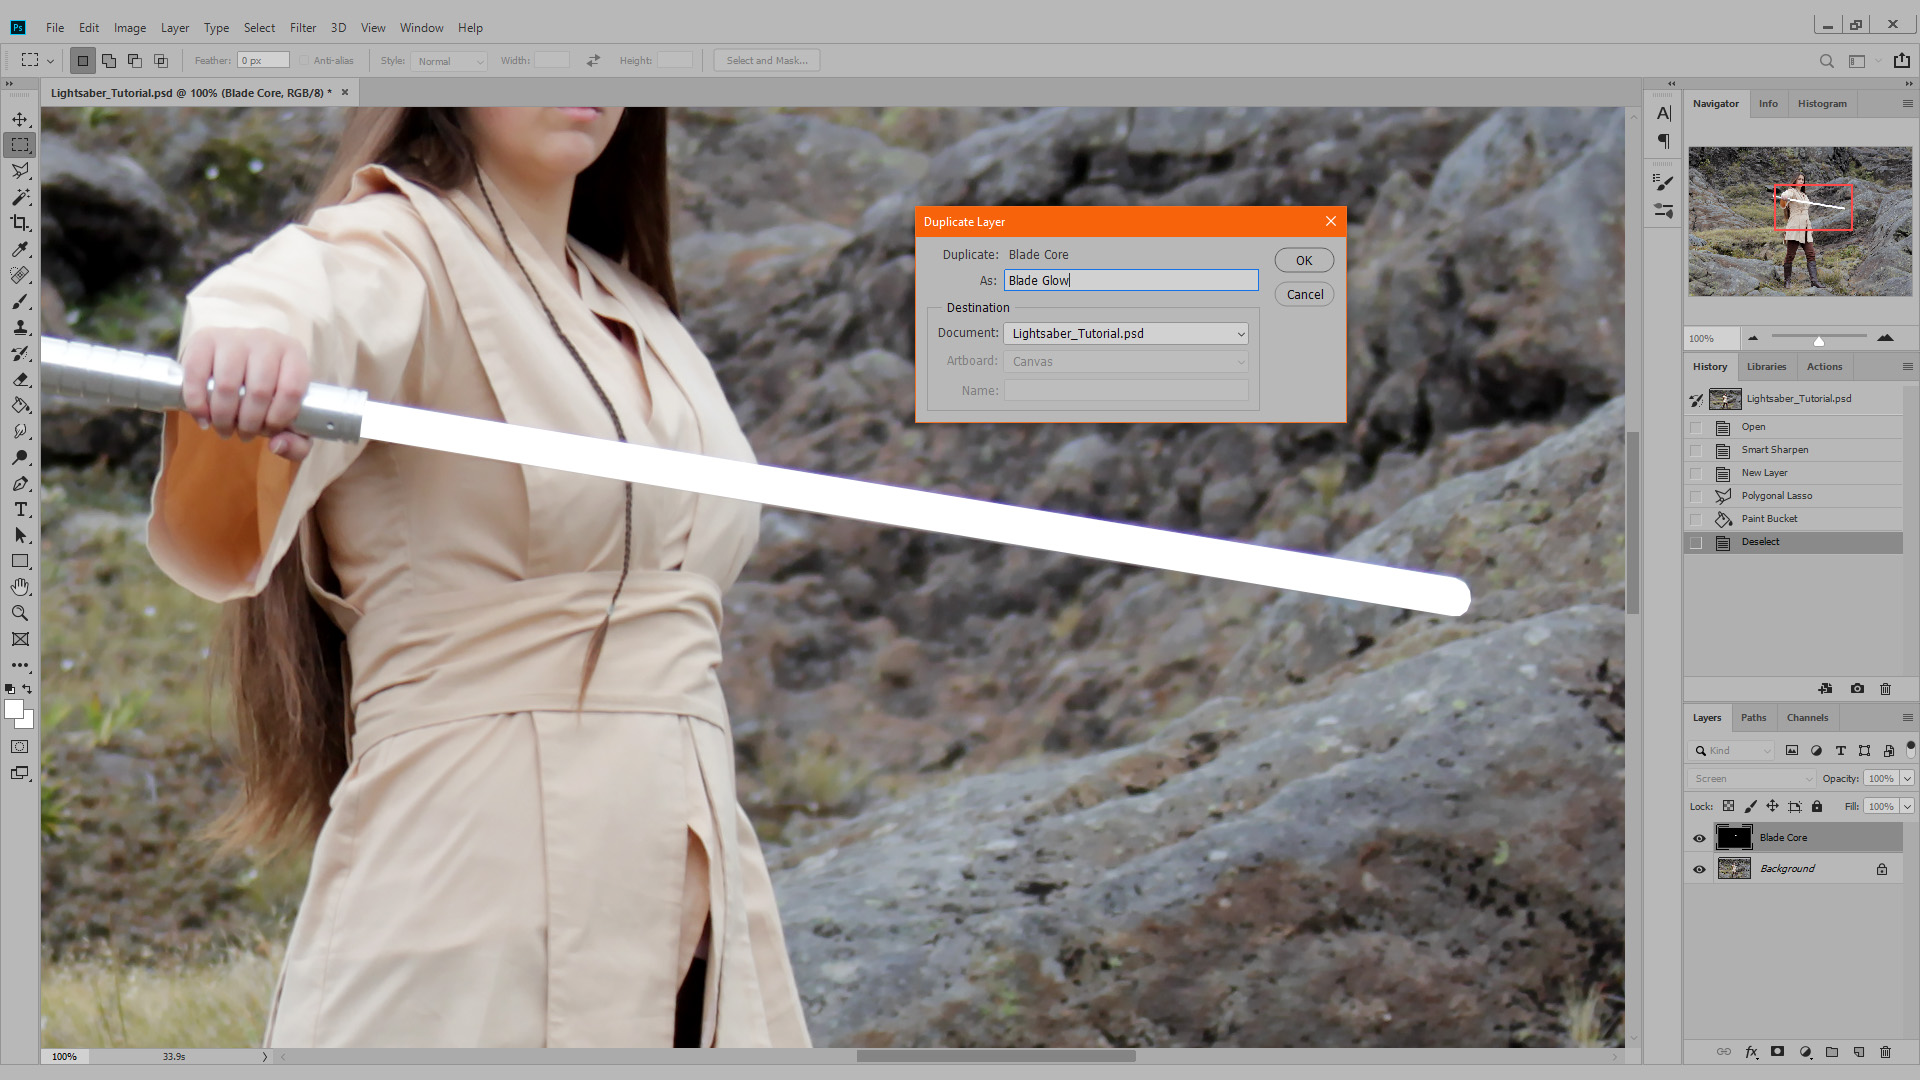
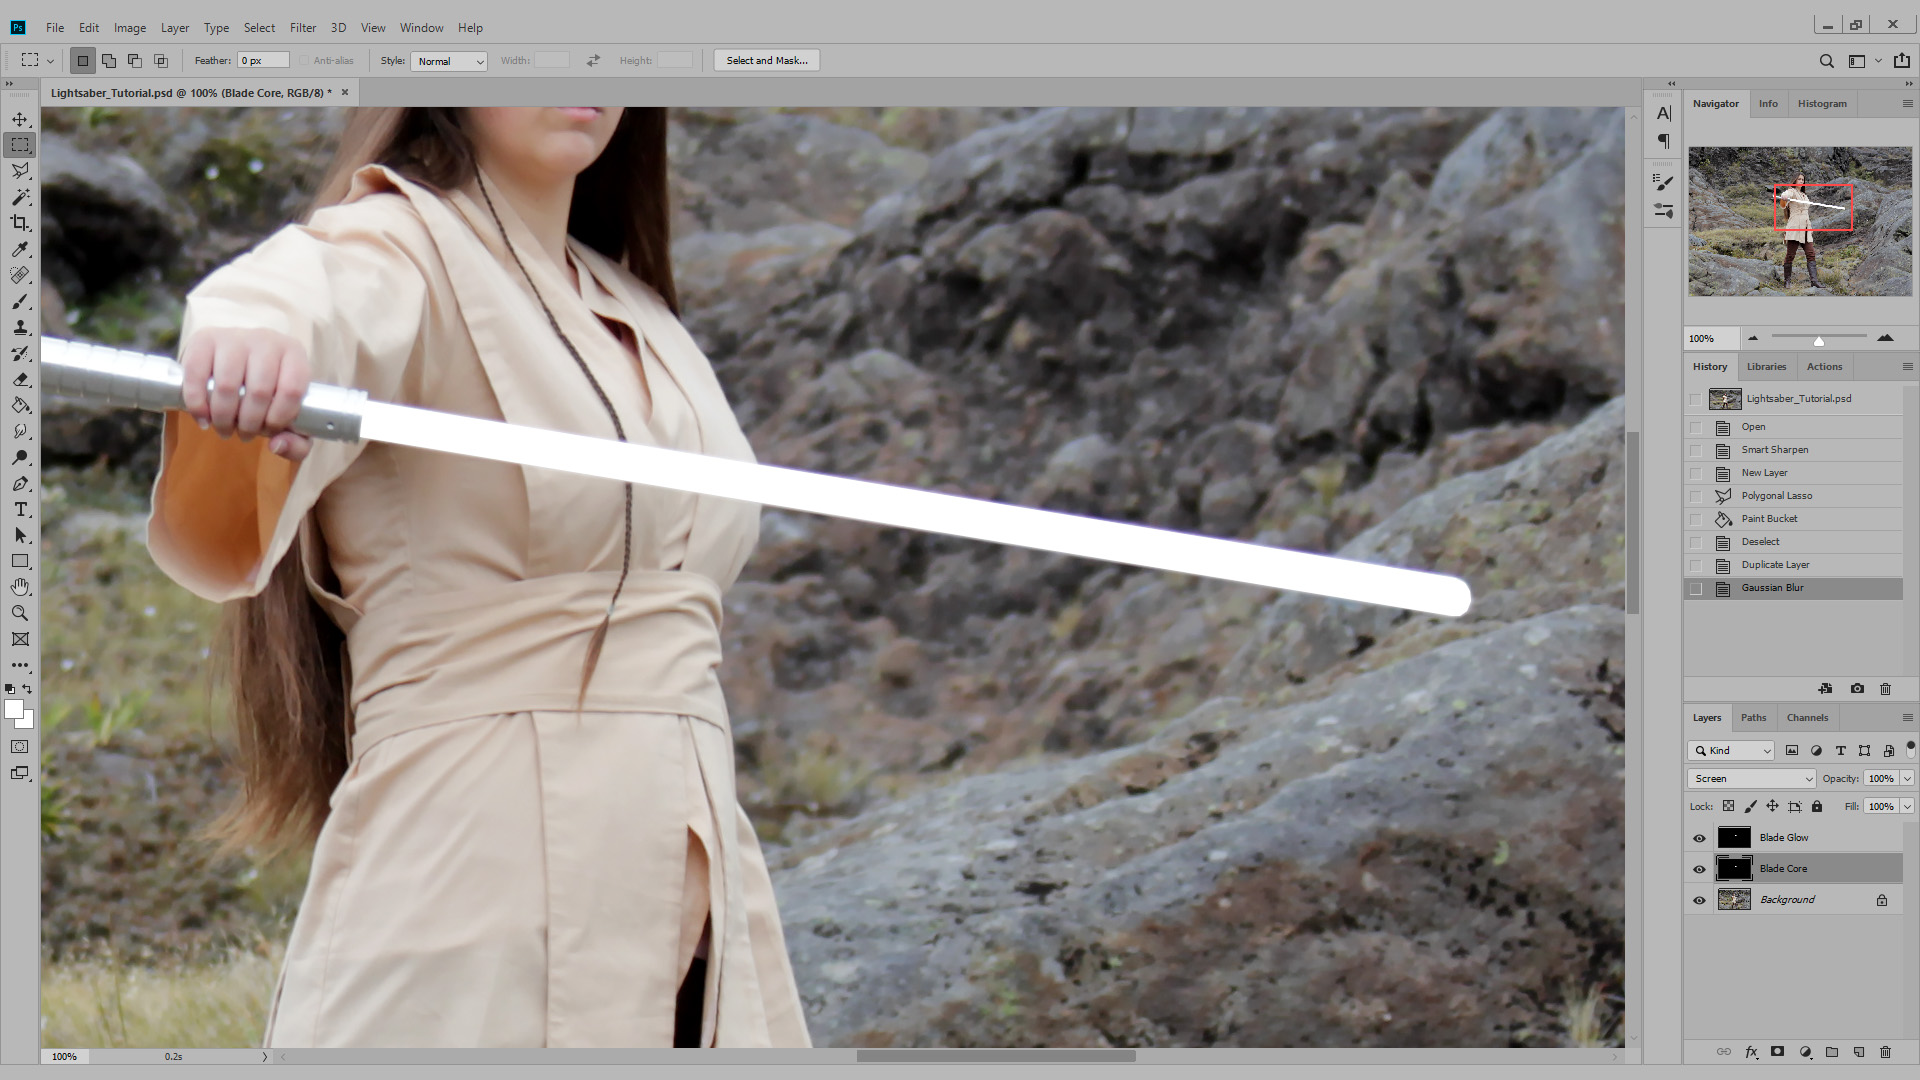
4. Create Blade Glow layer – the glow of the blade will be created and manipulated separately from the blade core. To get the starting point for the blade glow effect, simply Duplicate the Blade Core layer, and rename the resulting layer “Blade Glow”. This Blade Glow layer will therefore obviously also be set to Screen blend mode, and be filled with black (apart from the white saber blade core itself, that we created in the previous step).
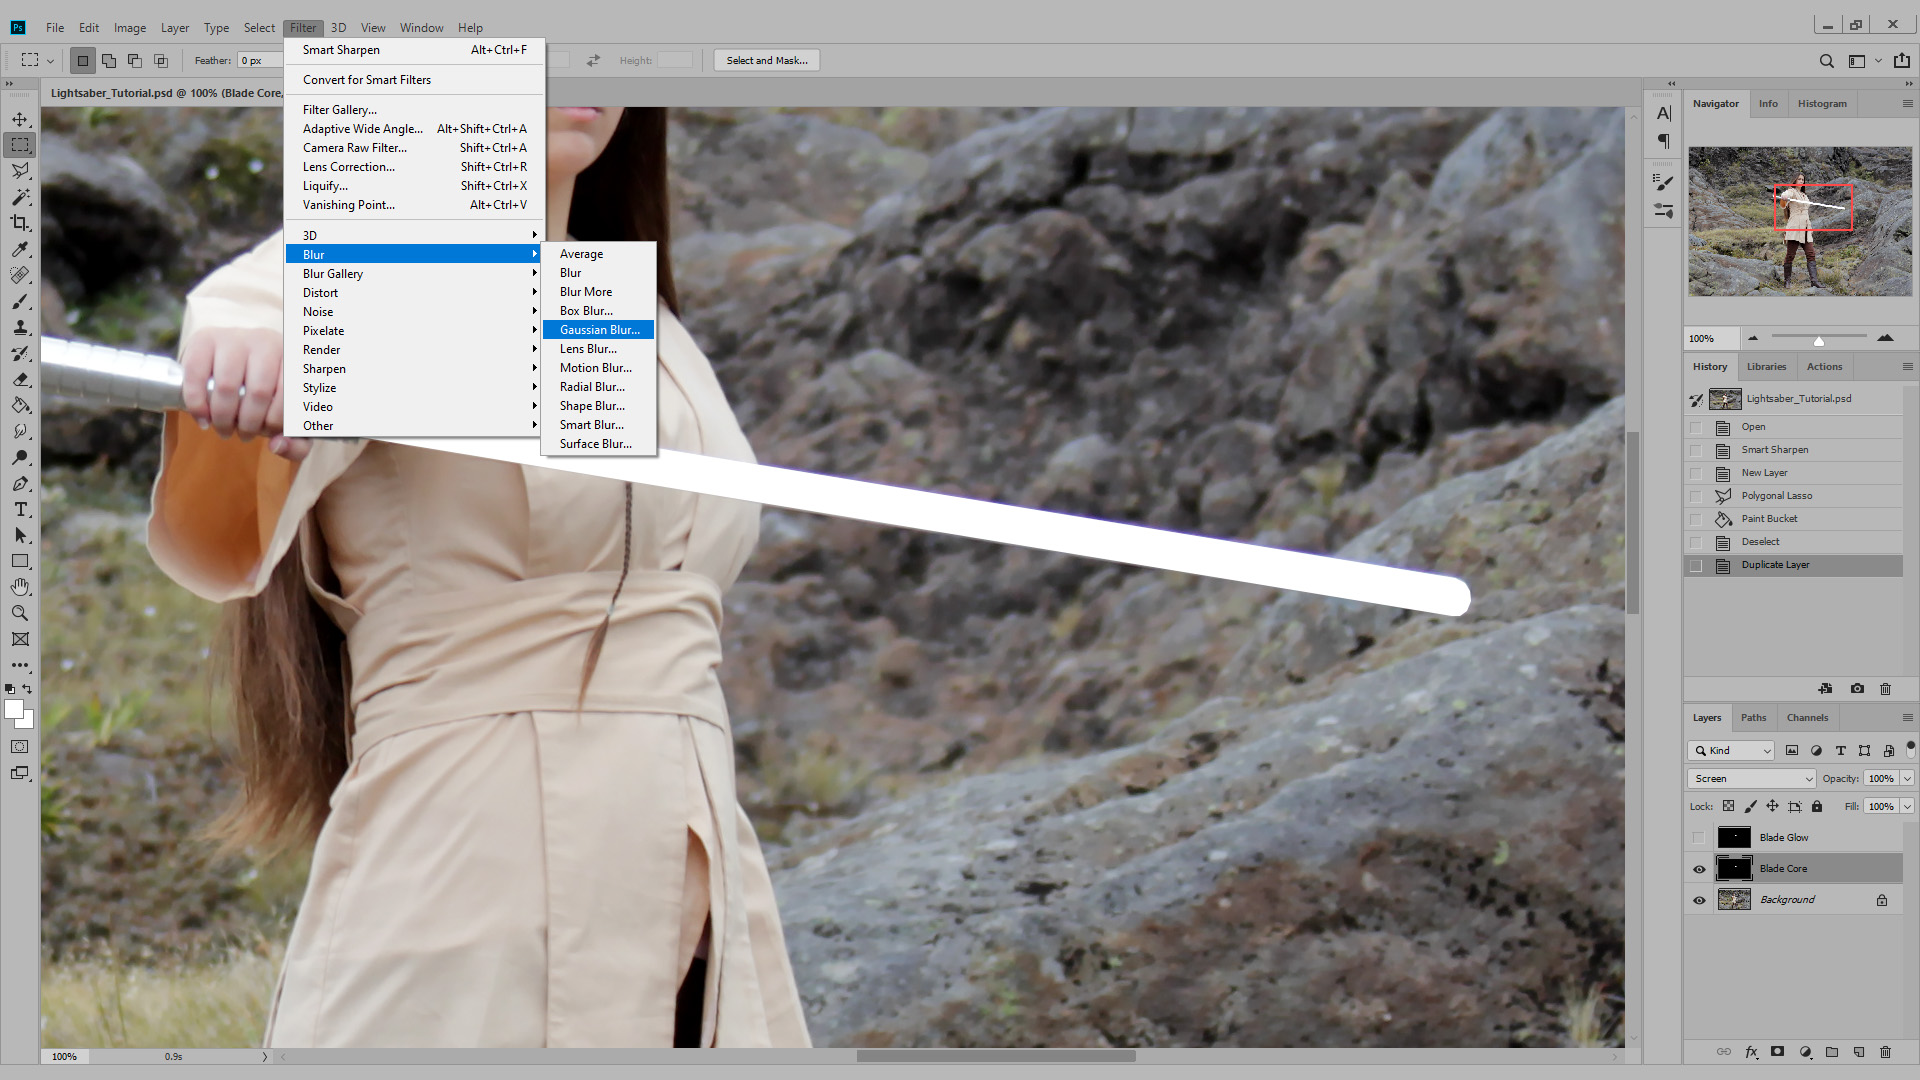
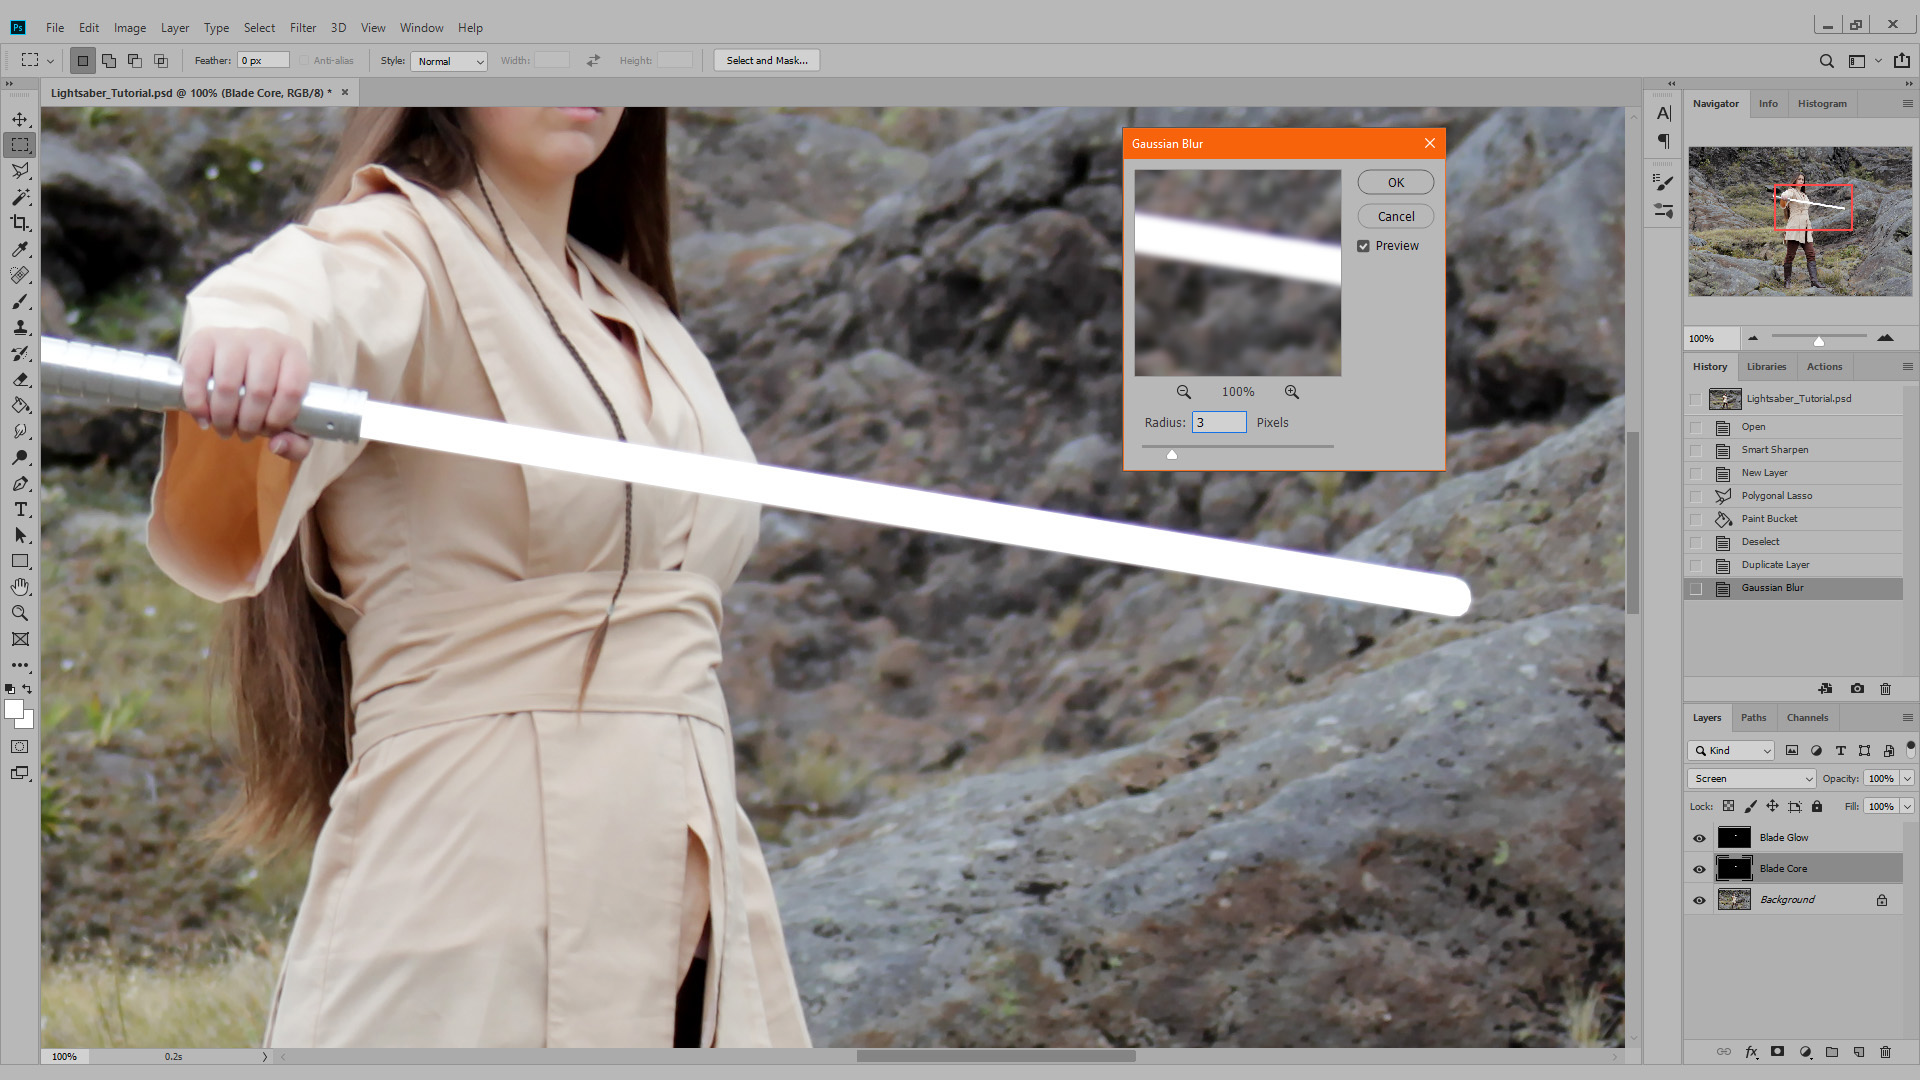
5. Blur Blade Core – at this point, both the Blade Core and Blade Glow layers are identical. Click back onto the Blade Core layer, and apply a small amount of Gaussian Blur (from the menu, select Filter > Blur > Guassian Blur) with a Radius of about 3 pixels. This blur is part of the overall effect, but it also compensates for any inaccuracies in drawing of the core, softening the curves of the saber tip etc. A slightly higher blur radius may be used if you are manipulating a very high resolution image.
6. Blur and duplicate Blade Glow layer(s) – now we go back to the outer glow of the blade. This step is a little bit flexible, and involves duplication and blurring of the original Blade Glow layer.
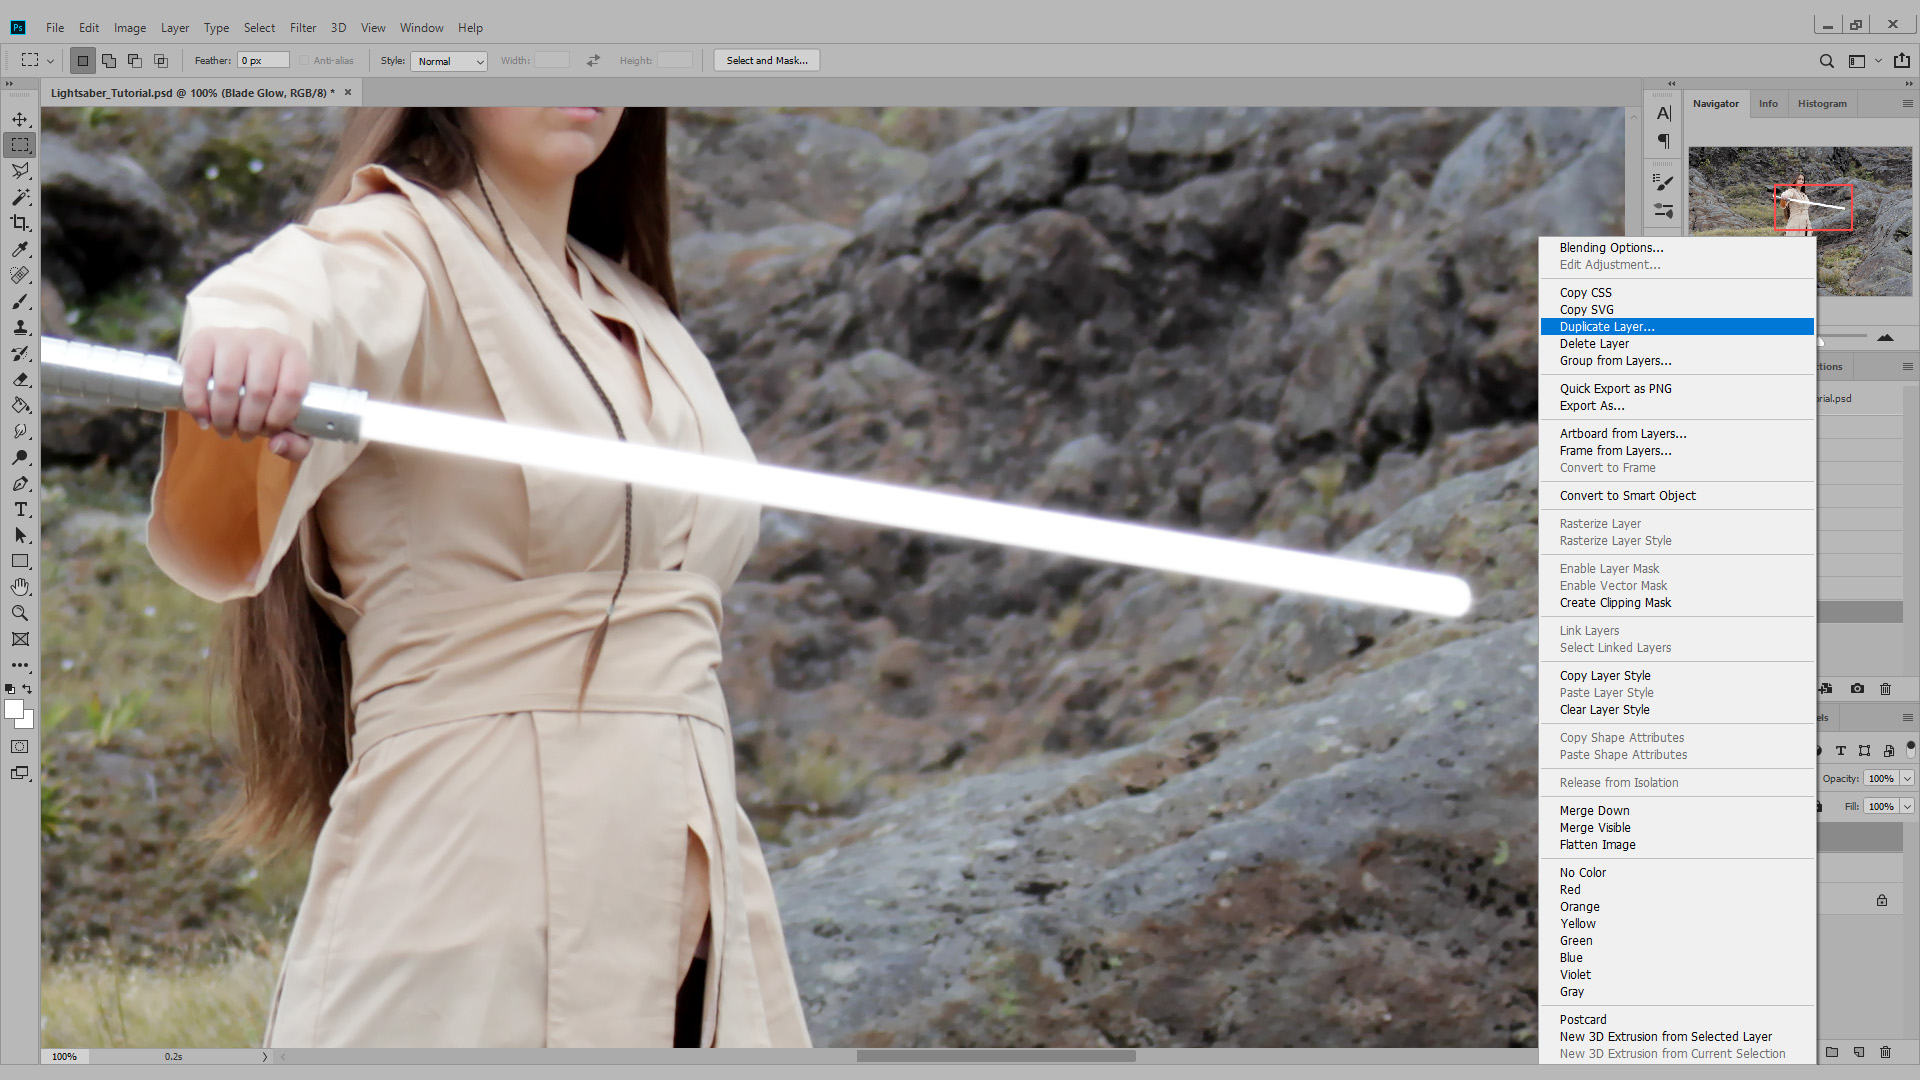
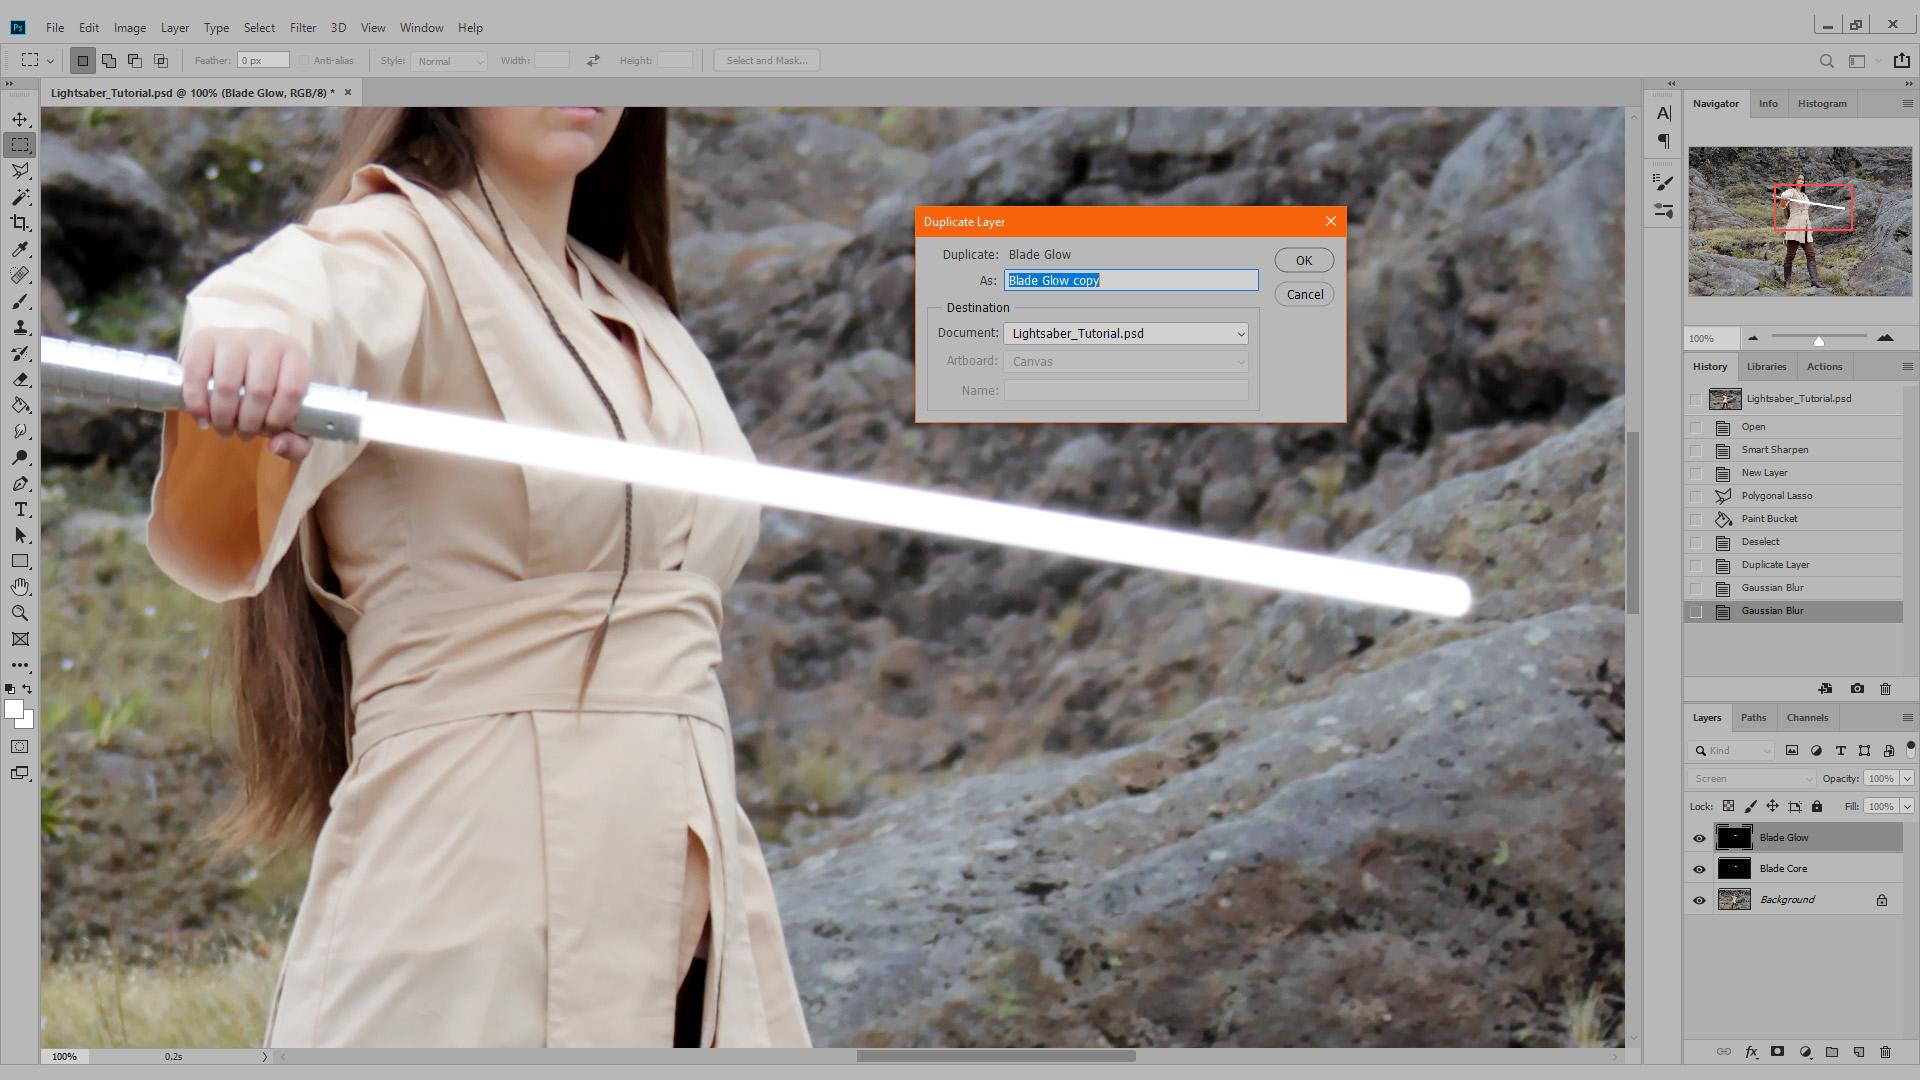
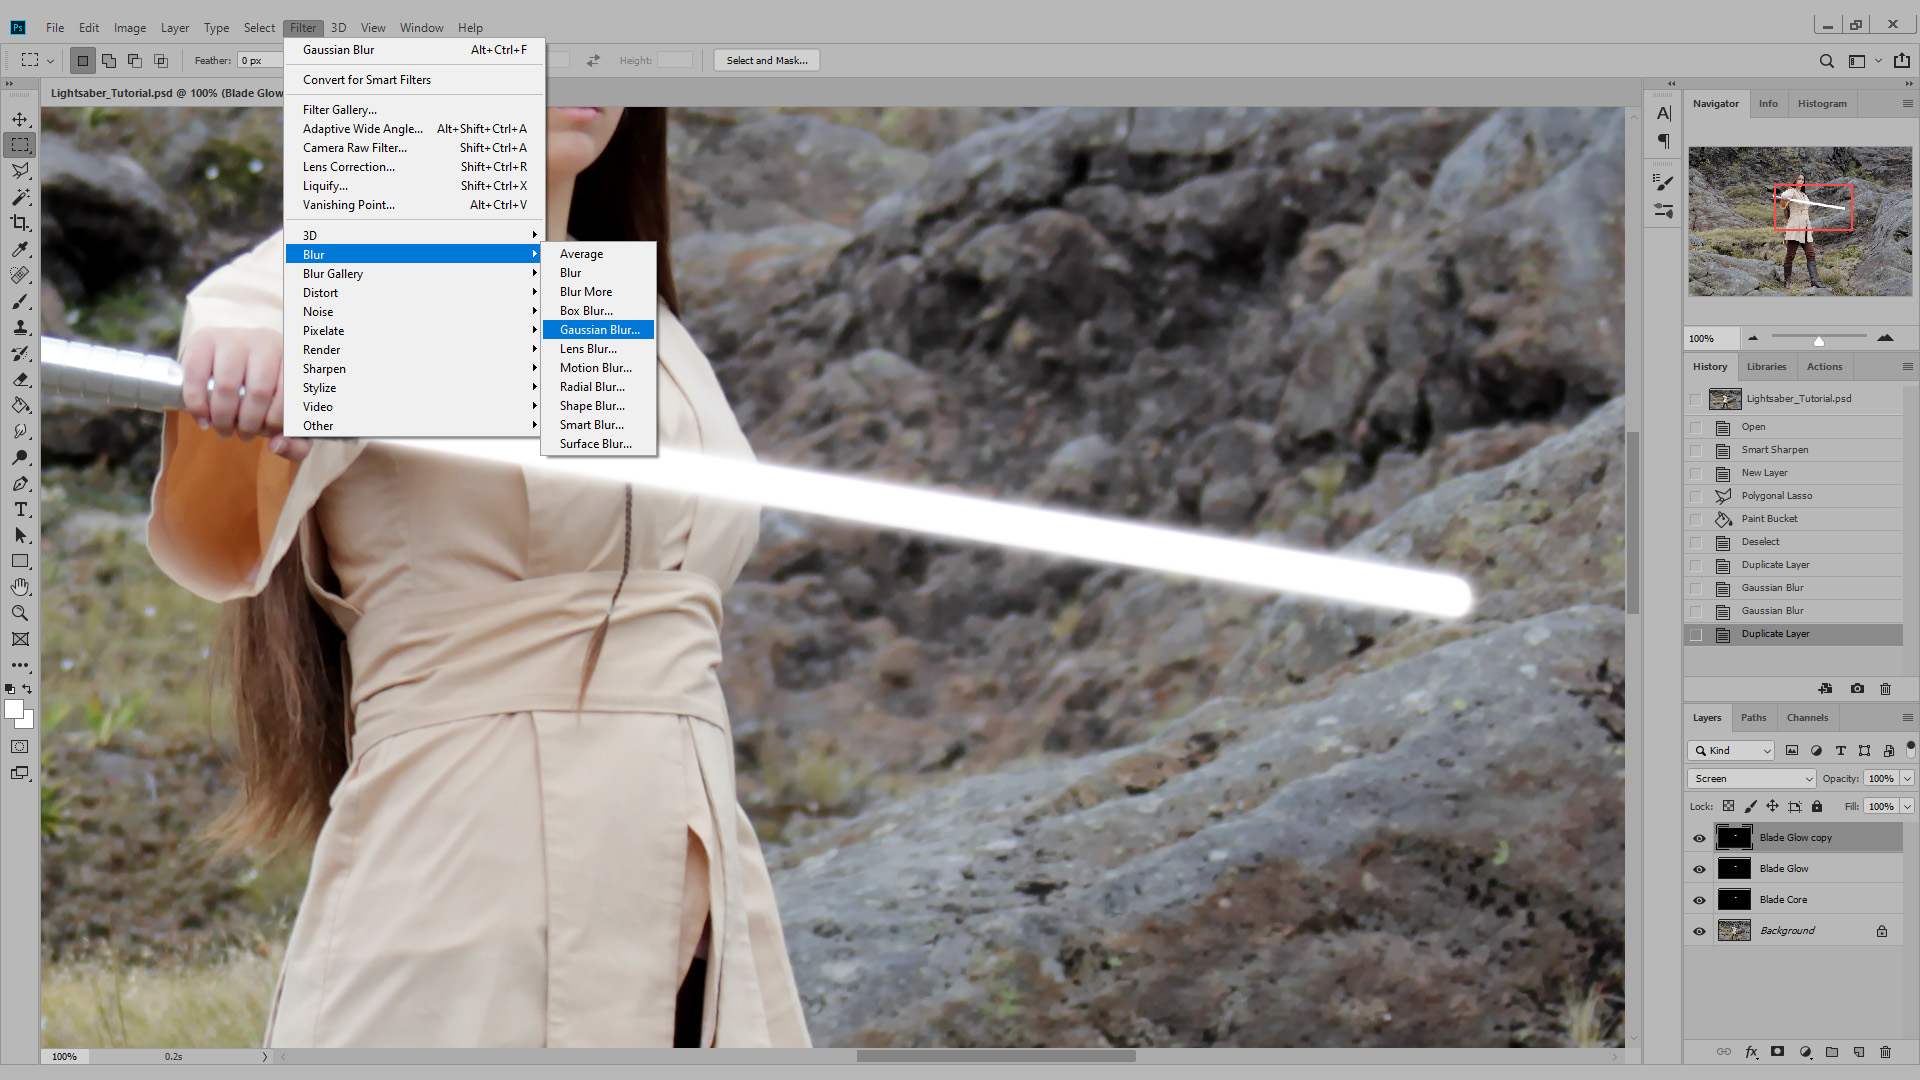
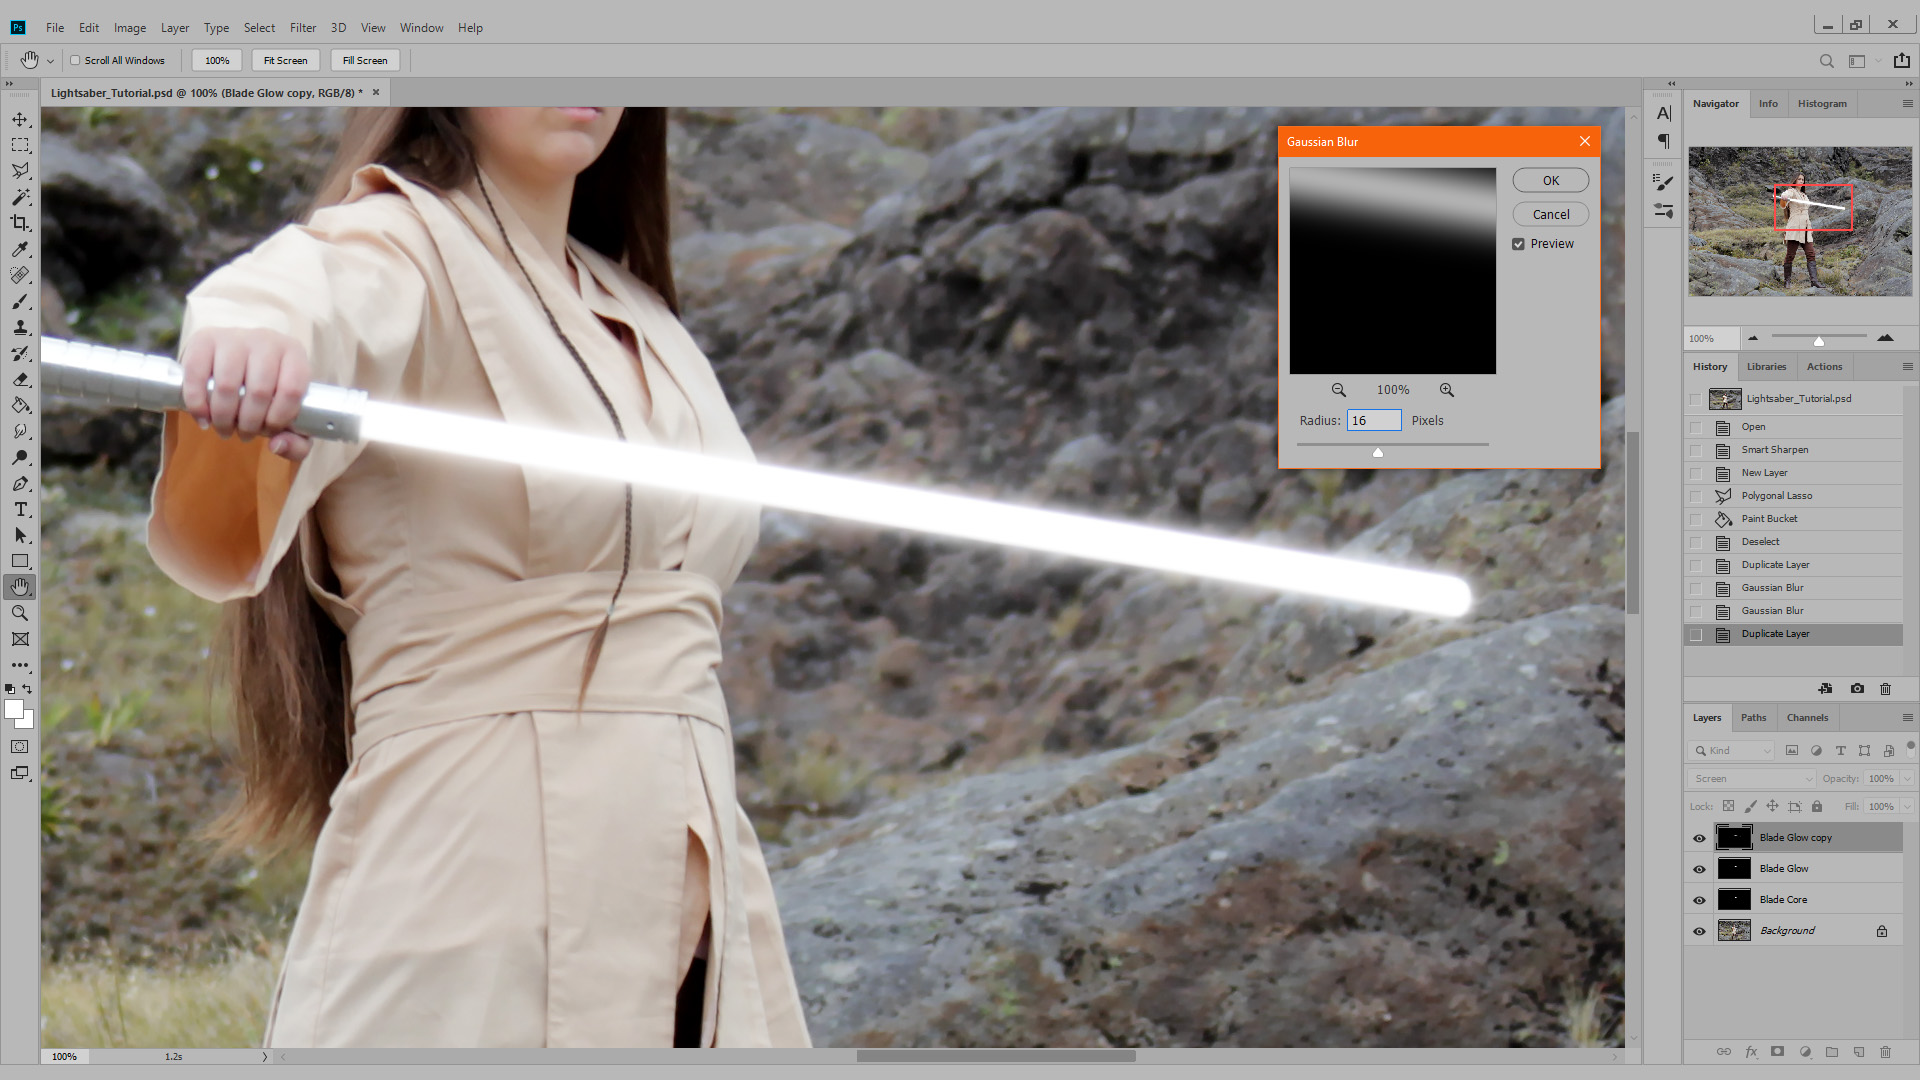
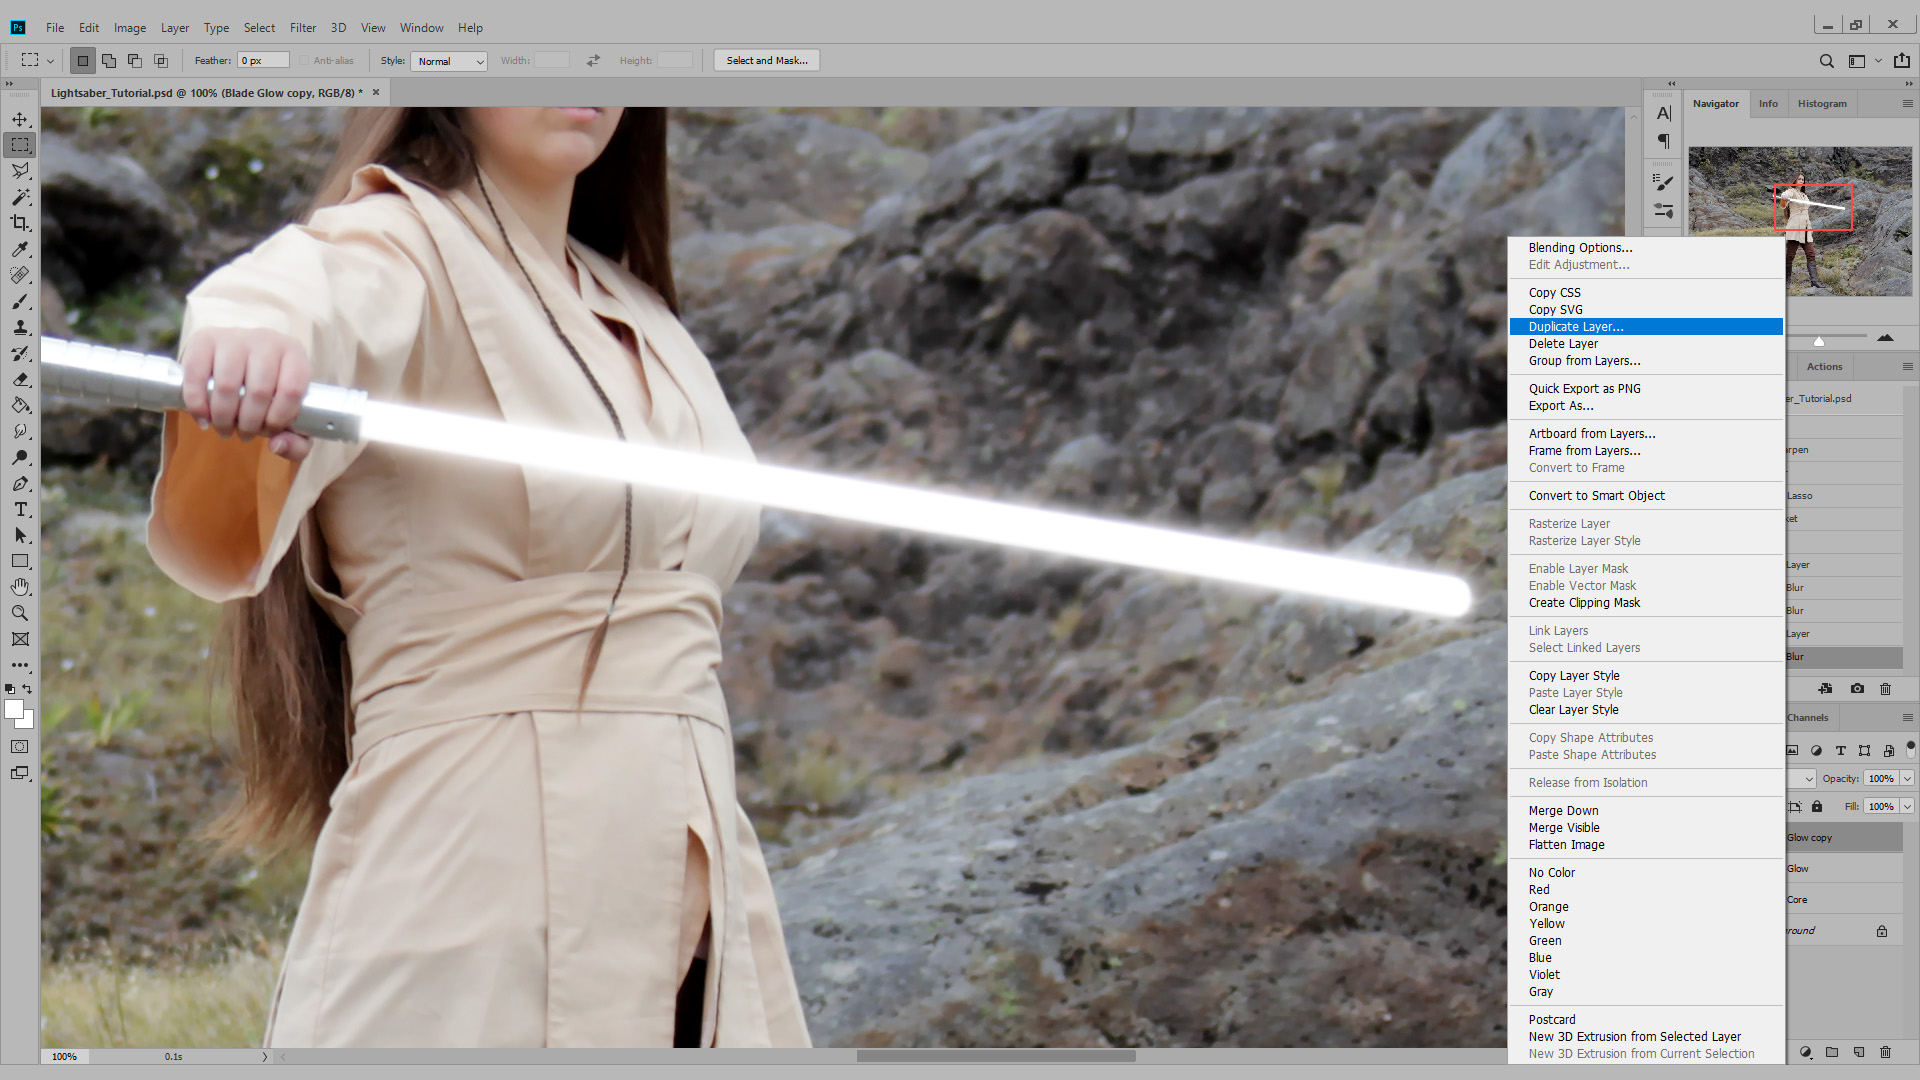
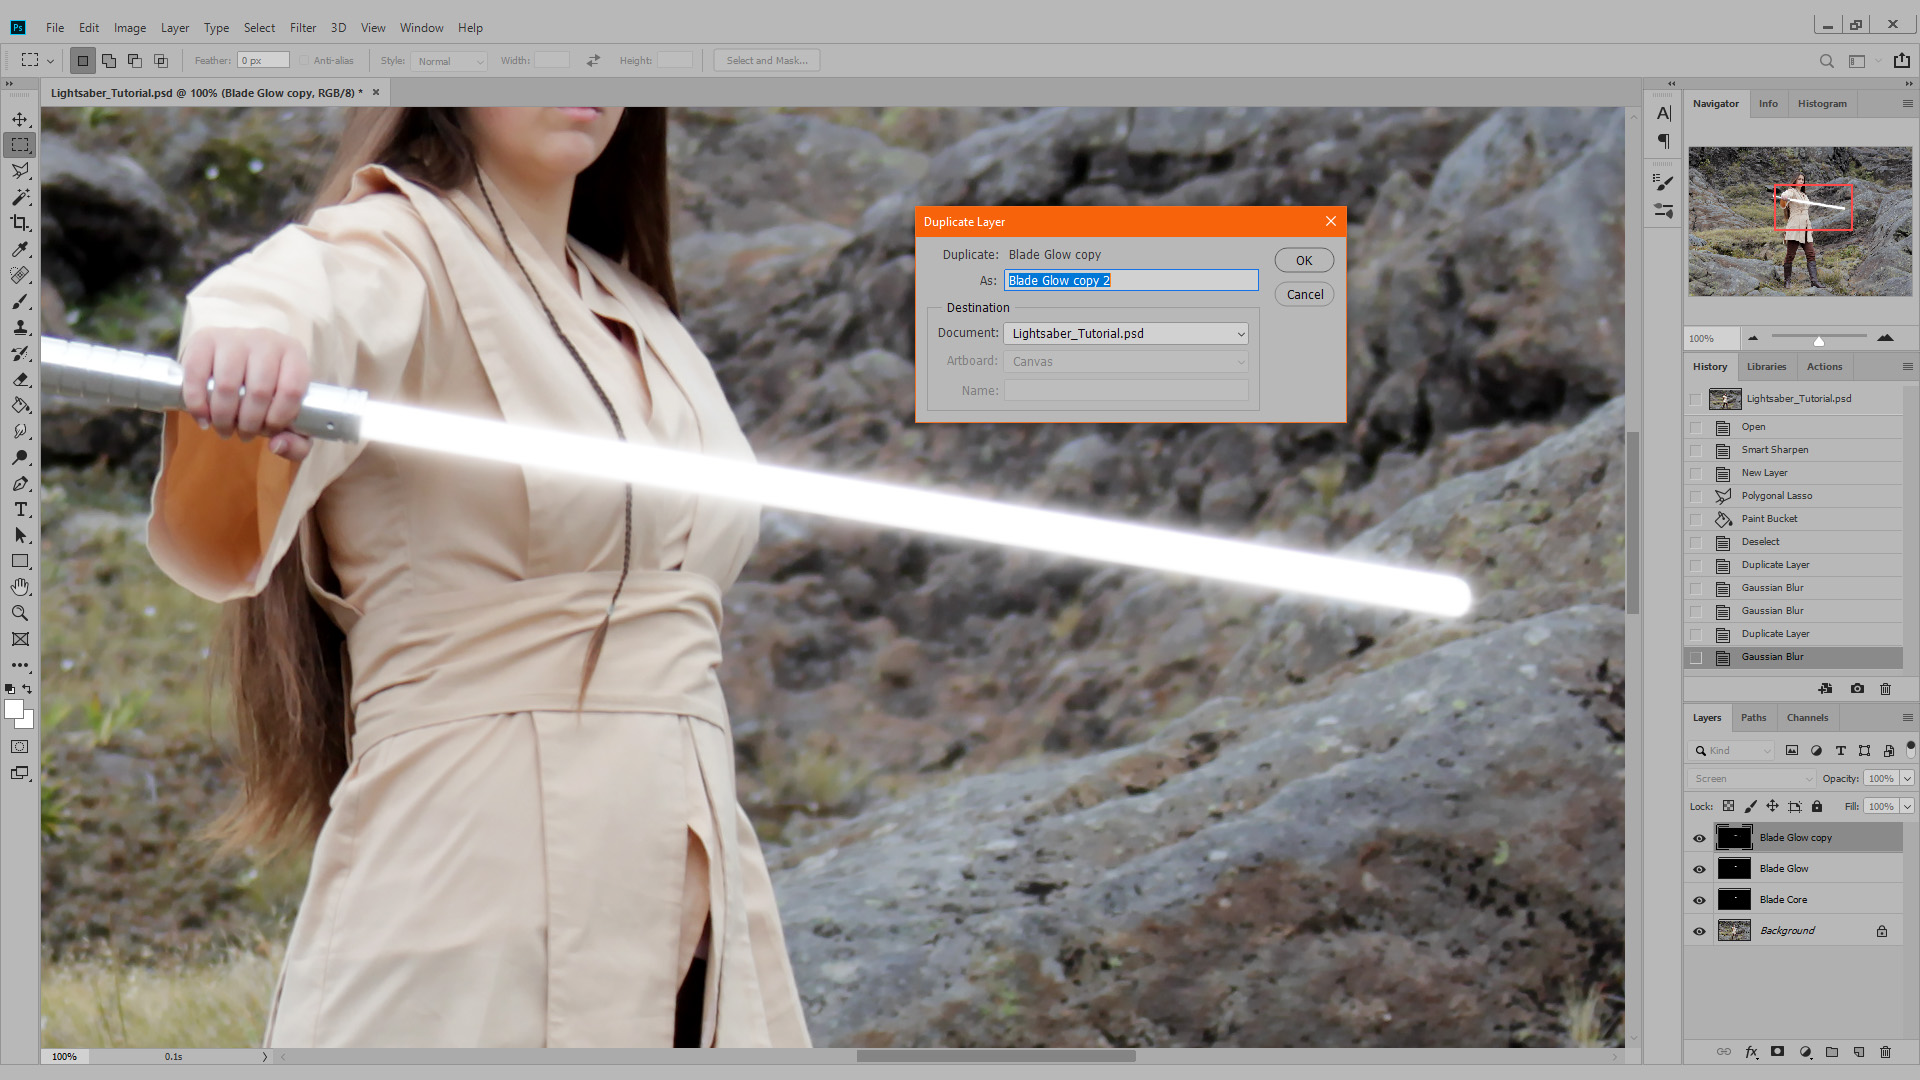
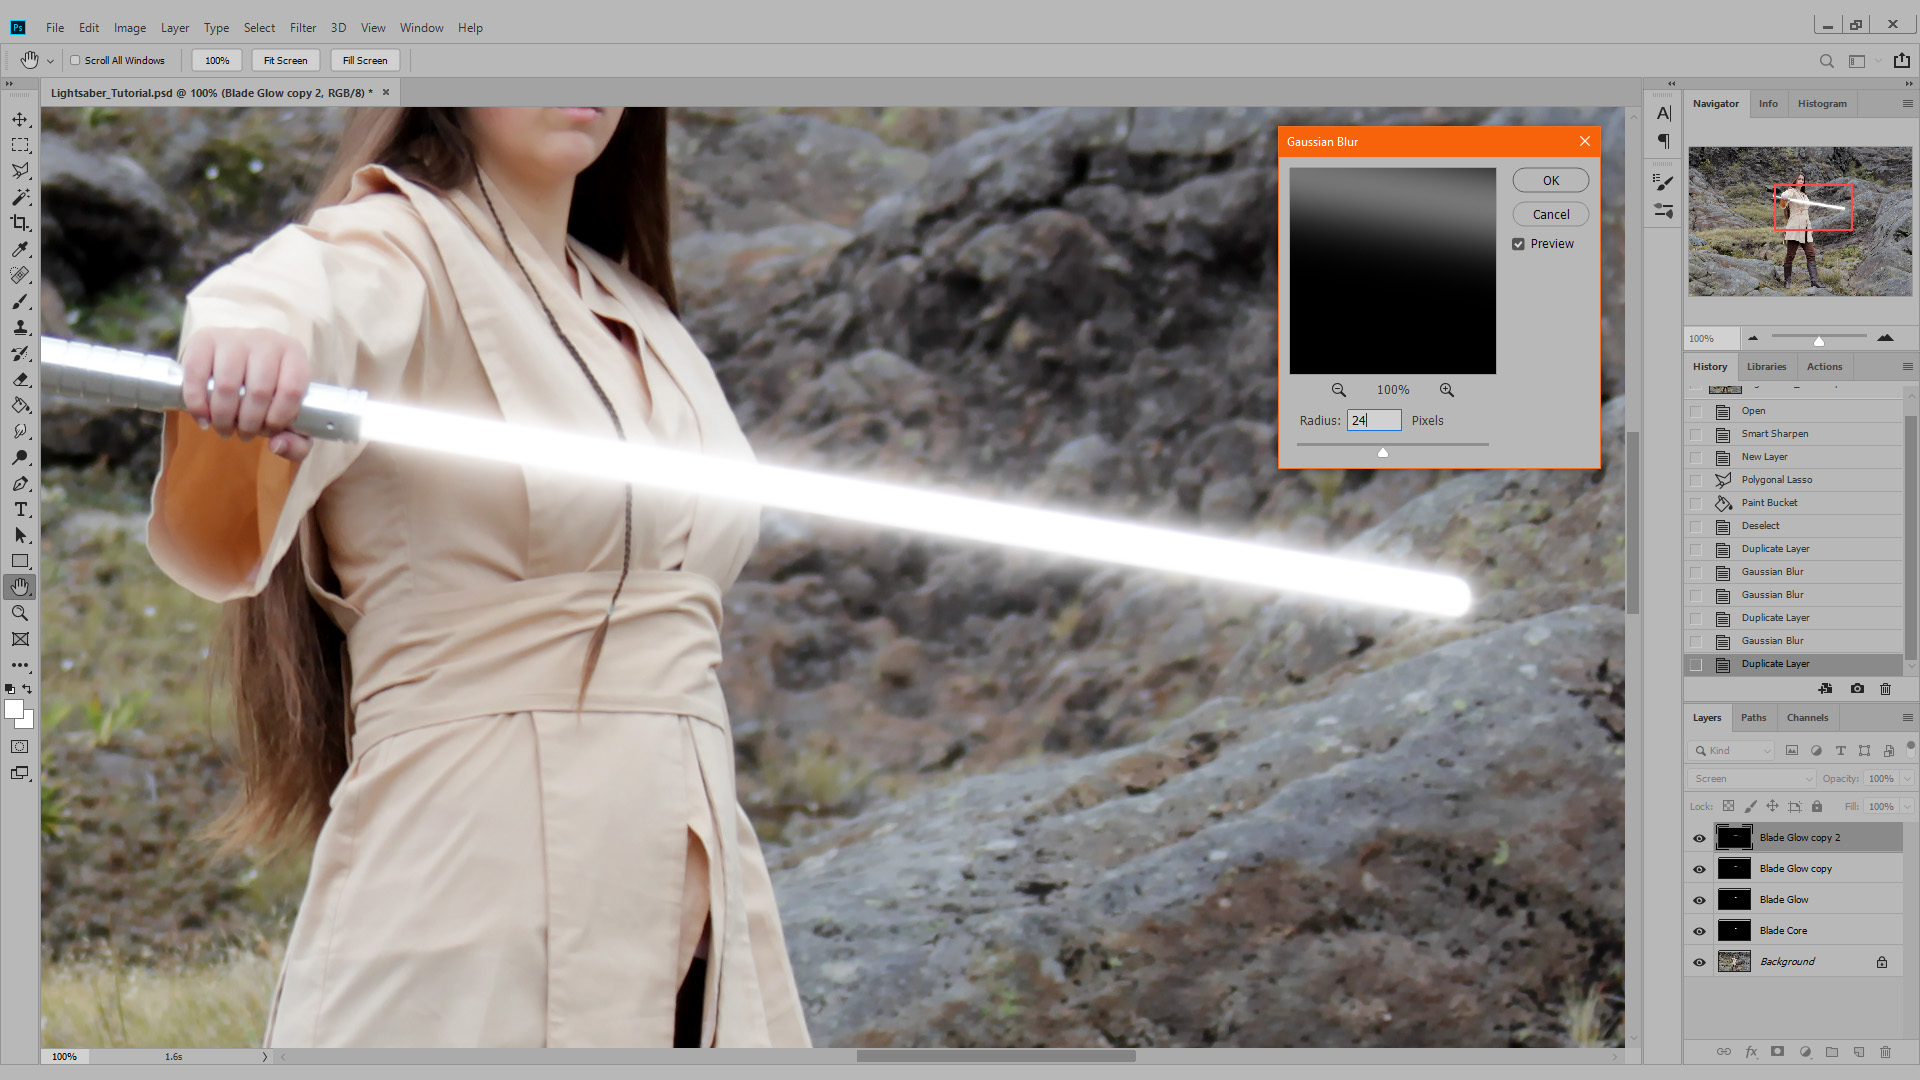
First, blur the Blade Glow layer. Use Gaussian Blur (from the menu, select Filter > Blur > Guassian Blur) with a Radius of about 8 pixels. Then duplicate this layer to create a second Blade Glow layer (just leave its name as “Blade Glow copy”… it won’t be sticking around for too long). Apply a Gaussian Blur filter to this second Blade Glow layer, with a larger Radius this time, e.g., around 16 pixels. Duplicate the “Blade Glow copy” layer to create “Blade Glow copy 2”, and apply a Gaussian Blur filter to this third Glow layer, with an even larger Radius this time, e.g., around 24 pixels.
This gives us three Blade Glow layers, each with a greater amount of blur applied. The overall effect is a lightsaber blade glow with a nice drop-off in transparency.
If, because of image size or amount of contrast between the foreground and background of the image, you feel like you need more “glow”, this can be added by including additional duplication and blur steps, with incremental increases in the blur radius as you go.

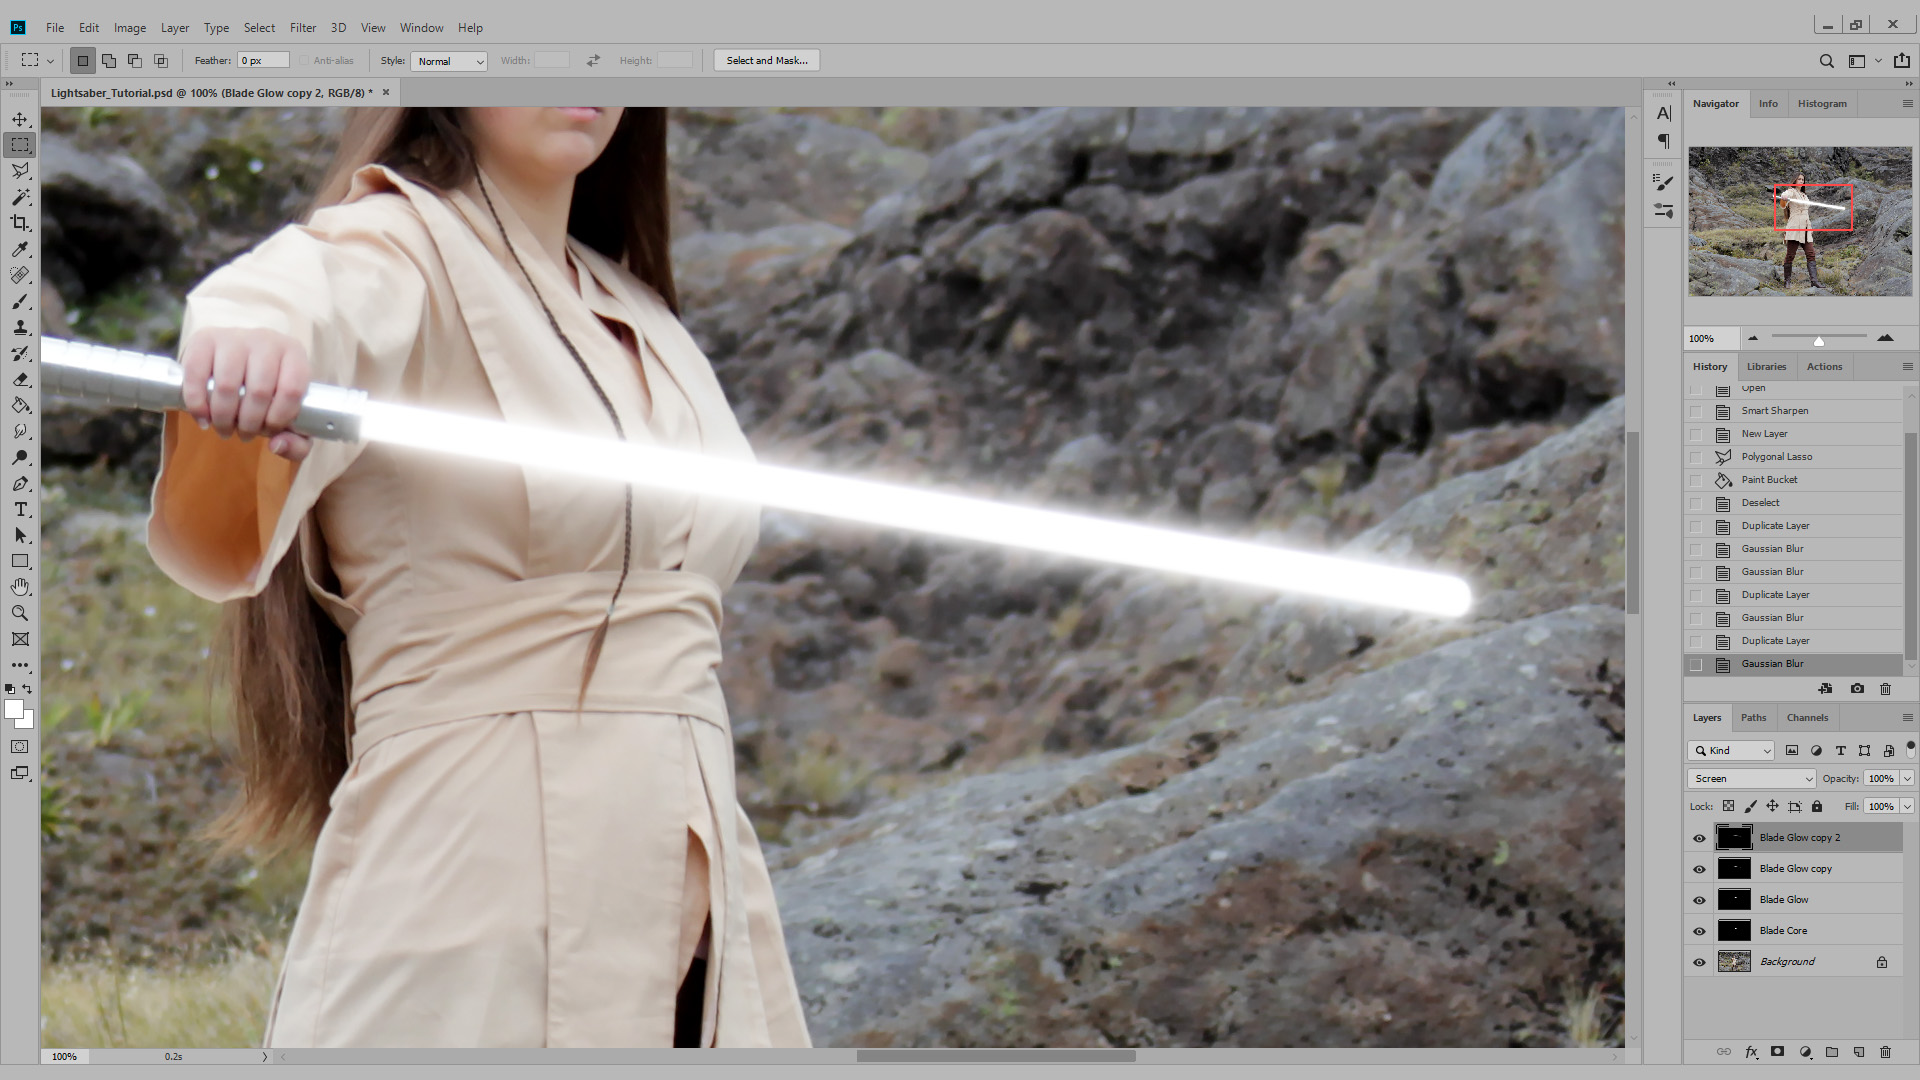
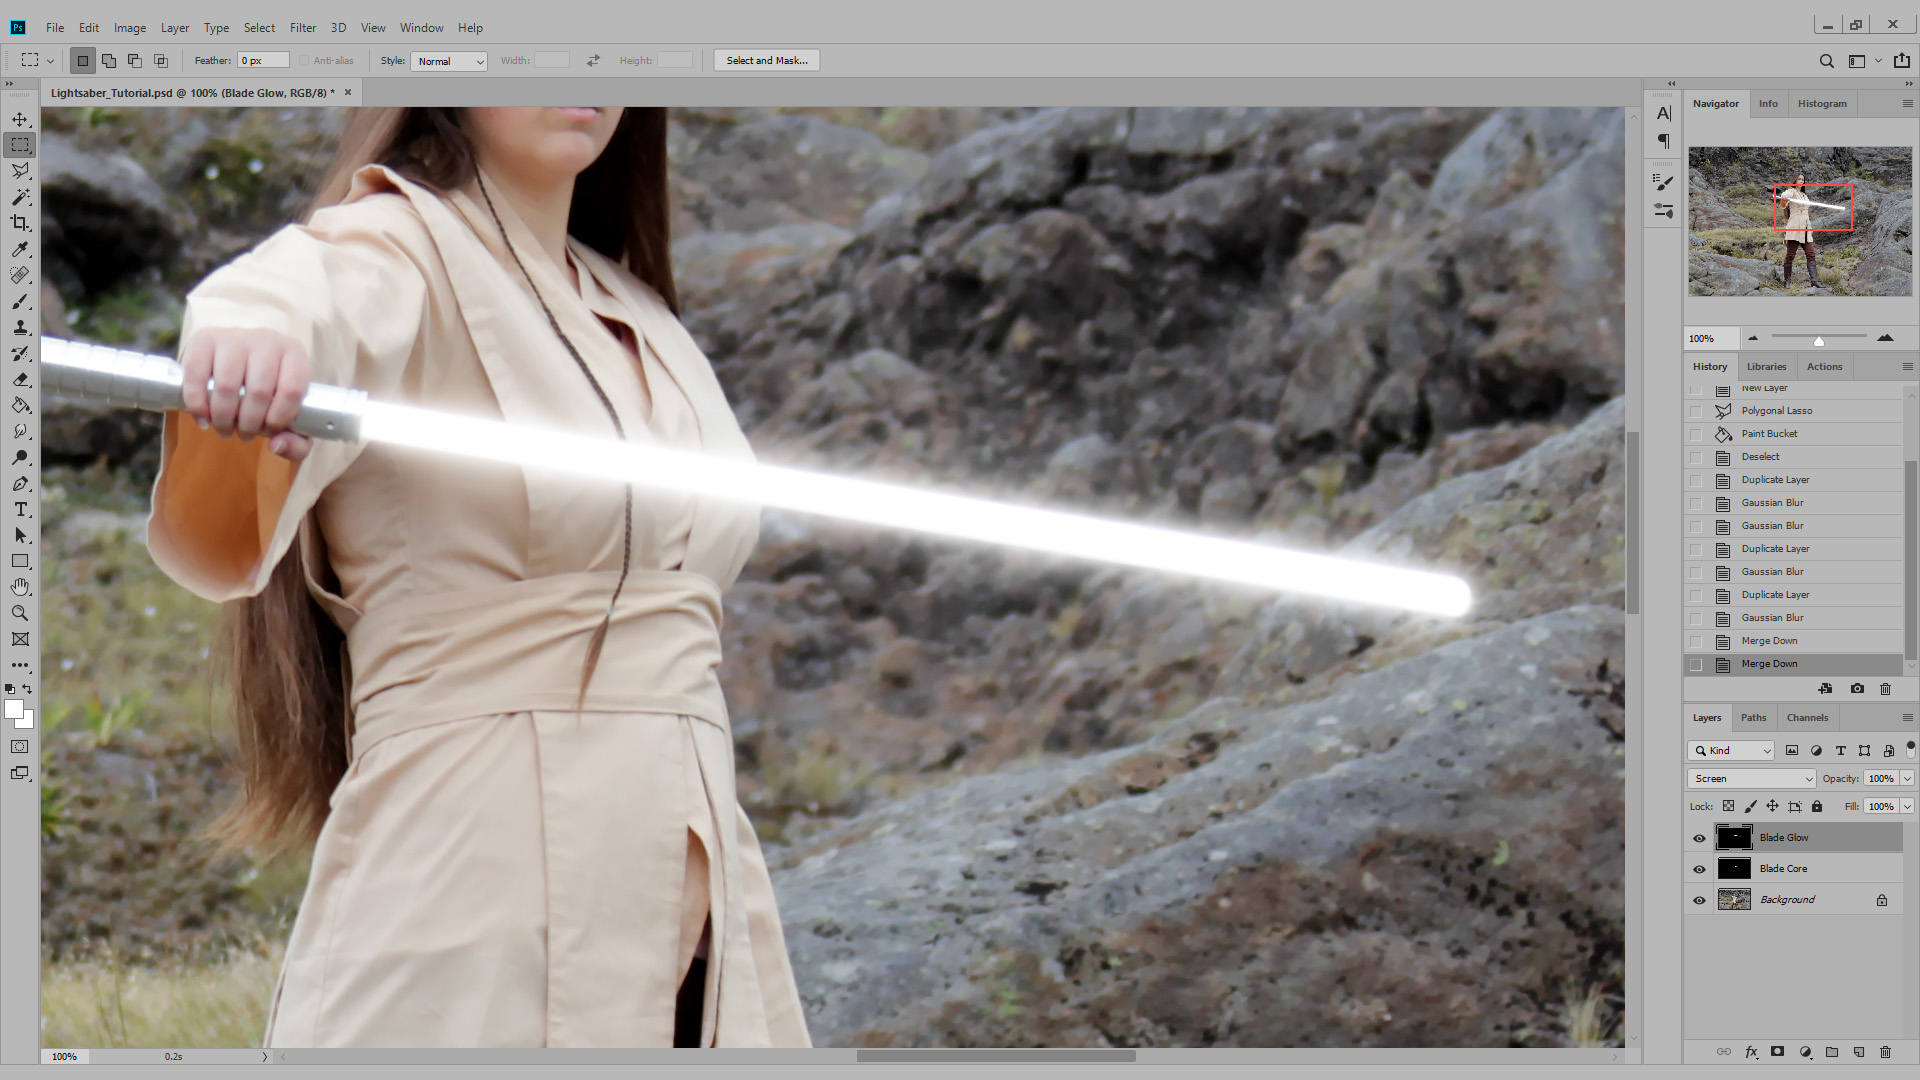
7. Merge Blade Glow layers – we want to add colour to the Blade Glow layers as a single layer, so merge all three of these Blade Glow layers. With the top “Blade Glow copy 2” layer selected, just use the Ctrl+E shortcut (or from the menu, Layer > Merge Layers) to merge “Blade Glow copy 2” with the layer below it (“Blade Glow copy”), and then once more to merge into the original “Blade Glow” layer.
Do not accidentally merge the Blade Glow and Blade Core layers.

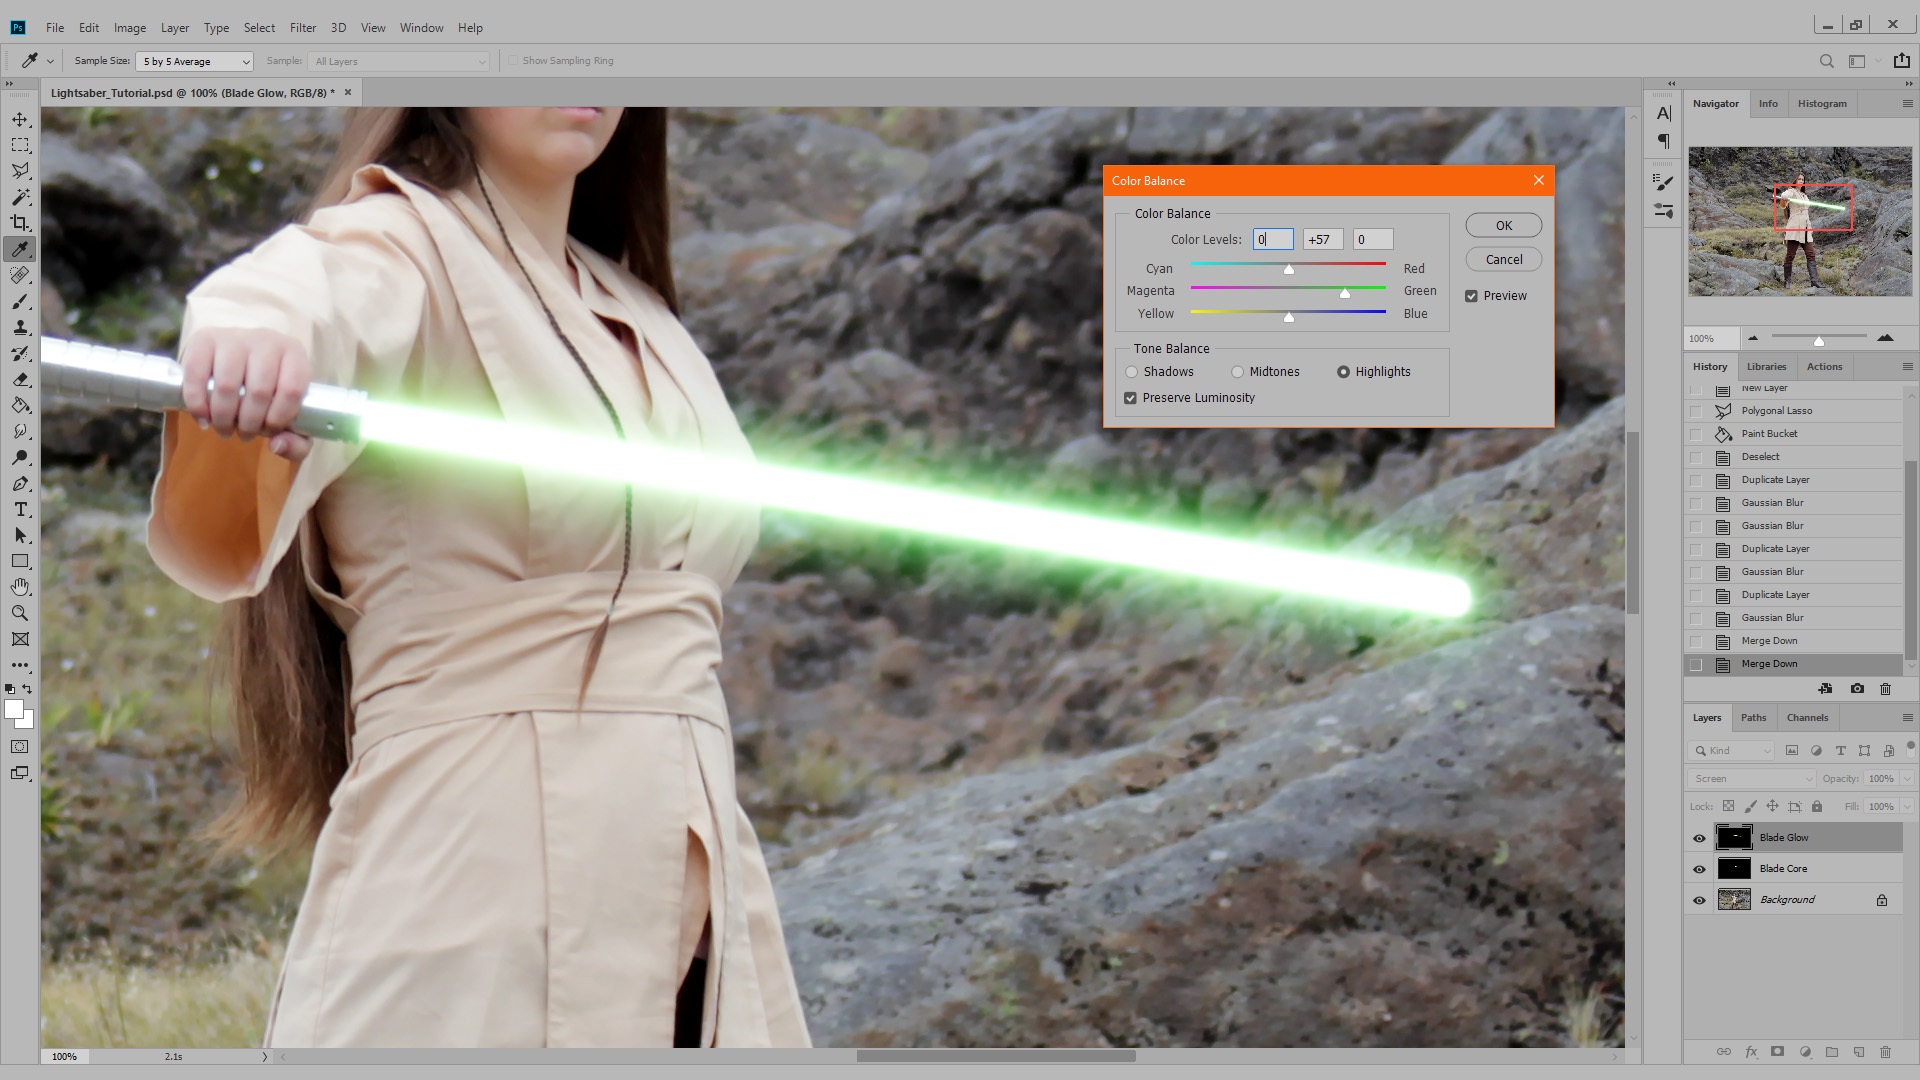
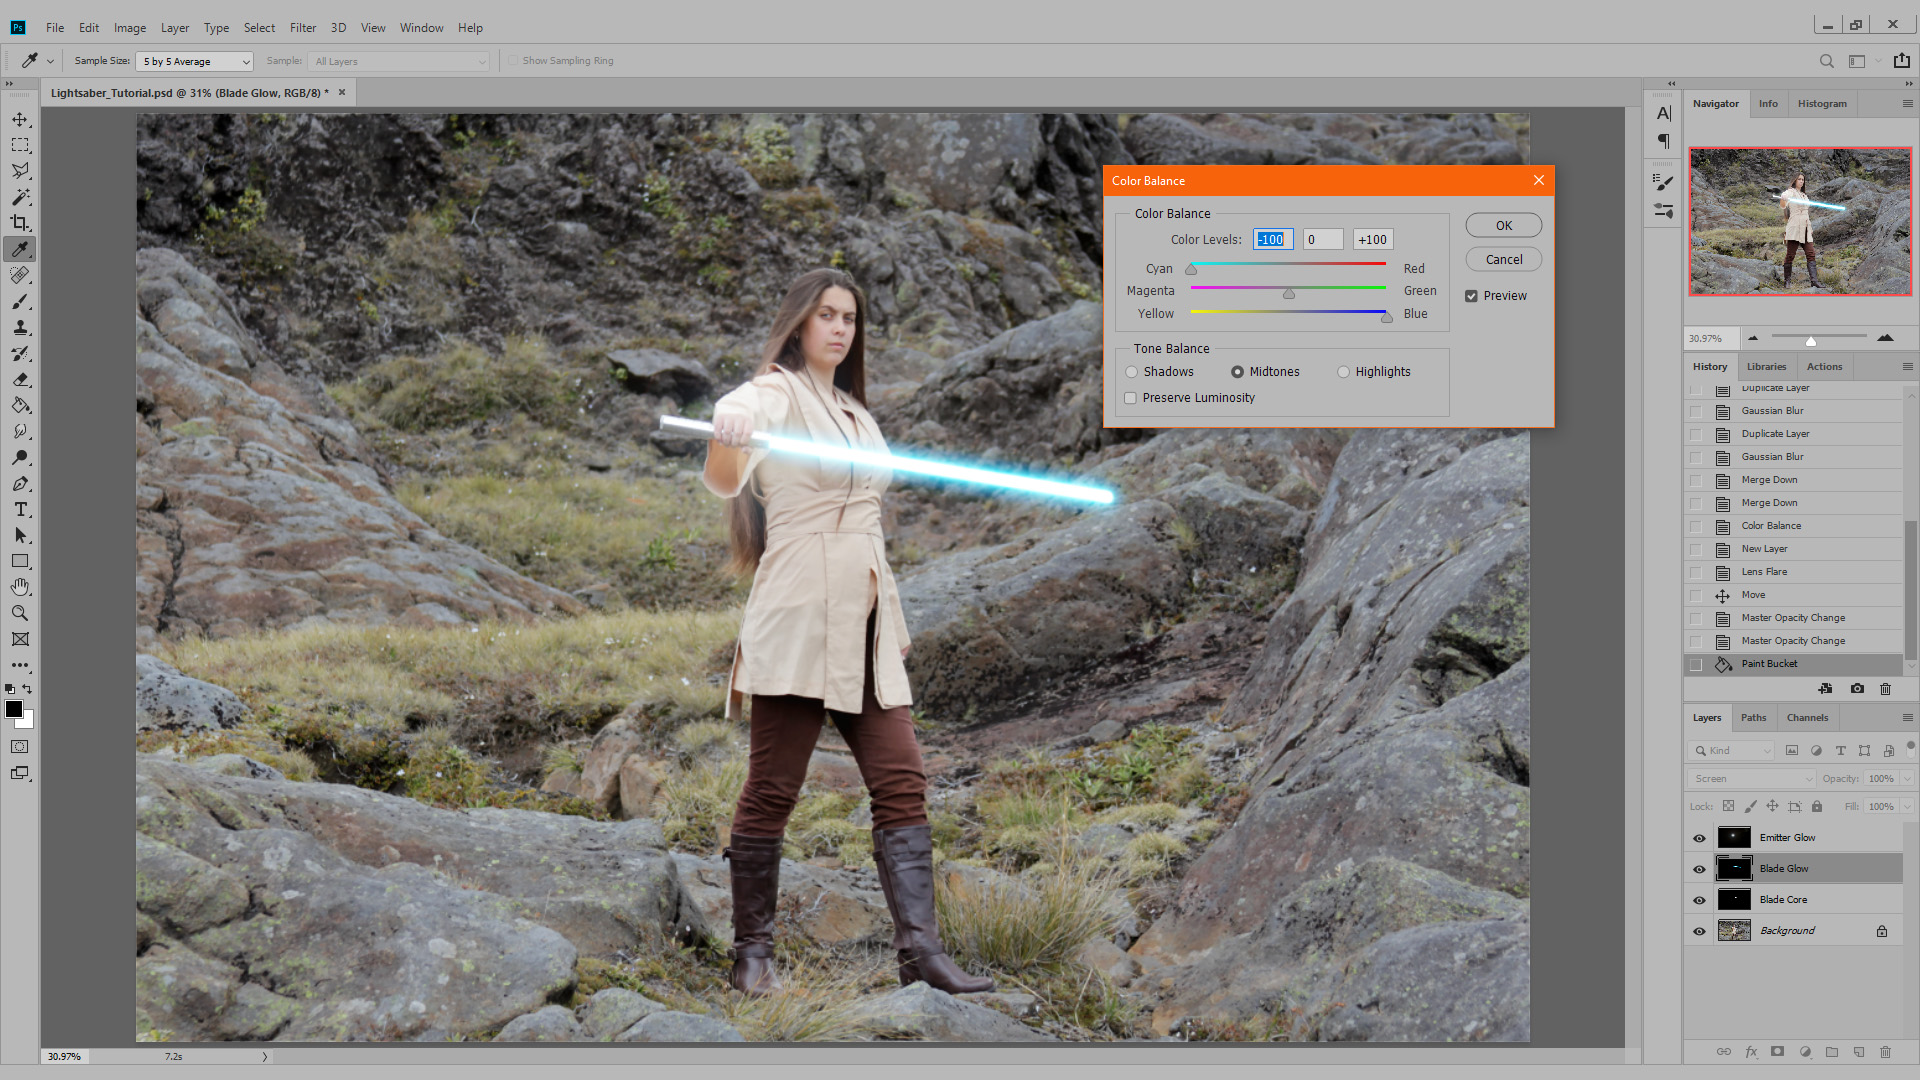
8. Add colour to Blade Glow – in a Star Wars lightsaber, the core (generally) remains white, while the colour of the glow is subtly applied around it (read more about lightsaber colours on Wookieepedia). The way we’re going to achieve this is just by changing the Color Balance of the Blade Glow layer. The common, primary colours of lightsabers (green, blue, red) are the easiest, but other custom colour choices/variants work well too.
Select Color Balance using Ctrl+B (or from the menu, Image > Adjustments > Color Balance). Move the RGB sliders for both the Midtones and Highlights (leaving Preserve Luminosity checked). For Red, Green, and Blue sabers, this pretty much means moving the sliders to 100%, or near, for the chosen colour in both Midtones and Highlights (e.g., for the green saber shown below, I’ve gone with +100% green in the midtones, and +57% green in the highlights).
Depending on personal preference, you can actually apply other Adjustments to this Blade Glow layer at this point, including Hue/Saturation, in addition to the Color Balance, in order to get the desired colour and intensity (just don’t over-cook the effect, as subtlety tends to work better).

(Optional) Tweak Blade Glow opacity – at this point, you are pretty much finished, and can save the image for publication/sharing. However, because the Blade Glow layer is separate from the Blade core layer, you may choose to first soften the blade glow by lowering the opacity of this layer over in the Layers panel. Although optional, this fine-tuning is the most common one you may need to apply.
Similarly, you could also optionally strengthen the blade glow with Adjustments, as mentioned above, or by duplicating the Blade Glow layer (+/- further blurring, as in previous steps).
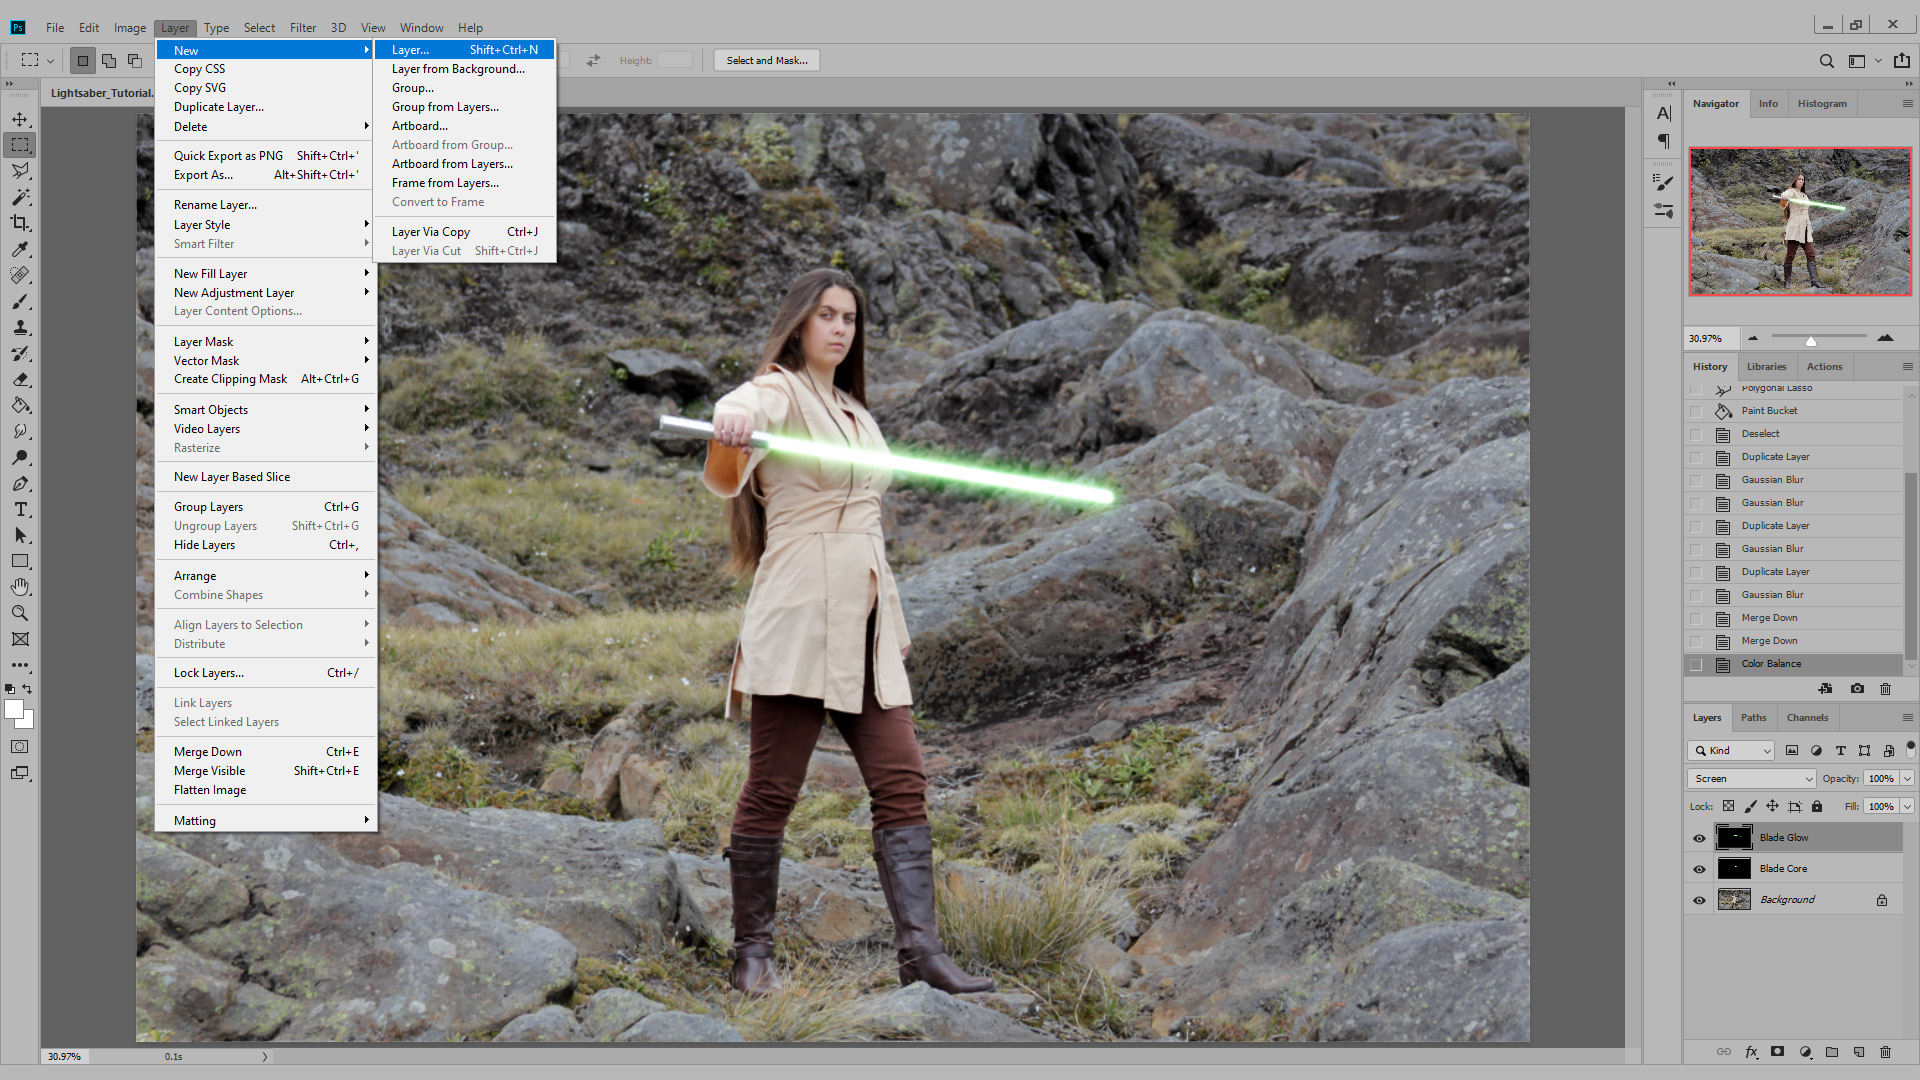
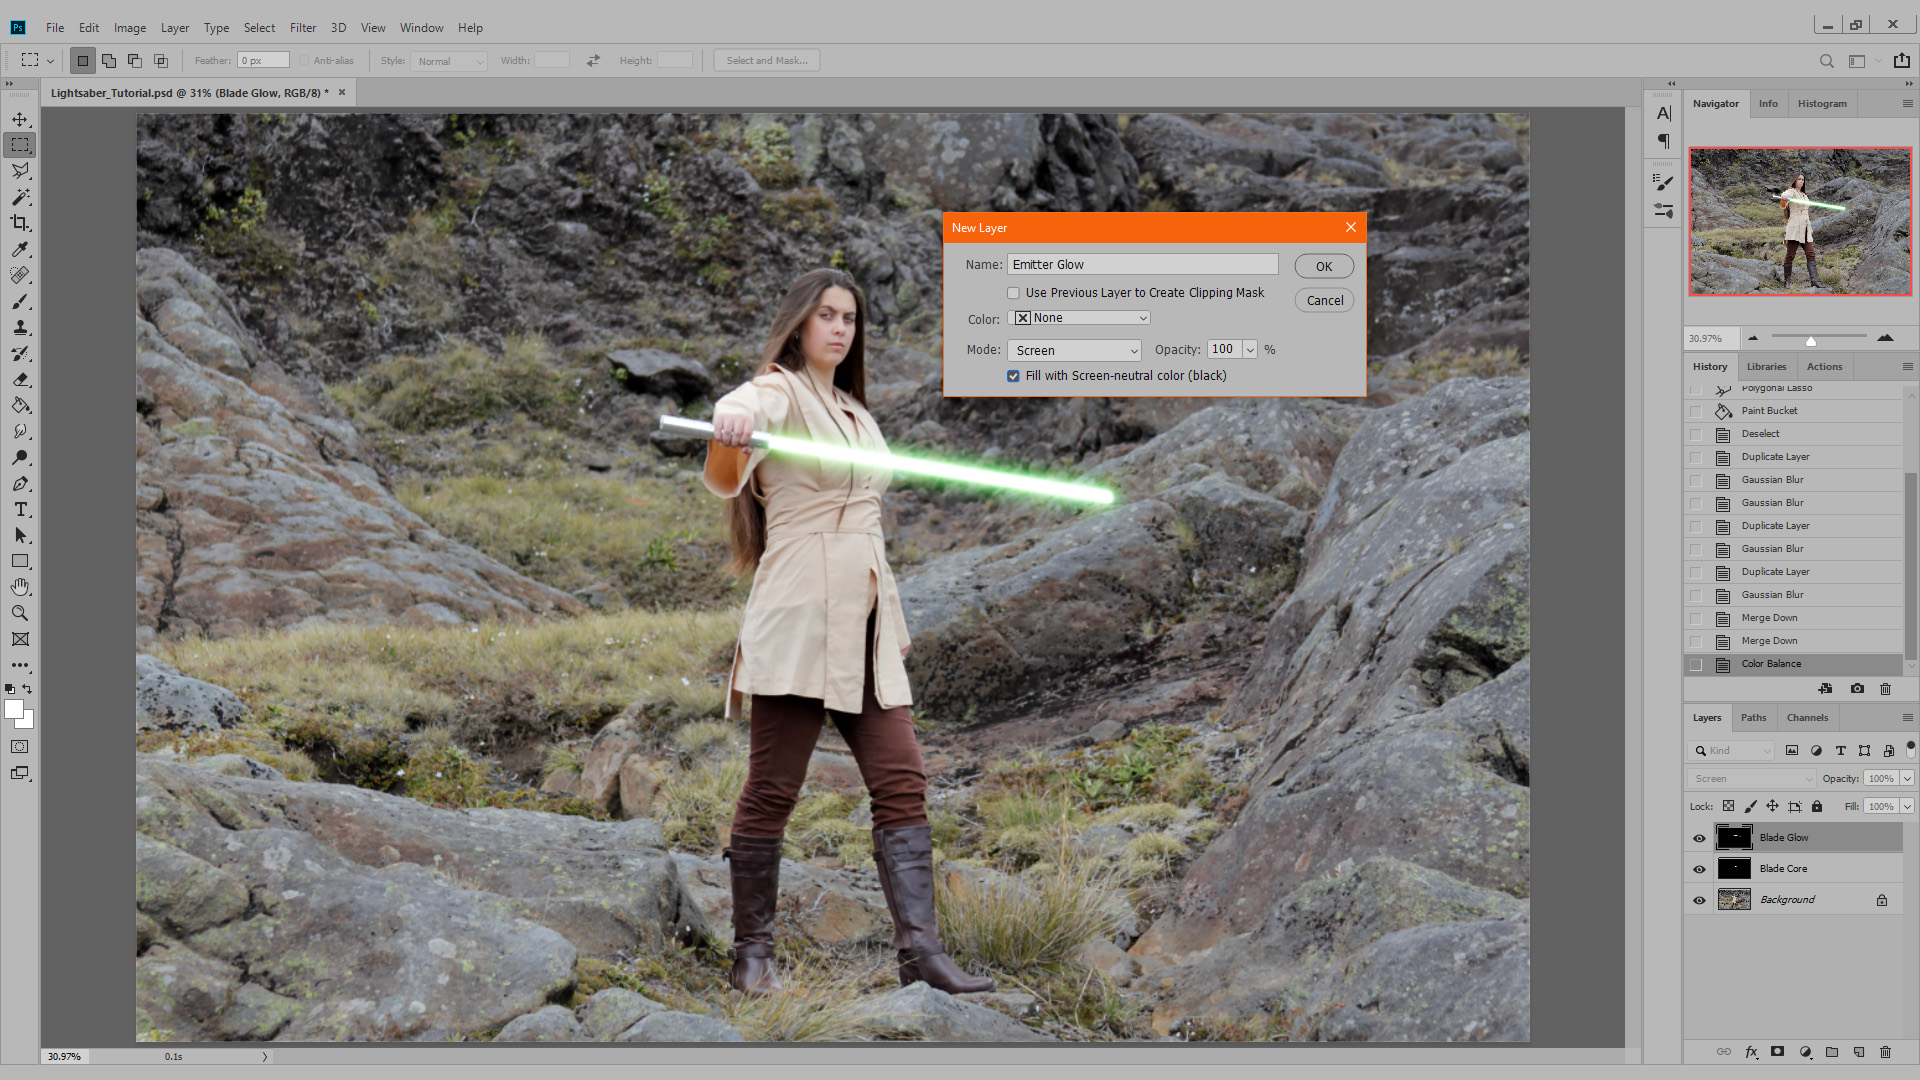
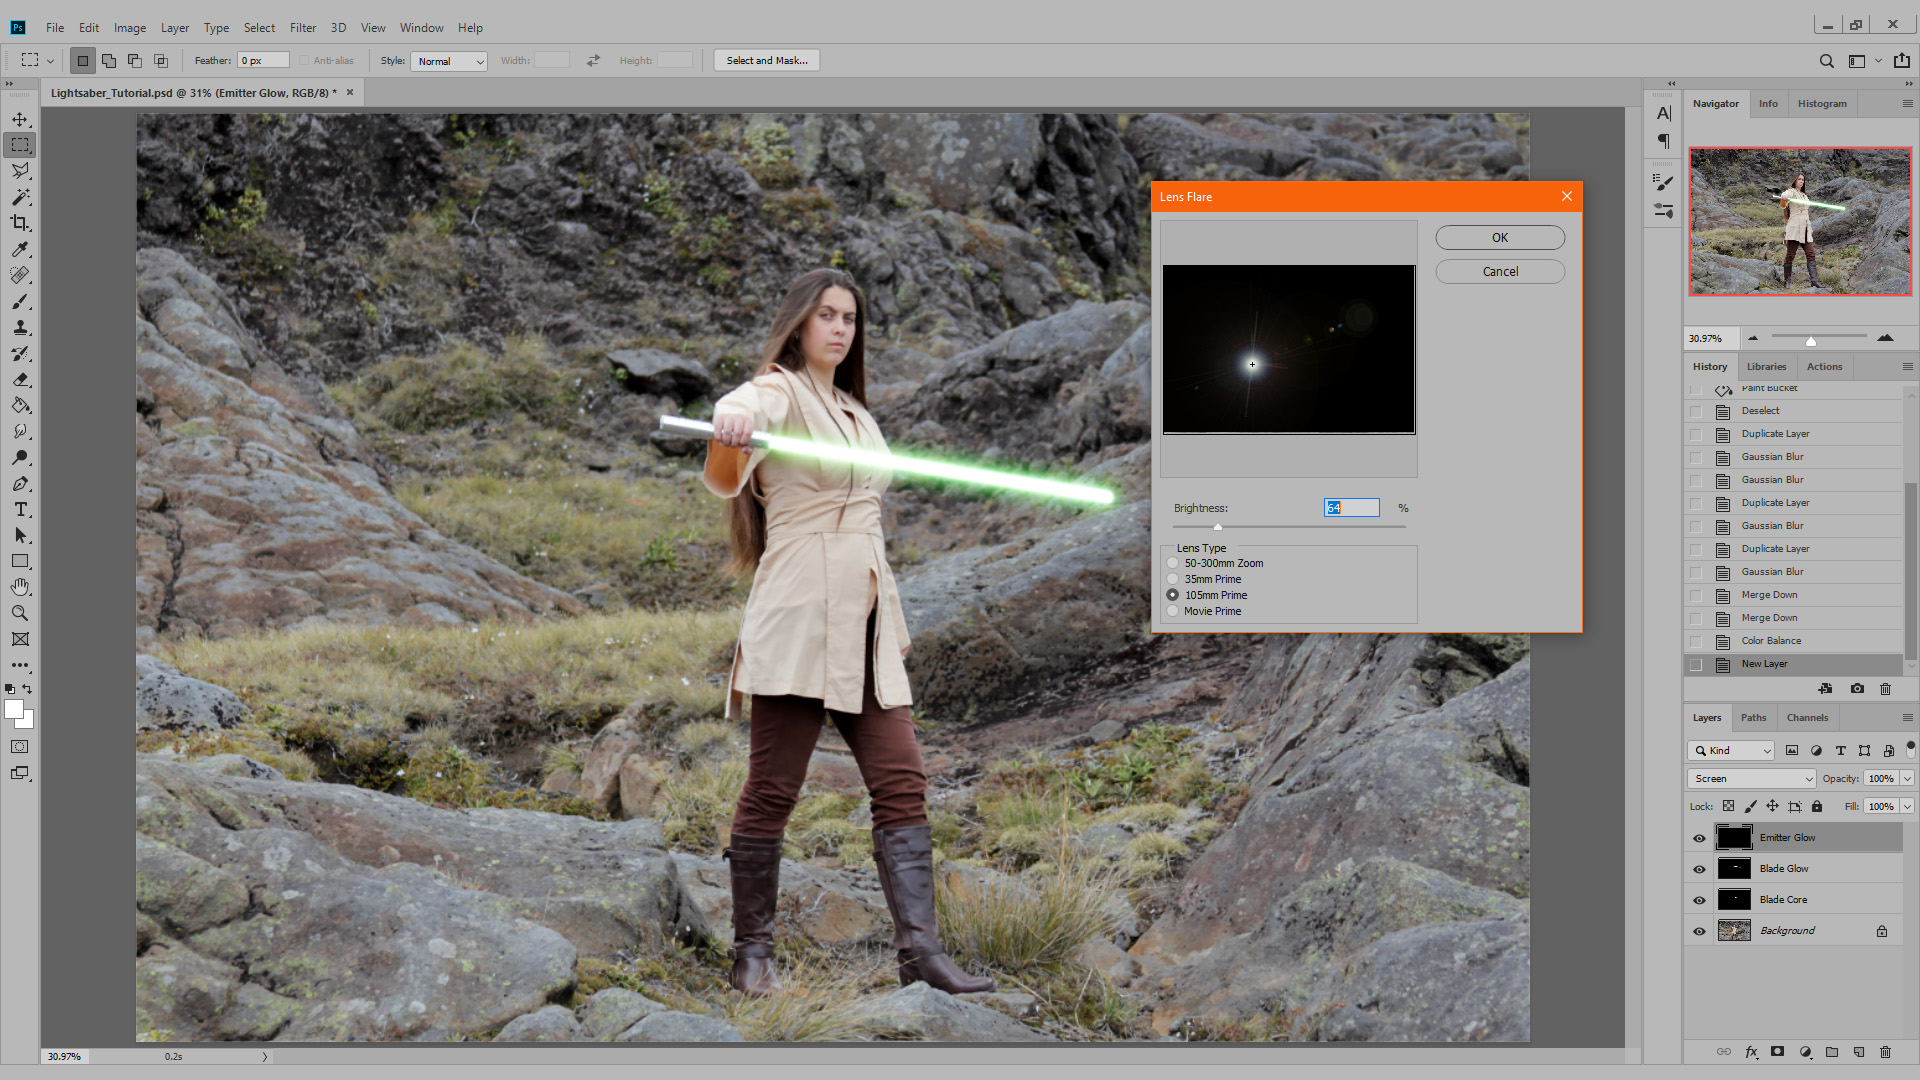
(Optional) Add Emitter Glow – because the light from a lightsaber blade would likely to fall on the person holding it, and or on other surroundings, there is an additional step I sometimes incorporate to simulate this, and to help tie the artificial lighting of the blade into the original image. I do this by adding in an additional layer that will render some light spill onto the hand, arm, and body of the person holding the lightsaber (it should fall most strongly on the hand, as the is almost always the part of the body closest to the saber blade).
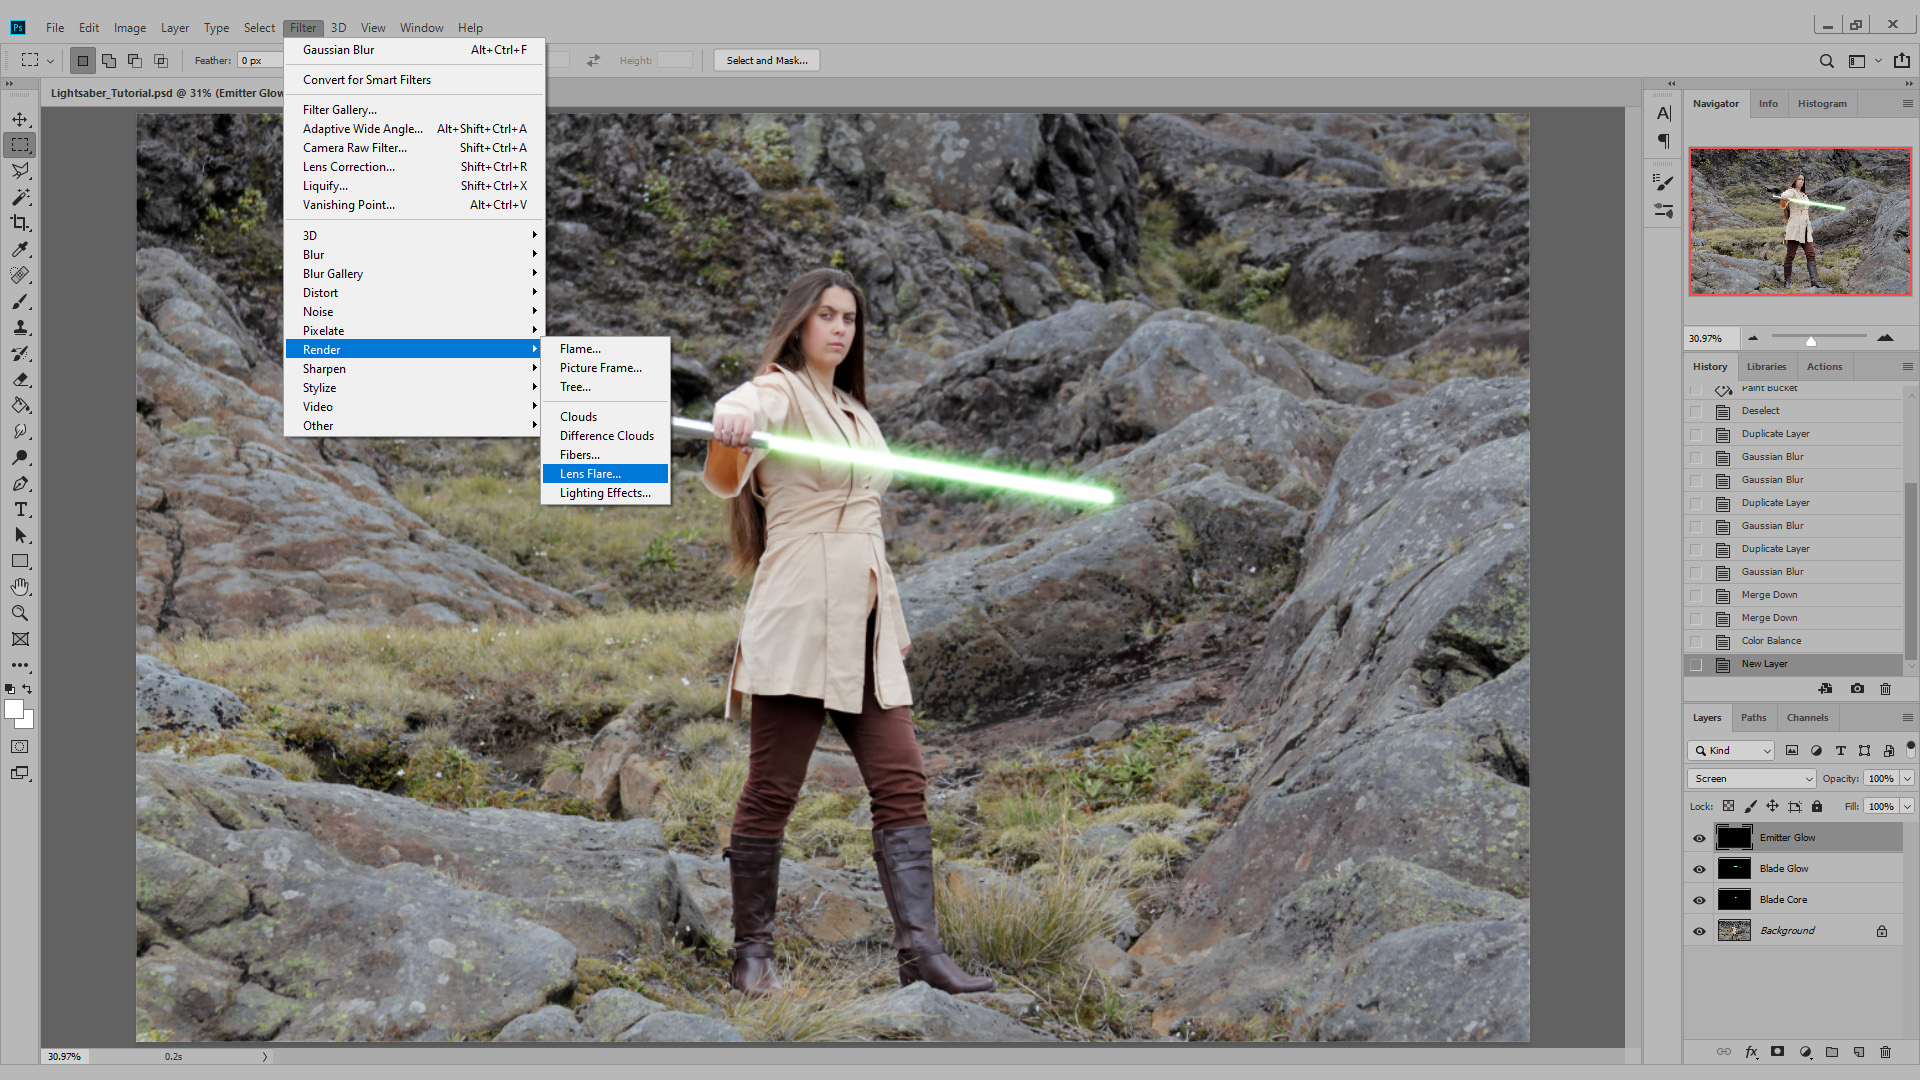
Create a new layer (Shift+Ctrl+N, or Layer > New > Layer), call it “Emitter Glow”, set Mode to Screen, and select “Fill with Screen-neutral color (black)”. Render a Lens Flare roughly at the emitter/base of the saber, where the blade meets the hilt (from the menu, Filter > Render > Lens Flare). Choose a lens flare that focuses more on adding a glowing point rather than dispersed and colourful flare effects, such as 105mm Prime, with Brightness dropped to 50-60%.
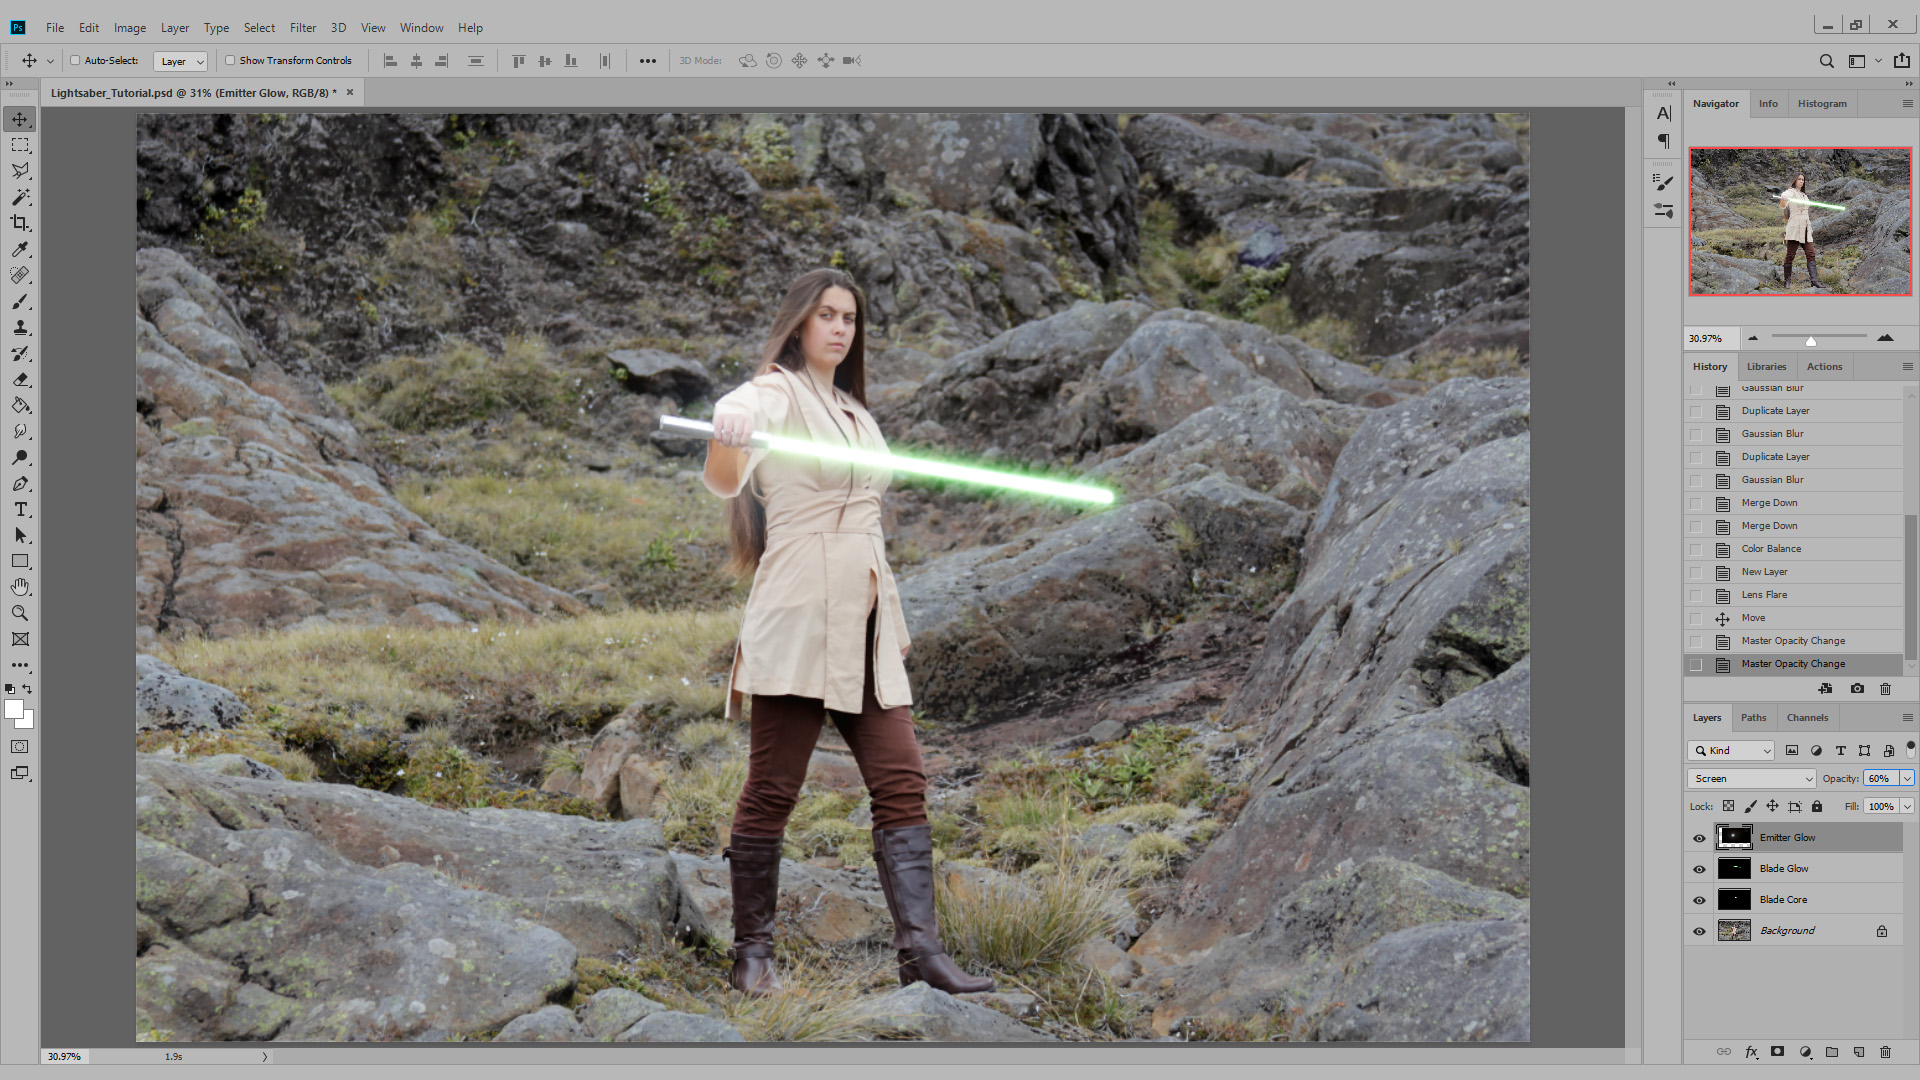
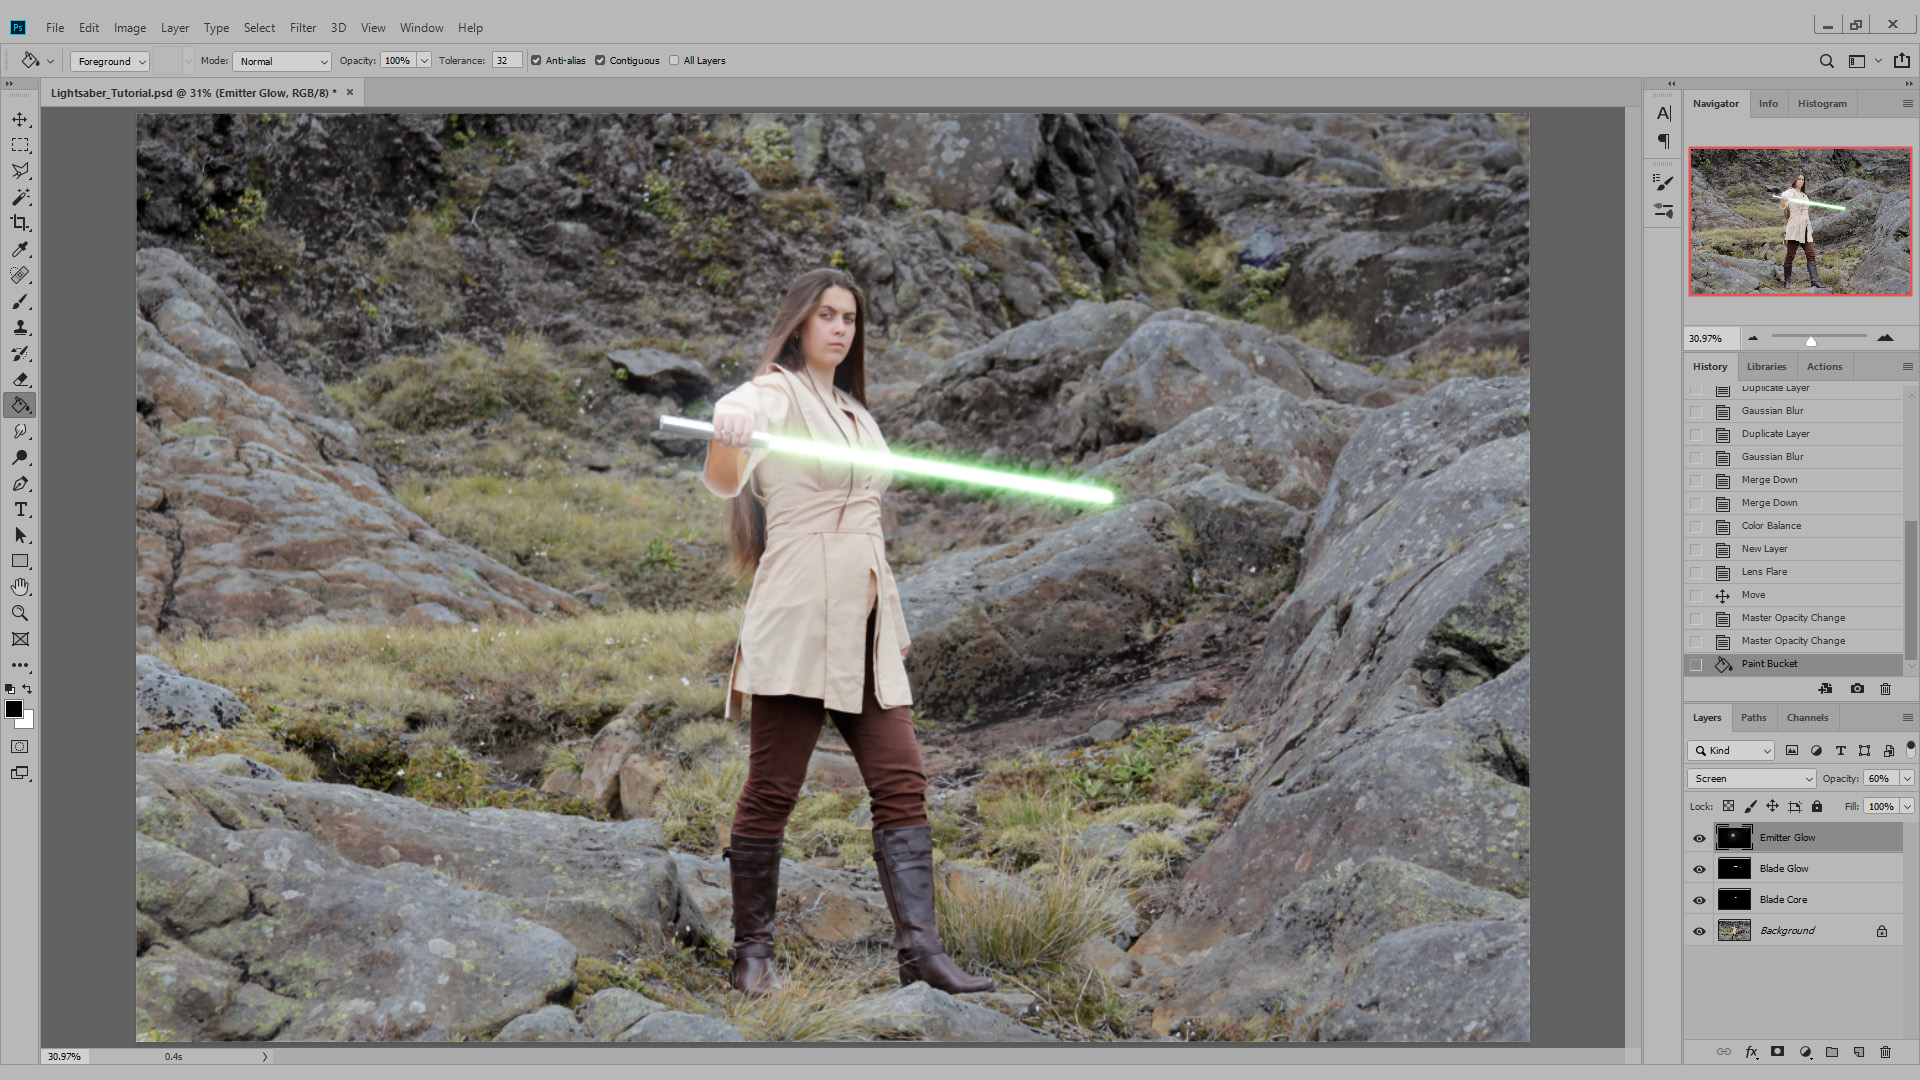
Using the Move tool, drag that layer until the centre of the flare is better positioned over the emitter of the lightsaber hilt (unless you got it perfectly right during the render step). Although you generally don’t need to, you may choose to fill any transparent space (using the Paint Bucket tool) on the Emitter Glow layer that resulted from it being moved, with black. This will just ensure that any rendered lighting effects that fall on the screen other than right at the saber emitter won’t have a harsh edge caused when the layer was moved. The opacity of the Emitter Glow layer can (and frequently needs to be) be altered to taste.
(Optional) Other tweaks – although we are pretty much done at this point, feel free to play around with other adjustments to any of the layers that have been added in. You can duplicate any layer to strengthen it, increase the blur, drop the layer opacities, and/or further adjust the Color Balance of the Blade Glow to create more than one version of a finalised image.
Have fun, and feel free to comment with links to any lightsaber effect pictures you’ve created!
Watch this tutorial on YouTube, with narration: